You can face the following issues if IPMI web-interface of your servers freezes:
- Virtual Media ISO files mounting works incorrectly
- IPMI web-interface does not work or works incorrectly
- Java applet does not start or starts incorrectly
- Java-applet doest not connect to console or connects incorrectly
You can reset IPMI using your account’s dashboard or IPMIView app
How to reset IPMI using your account dashboard
Use the following steps to reset IPMI from your account’s dashboard:
- log in to your account
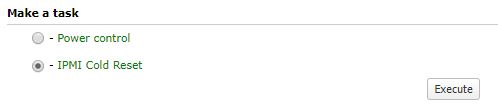
- Go to
Servers and equipmentmenu (on the left) - Push
resetbutton inactionscolumn - Create
IPMI cold resettask and run it
Attention! You will reset IPMI controller only, not your server.
How to reset IPMI using IPMIView app.
You can download IPMIView using official website or FTP-server.
UI may slightly differ in different versions
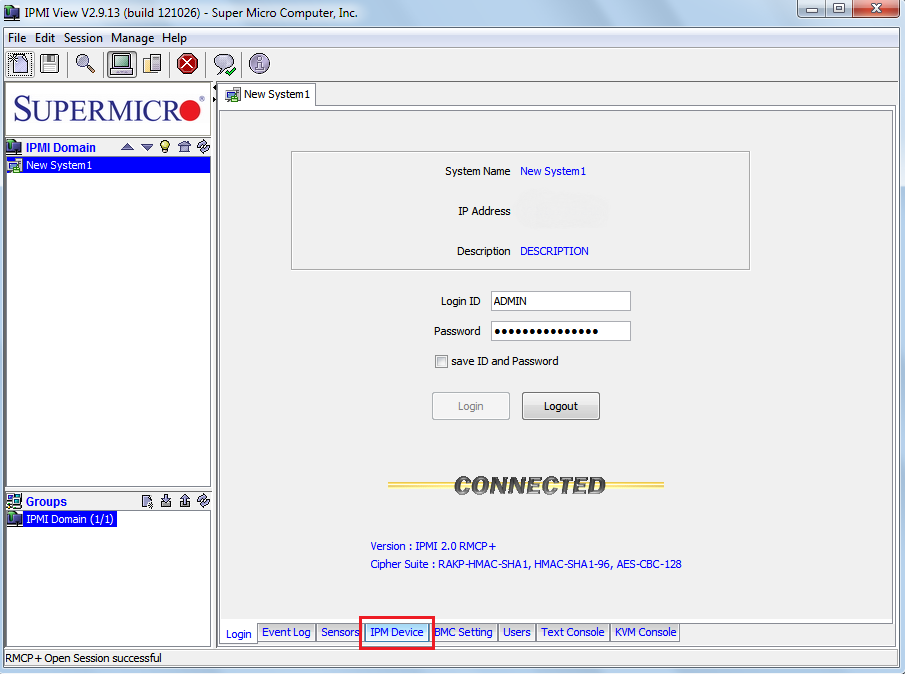
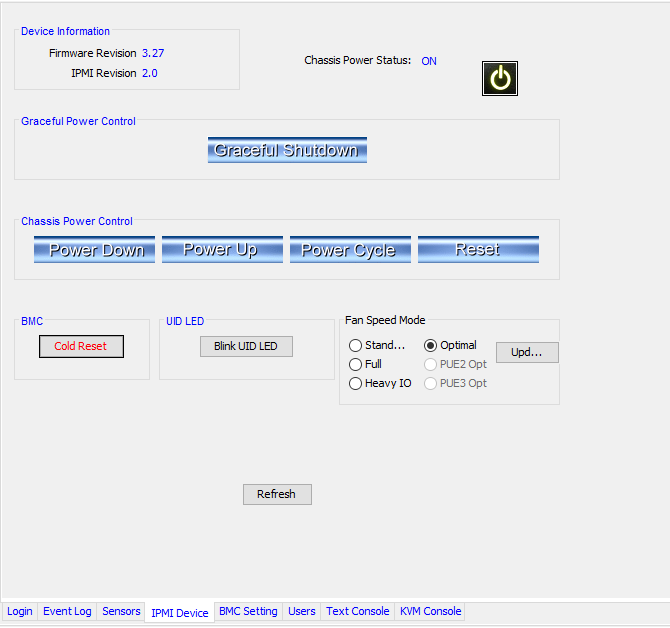
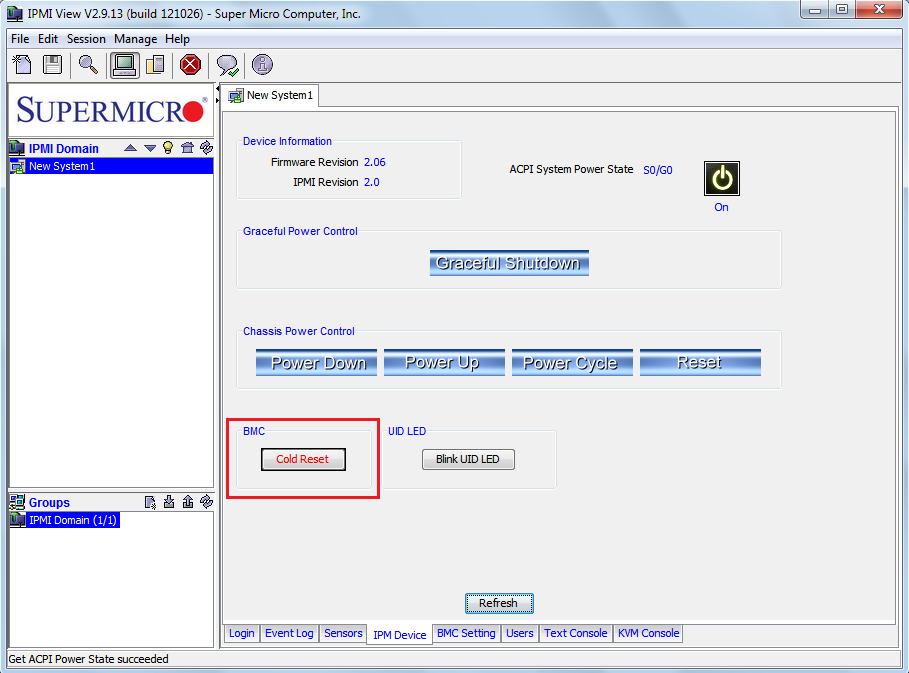
Run IPMIView app and then choose IPMI device tab at the bottom.
On the screen you'll see Cold Reset button. If you push it, the IPMI controller will be reset (your server will be not).
IPMI (Intelligent Platform Management Interface) is the controller that is built into all the servers that we offer for rent.
It enables power management, remote connection (KVM), ISO mounting, server health monitoring - everything is remote and no direct access is required.
Once we prepare and issue a server for you, you’ll be able to configure it and set up the operating system.
IPMI operates independently from OS and benefits from a dedicated wired connection and IP address. Thanks to that, even if your OS is not accessible, you can still control your server remotely.
How to install an operating system using IPMI?
Remote access to IPMI is restricted by default due to security reasons. In order to access it, you need to whitelist your IP(s) in the Account settings. You can find more details in the following guide…
Connection to the IPMI server is implemented with the help of the web-interface or IPMIView Program. We will tell you how to install the operating system using both options and you will be able to choose the one that is convenient for you. We recommend the IPMIView program.
Web-interface
IPMI controller IP address, as well as access credentials, can be found in your Account or in the email, addressing initial server’s provisioning.
Just copy & paste the IP address into your browser’s address bar and use the credentials to authenticate when prompted.
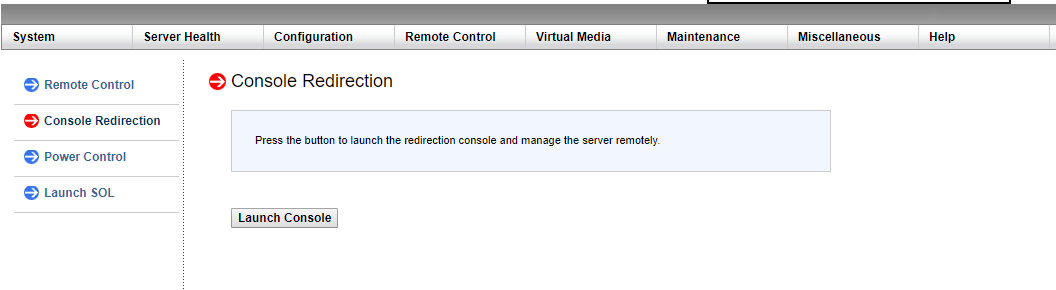
In the top menu, go to Remote Control, then choose Console Redirection and then press the Launch Console button.
After that, you’d need to download and then run Java app. Depending on your operating system configuration, it may require security exception approval.
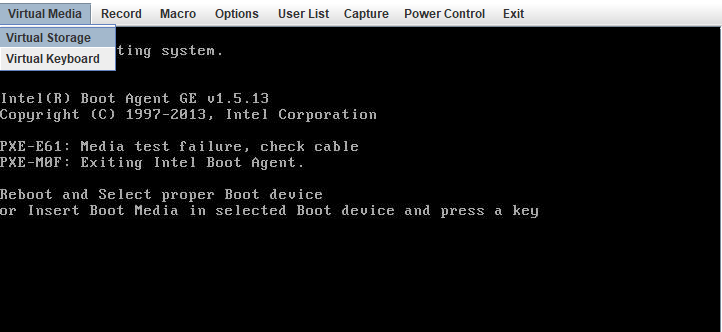
The window will appear, in which you will need to choose Virtual Media and then Virtual Storage
On Device 1 tab choose the ISO file in the Logical Drive type drop-down list and path to your ISO image file (use Open image button).
Once it’s done, press Plug In button to plug your image.
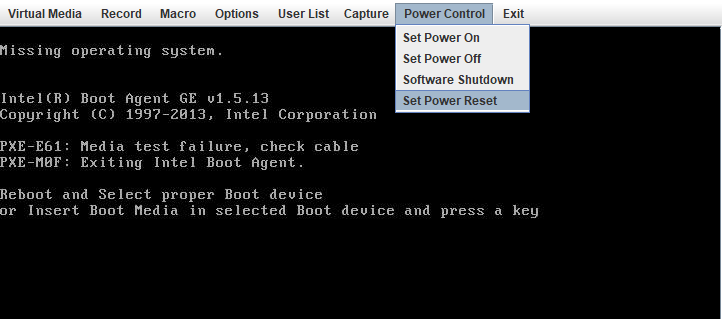
After that, you need to restart your server to boot from the ISO file you mounted. Go to Power control section and click on Set Power Reset.
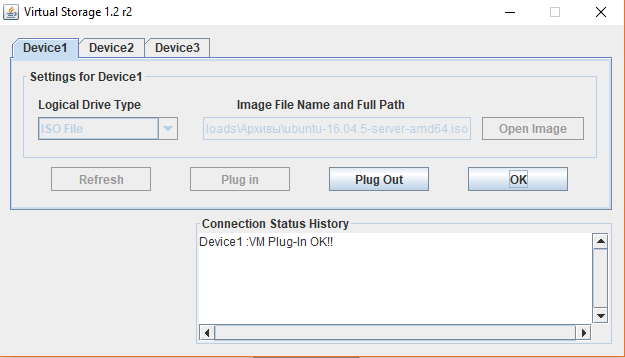
Keep in mind that you can connect up to (3) images simultaneously using tabs Device 1, Device 2, and Device 3 (although it depends on a specific type of server you use).
This section can be useful for the installation of additional drivers.
Macro menu section allows sending Ctrl-Alt-Del and other special keyboard combinations.
How to use web-interface with legacyIPMI firmware versions.
IPMIView
IPMIView tool is available for download from the official SuperMicro website (sign-in required) or from the ftp-server: https://www.supermicro.com/wftp/utility/IPMIView/
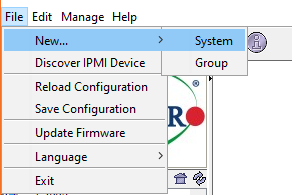
After you download and install the app, you can add your server using File -> New -> System.
Add System Name (a name of your server) and IP address (IPMI address that you can find in your Account and/or in the email, addressing server’s provisioning.) Please make sure there are no spaces after the IP address. If everything looks good - press OK.
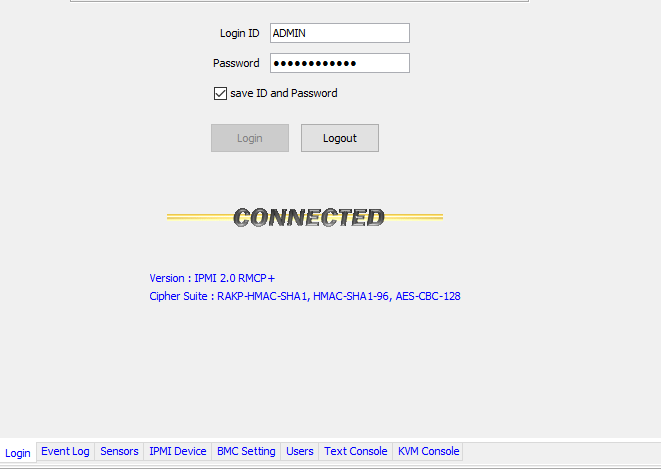
You will see your server in the list, on the left side of the window. Double-click on it and use your credentials to authorize. Credentials, as well as the IP address, can be found in your Account or in the email, addressing server’s provisioning.
If connection is successful, you’ll see Connected. On the bottom of the window, menu tabs for server’s management will appear.
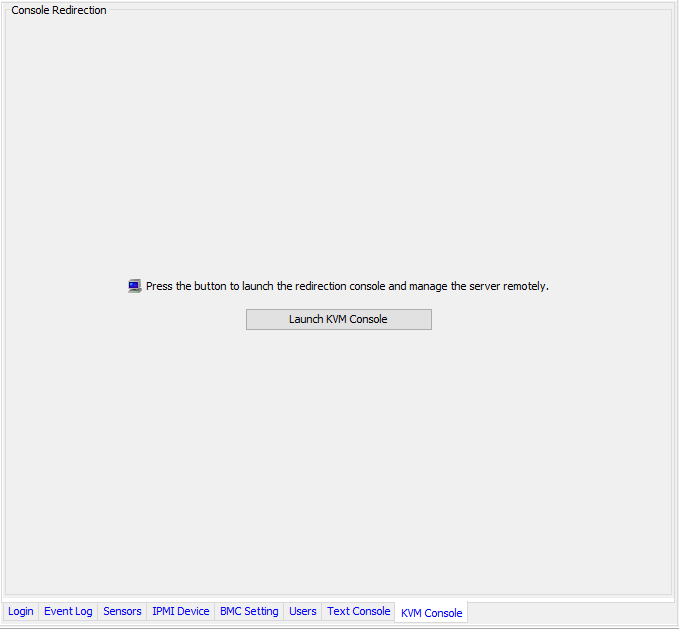
To control your server remotely, go to KVM Console and press on the Launch KVM Console.
For the OS install you’ll need to use the same steps as via web-interface (see above).
Use IPMI device tab if you need to perform power management tasks (power on, off, cycle).