
When creating a VM, in addition to selecting from the list of ready-made operating system images, you can also import your own image. The main requirement is that it must contain installed drivers that support OpenStack virtualization.
Detailed information about preparing images and a list of ready-made images of the most frequently used operating systems is available here.
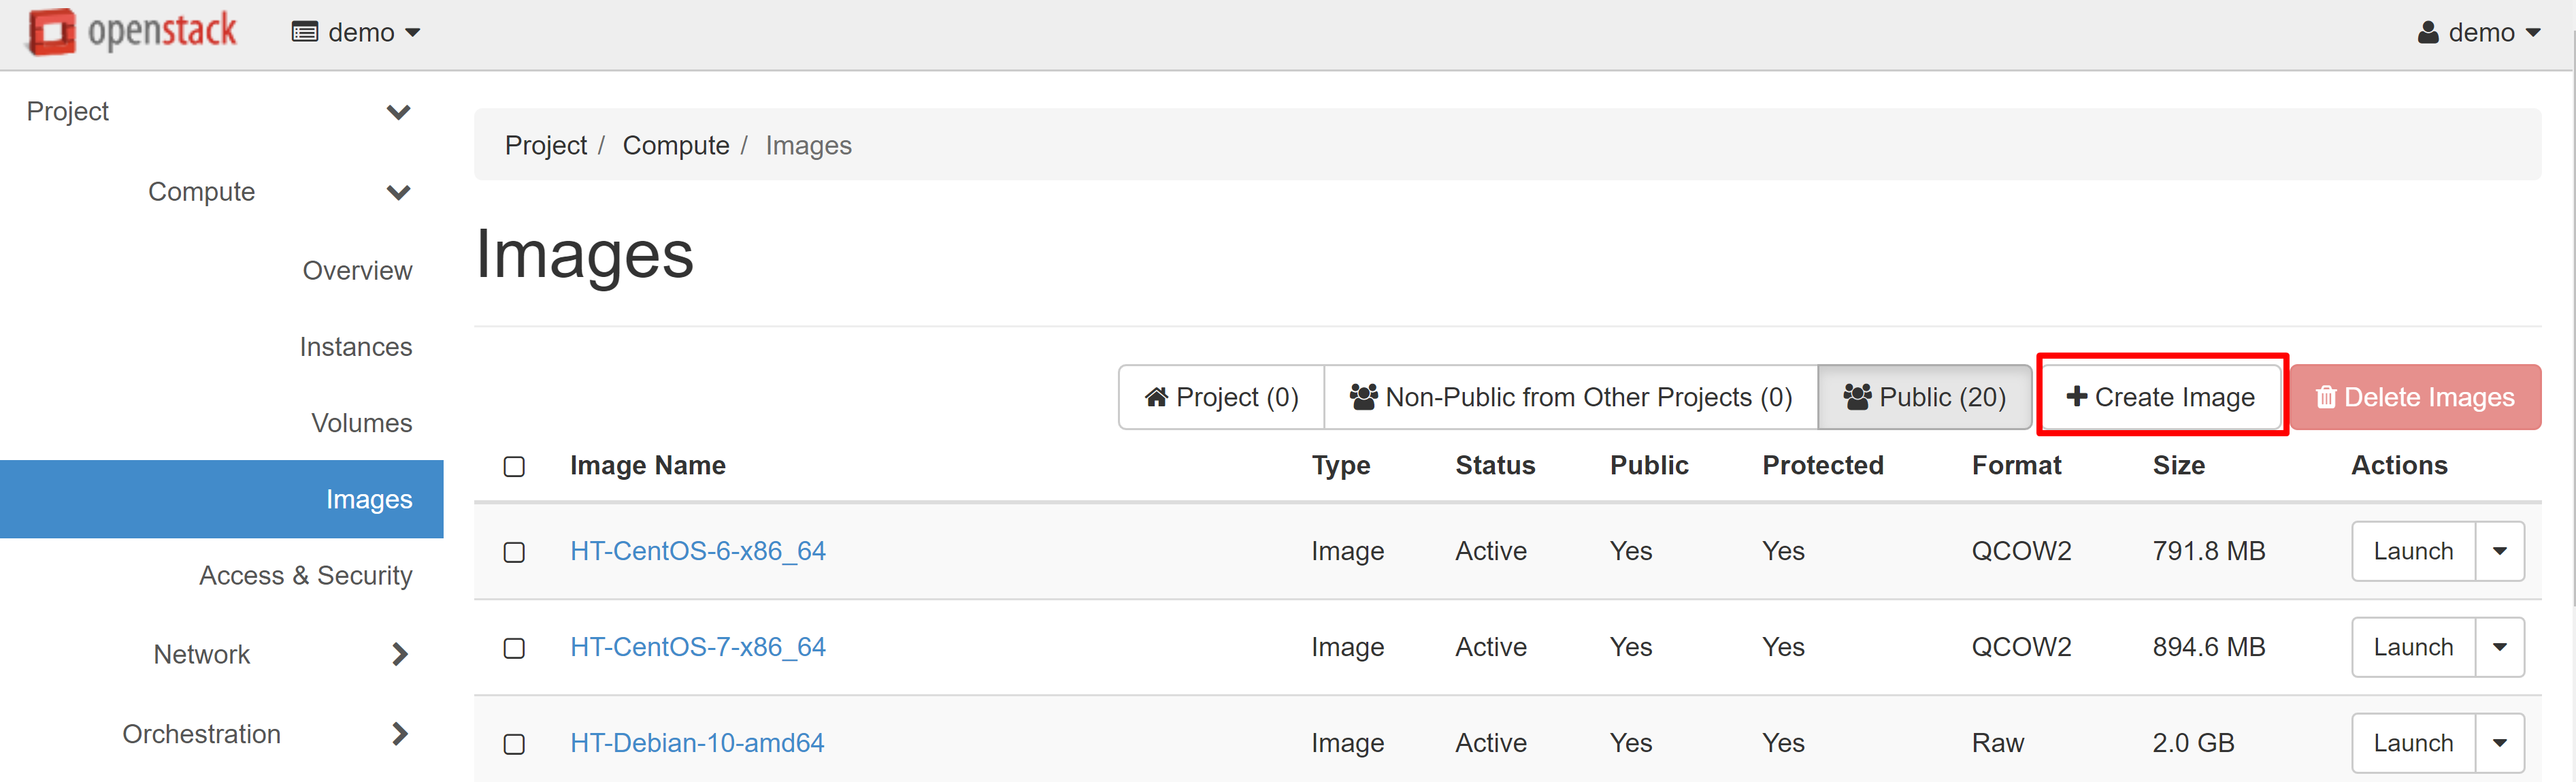
In order to import your OS image, go to the COMPUTE > IMAGES section, and click CREATE IMAGE.
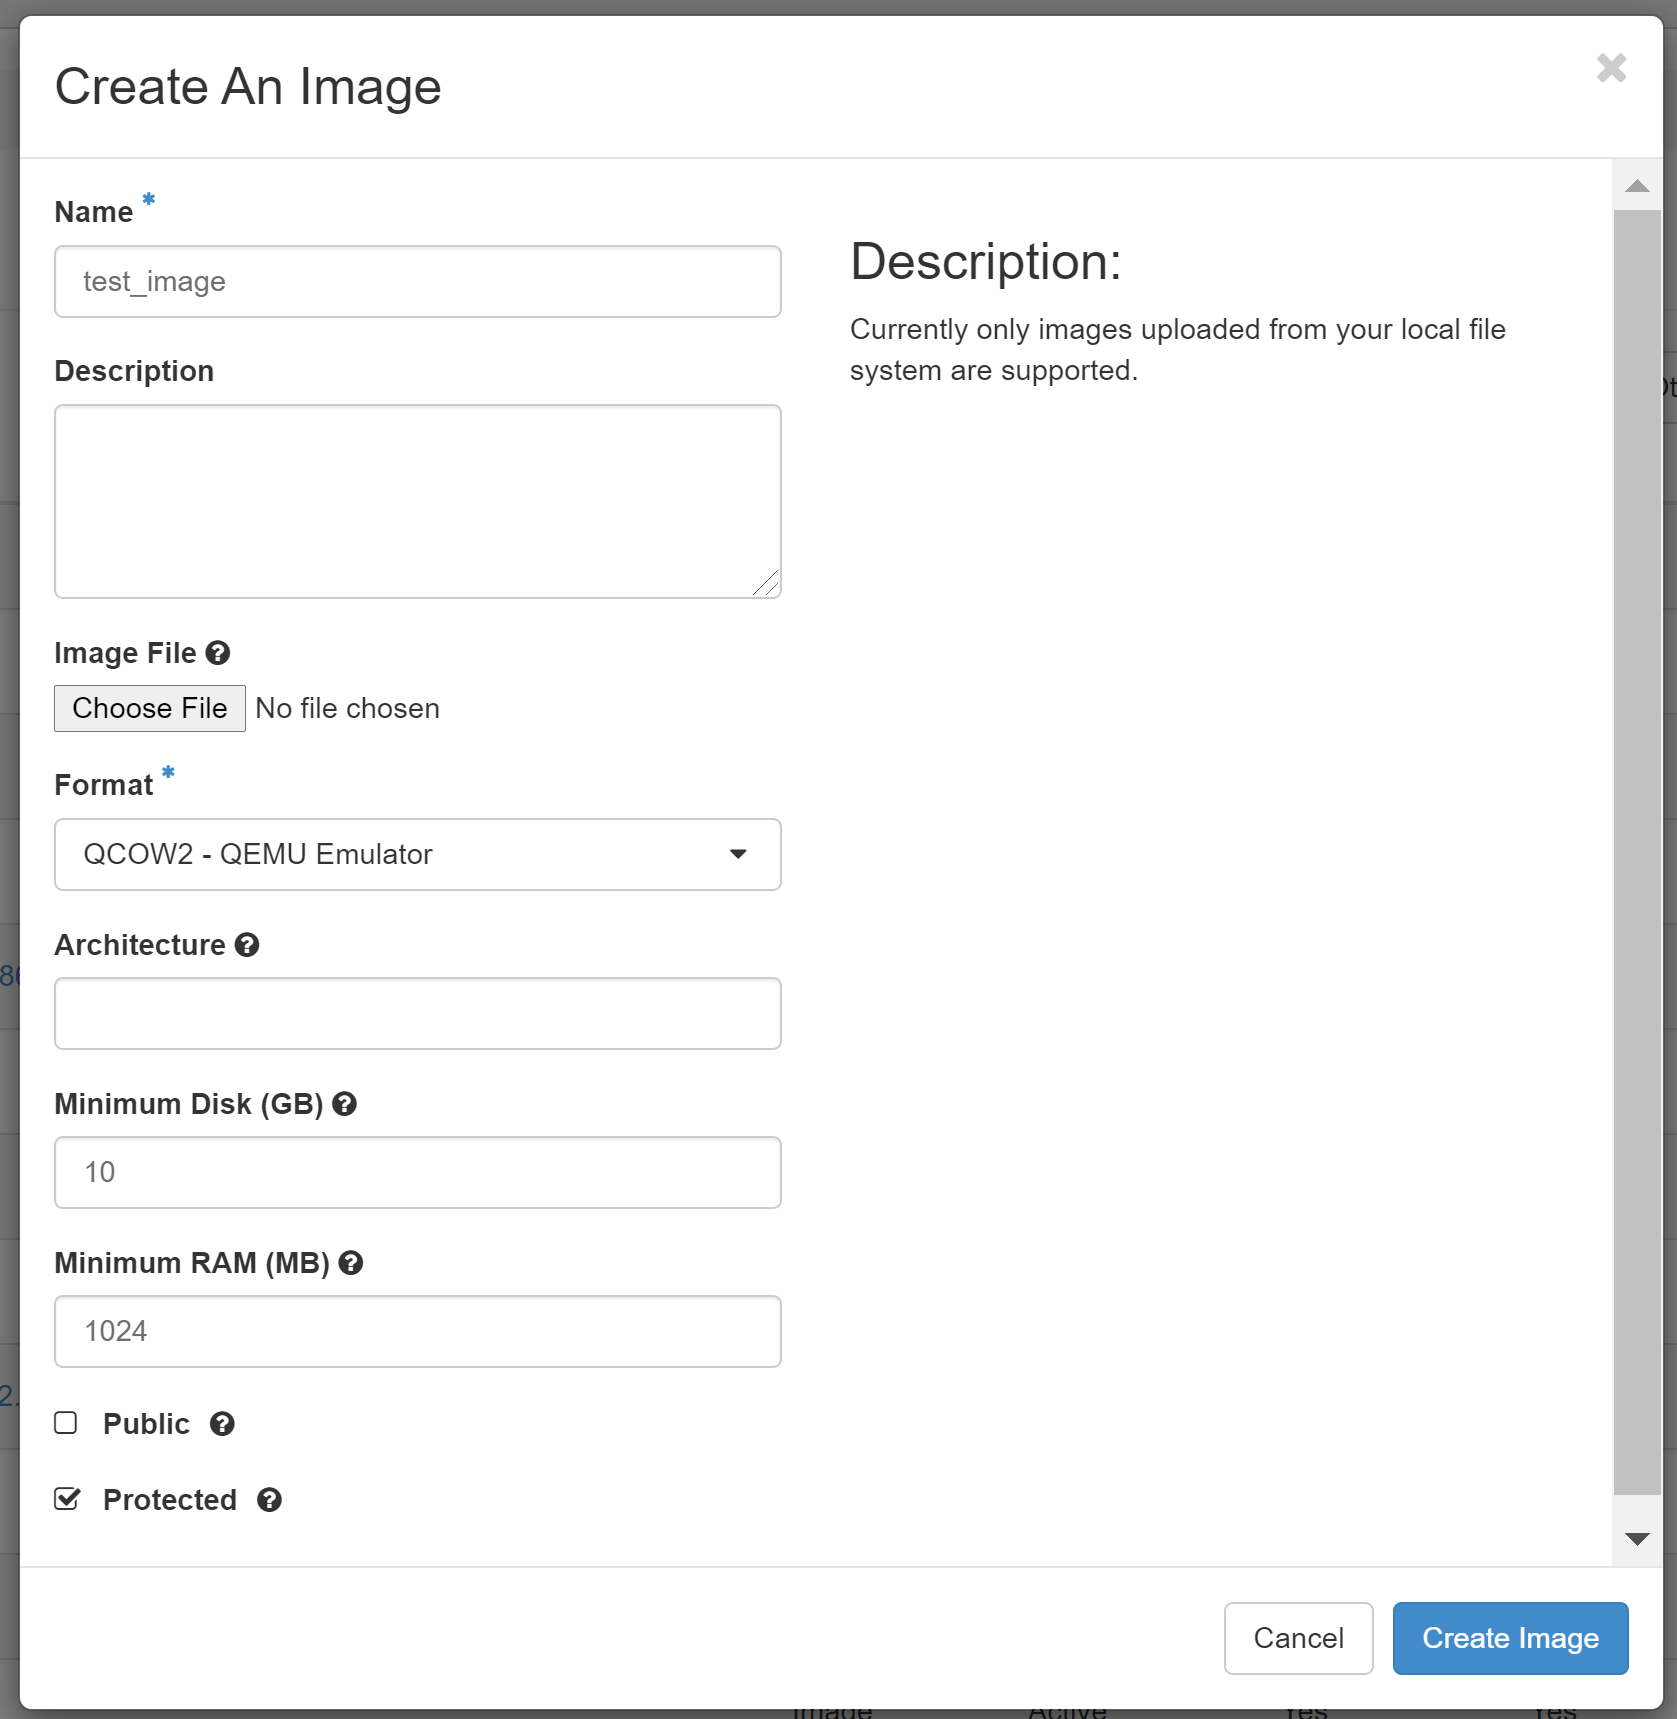
In the window that opens, enter the image's name. Then click CHOOSE FILE to download the image file from your device.
We recommend that you choose QCOW2 — QEMU EMULATOR as the format of the uploaded image, in order to save space in your image storage.
You don’t have to specify the software design, but we suggest that you set the minimum system requirements — the size of the disk and RAM.
We recommend that you don't check the PUBLIC box — this option means that your image will appear in the list of public images and other cloud users will be able to use it.
The PROTECTED option means that the image cannot be deleted from the system. If you are worried about the accidental deletion of the image, you can check this option. If you need to protect or delete this image in the future, you will be able to check or uncheck this option in the image editing menu at any time.
After filling in all the required fields, click CREATE IMAGE to upload your own operating system image to the OpenStack environment.
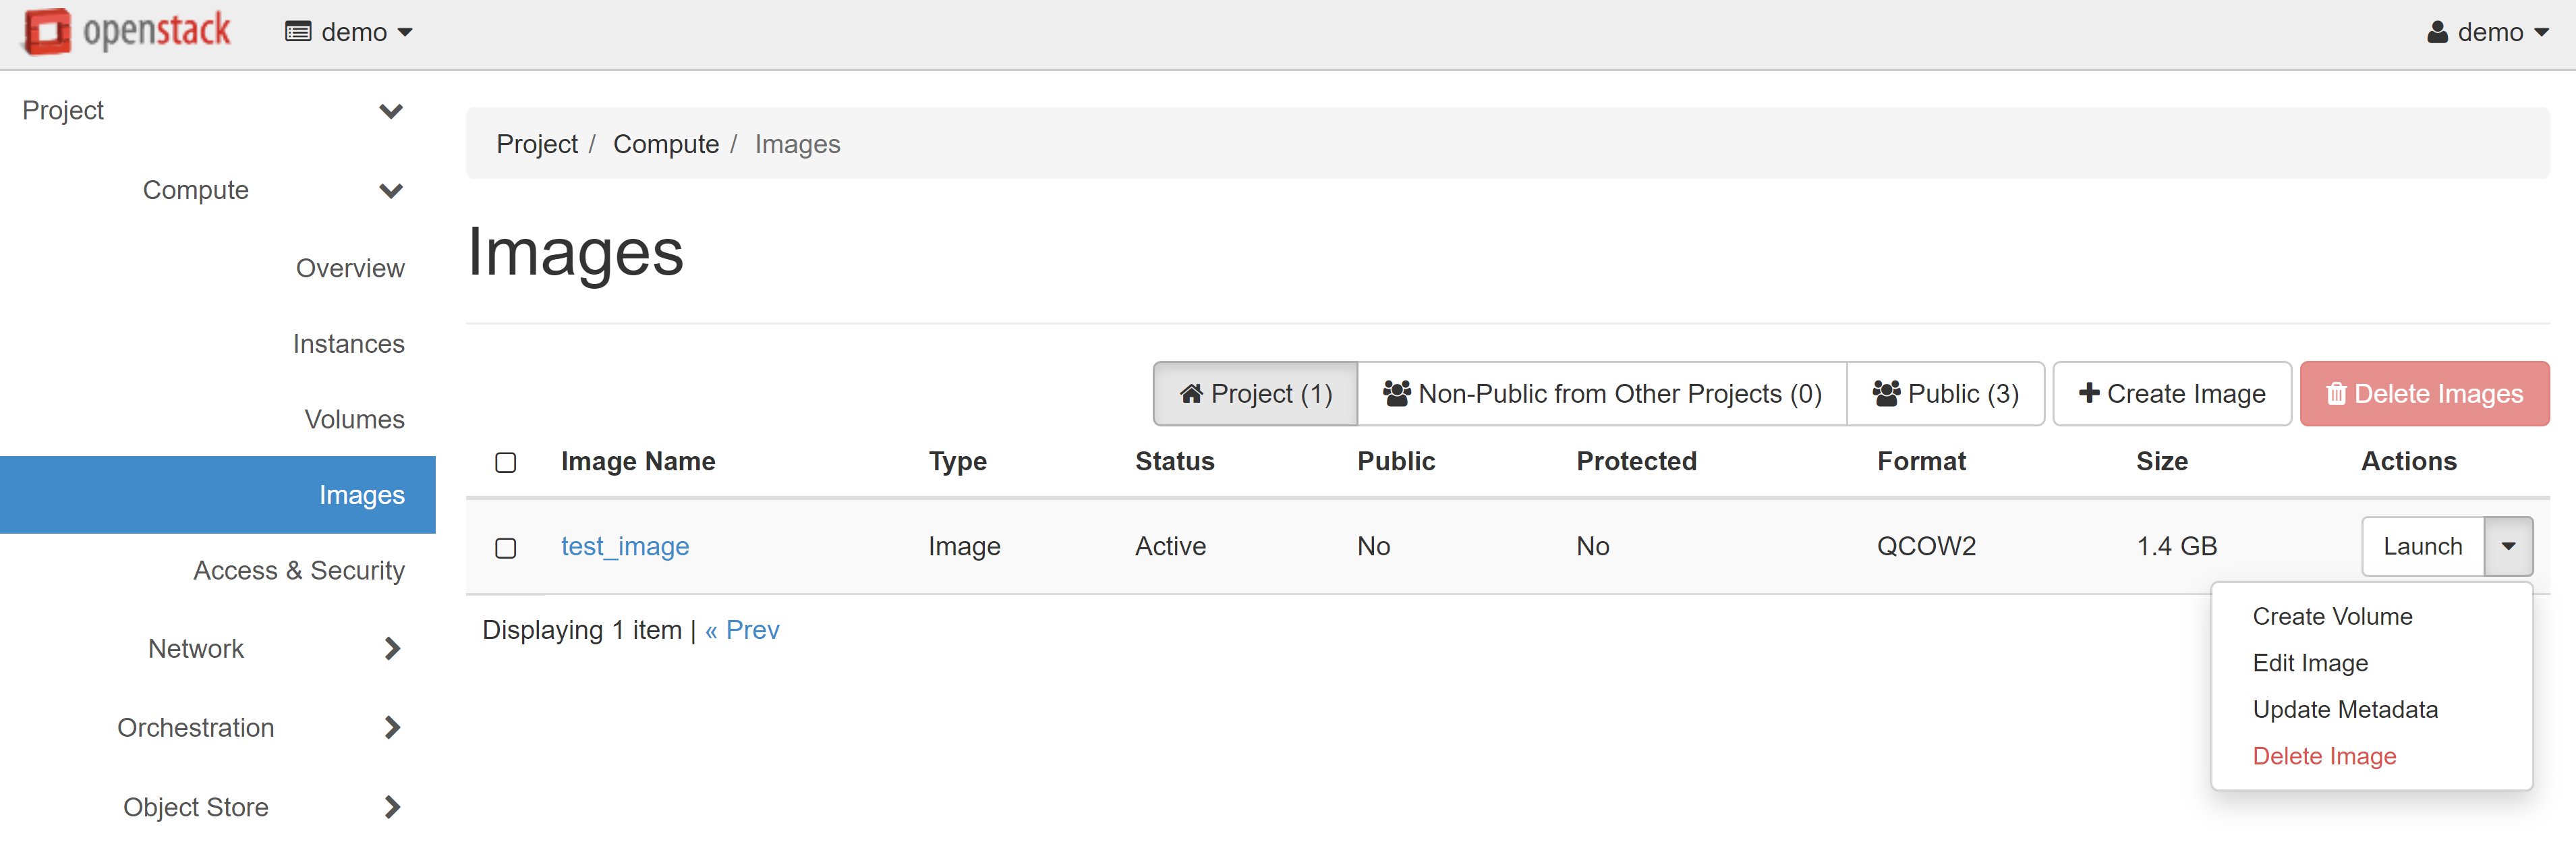
The downloaded image will appear in the COMPUTE > IMAGES section on the PROJECT tab.
For more information about creating instances from images, see our guide “Virtual Data Center: Getting Started”.
Download from Down Under: OpenStack Summit Sydney Day 3
We had a great time meeting our colleagues and talking to attendees about the kinds of solutions they are looking for and the solutions we need to develop.