

1. How To Configure The Network
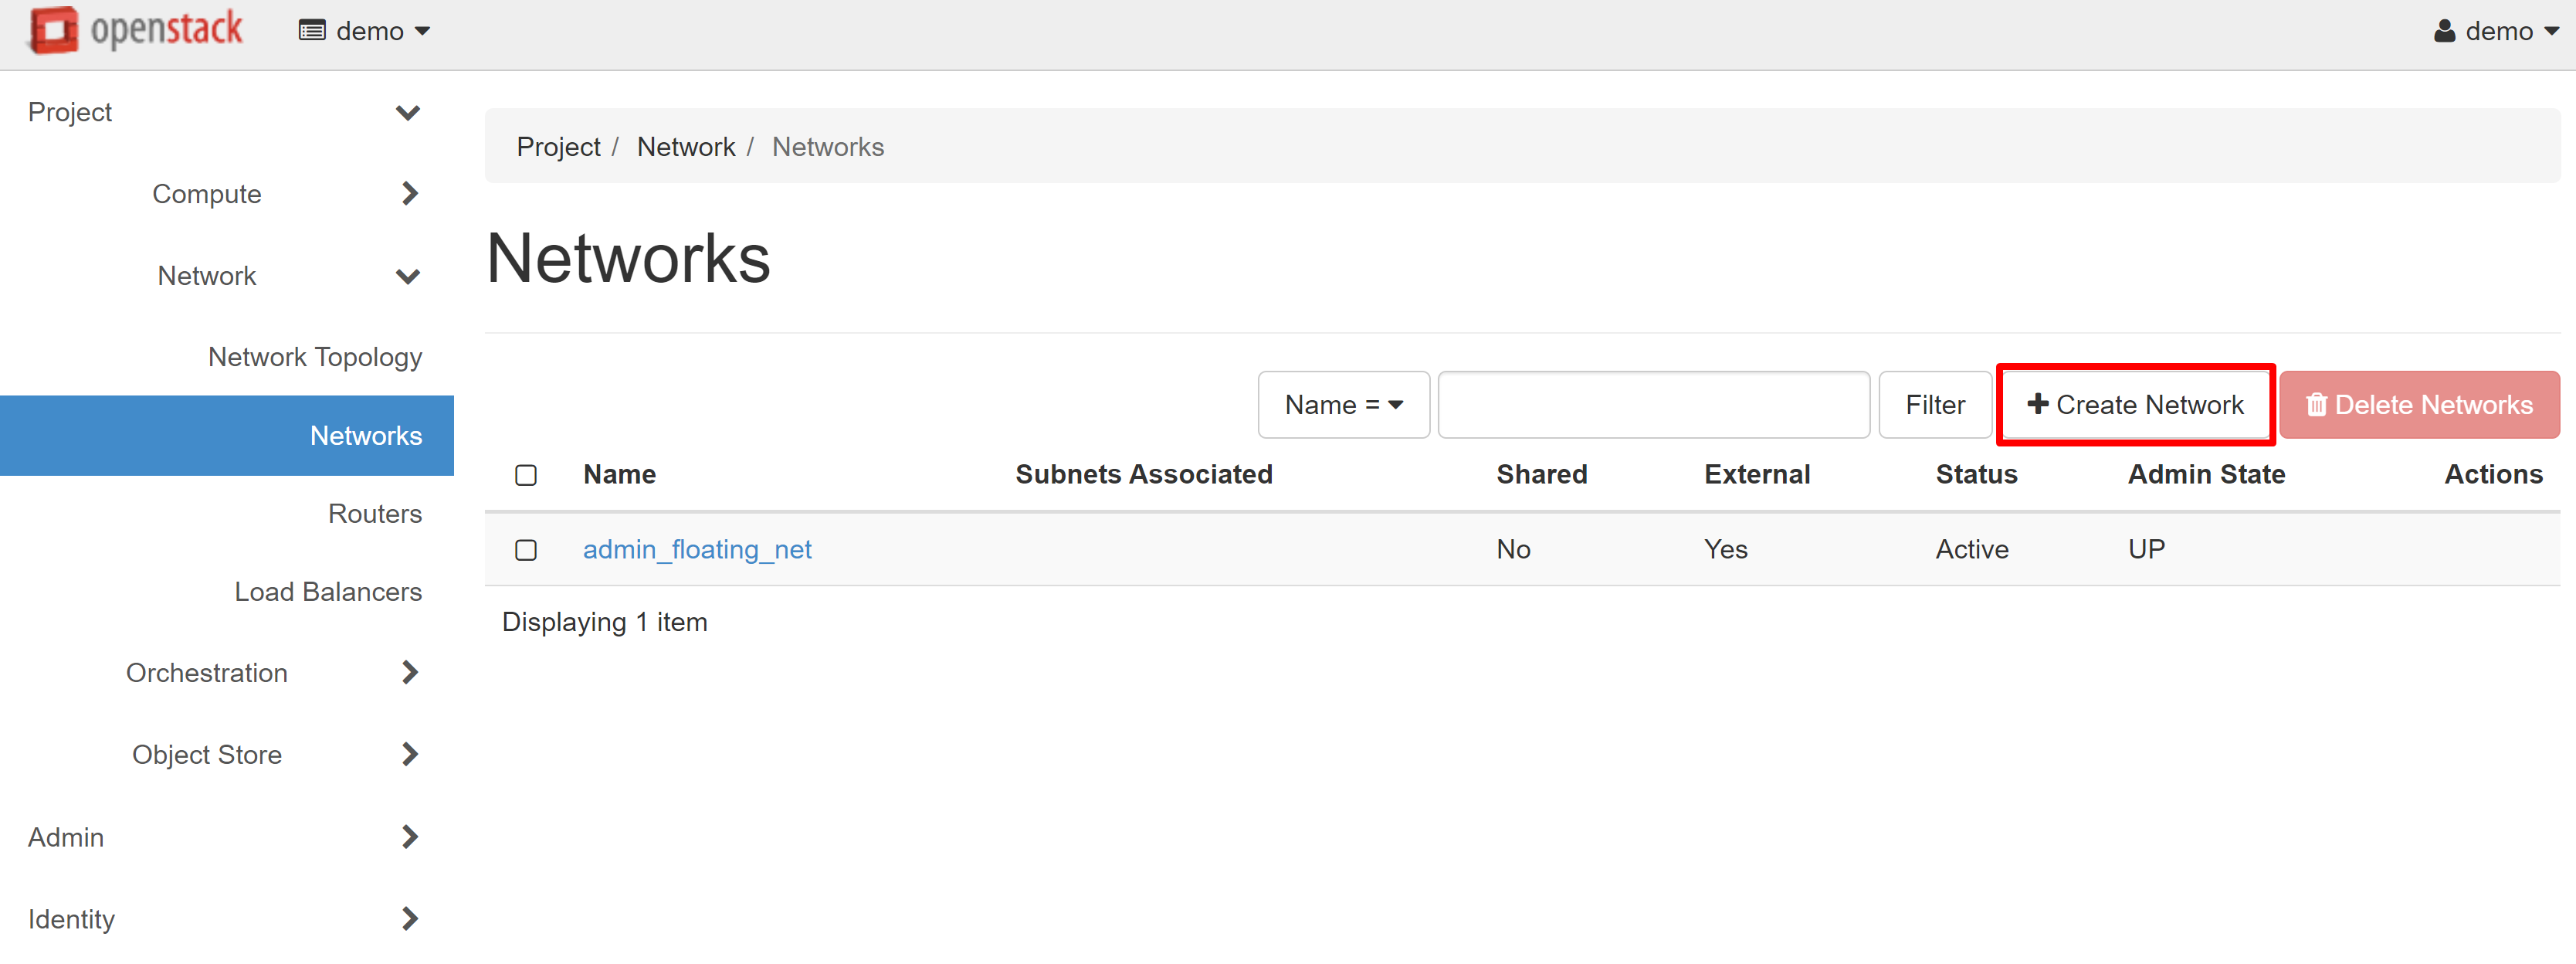
After you have received the access details for your project and have logged in to it, you should first configure the network where your instances will work. To do this, go to the PROJECT — NETWORK — NETWORKS section. To start the network creation process, click the CREATE NETWORK on the page that opens.
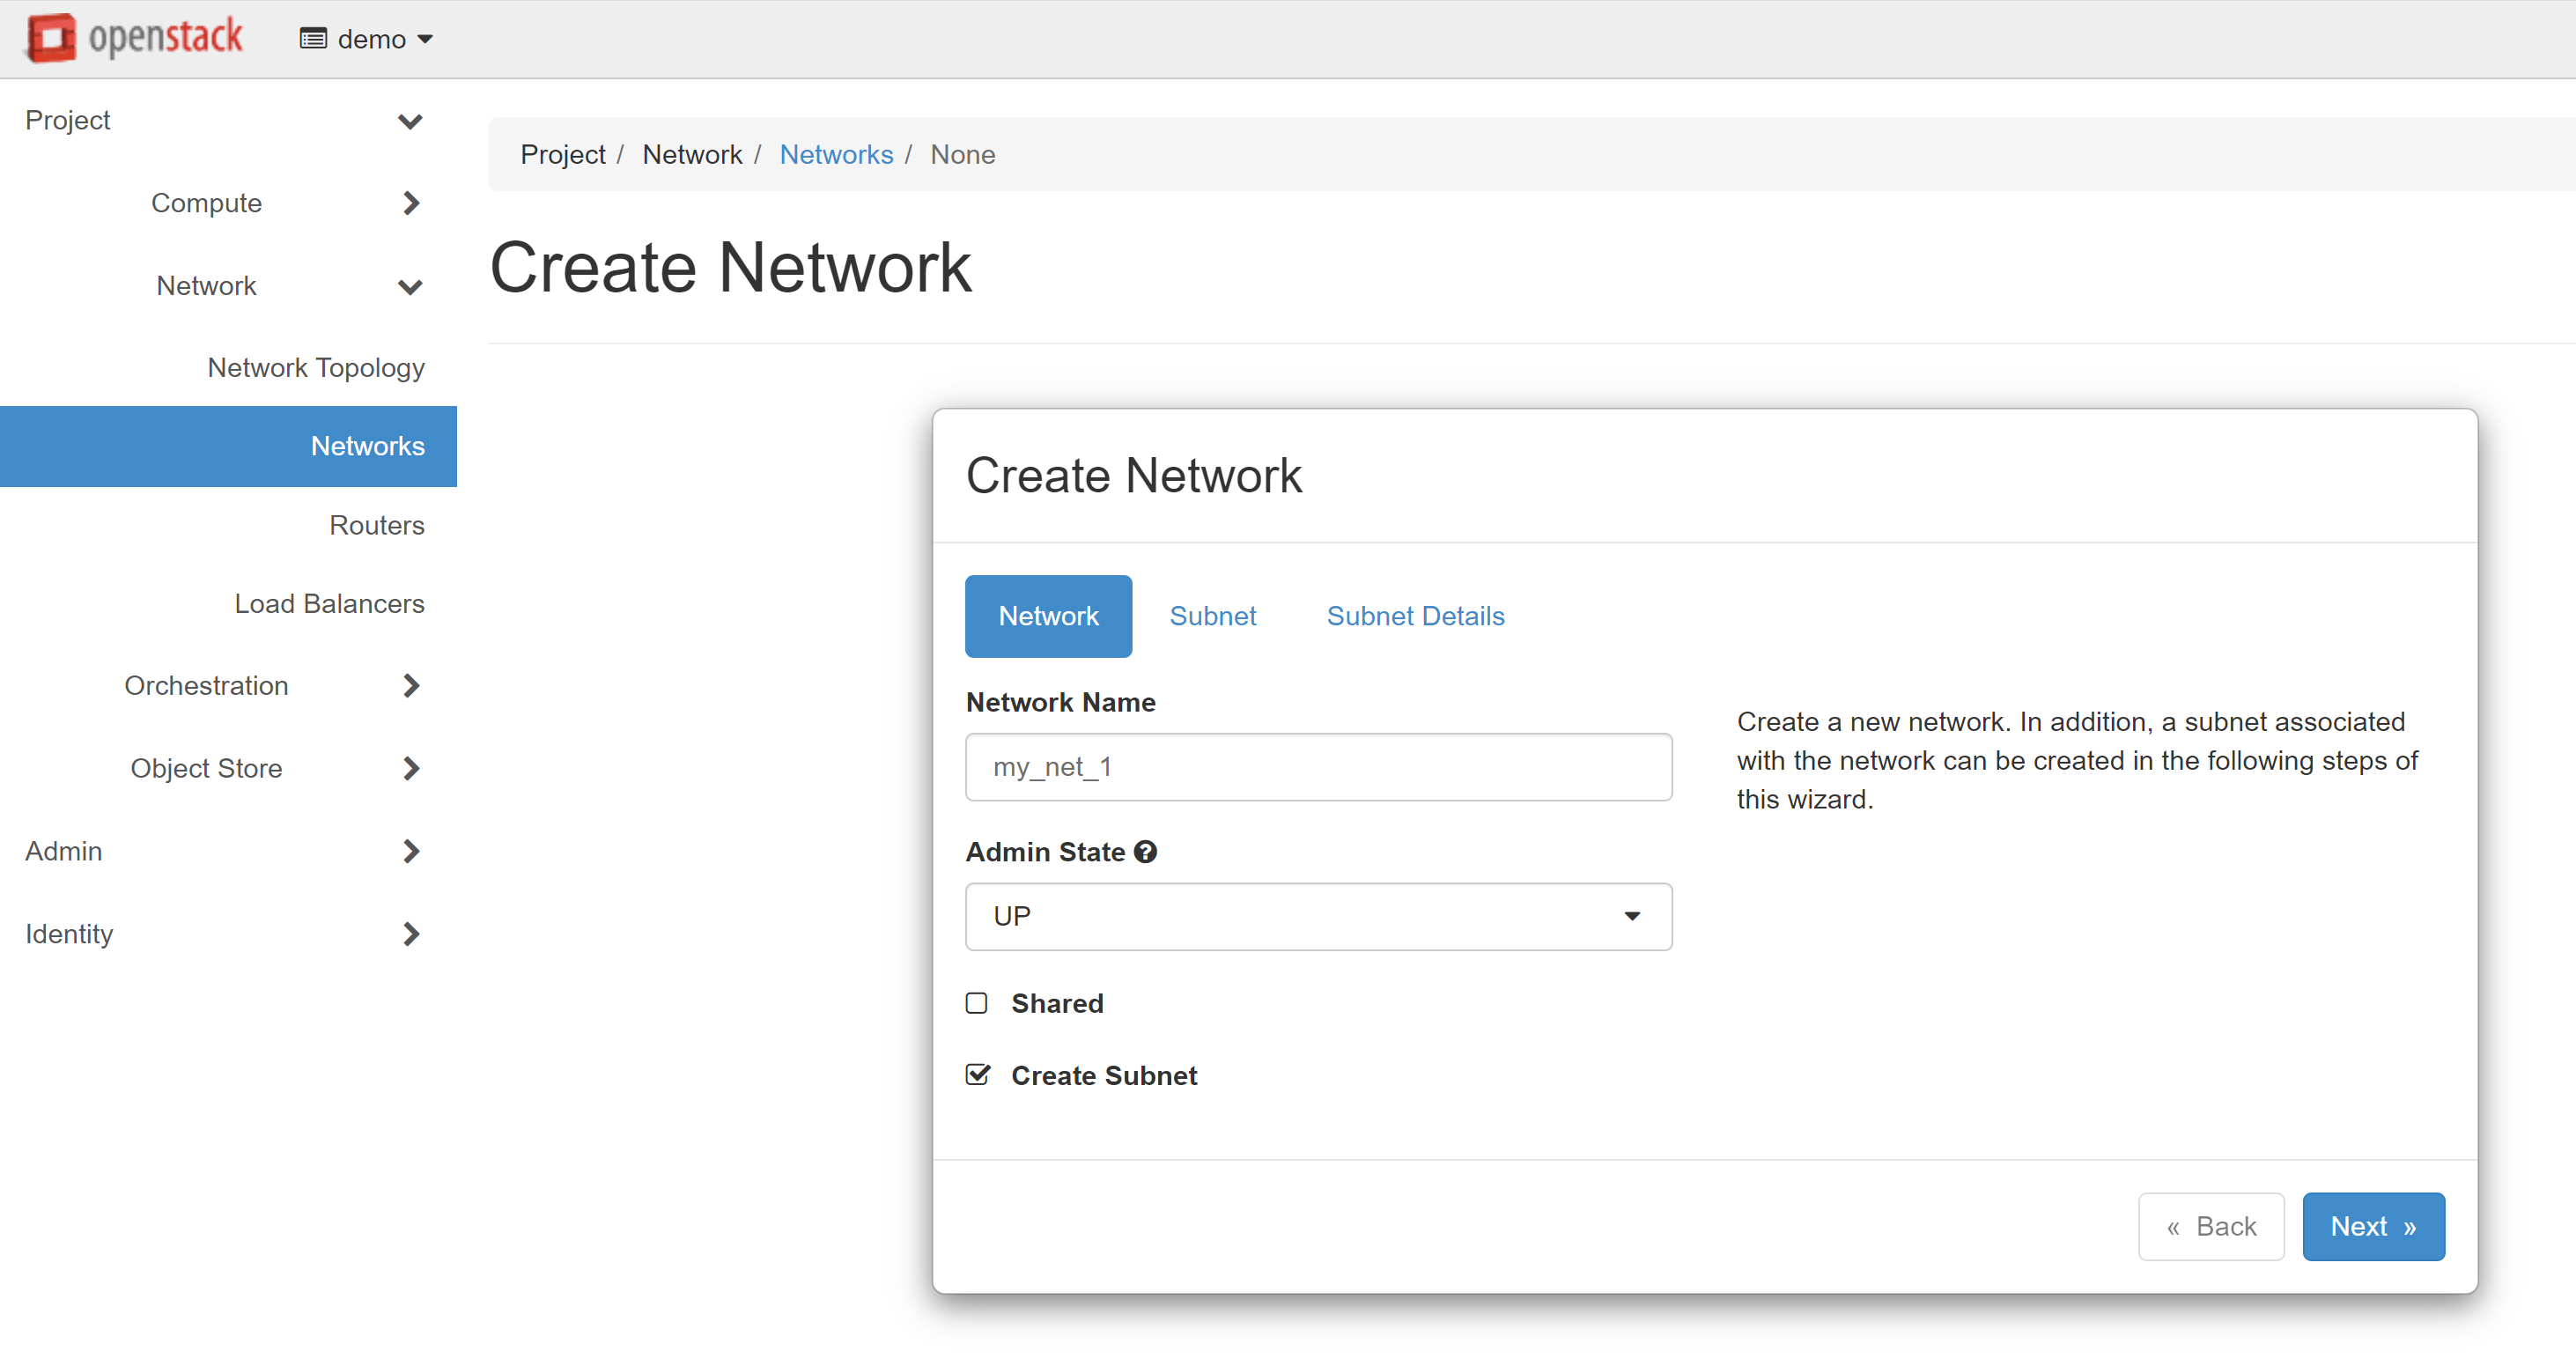
In the NETWORK tab, you can enter any name in the NETWORK NAME field. In our example, this will be my_net_1.
Attention! To avoid any errors, all names should be written in Latin letters.
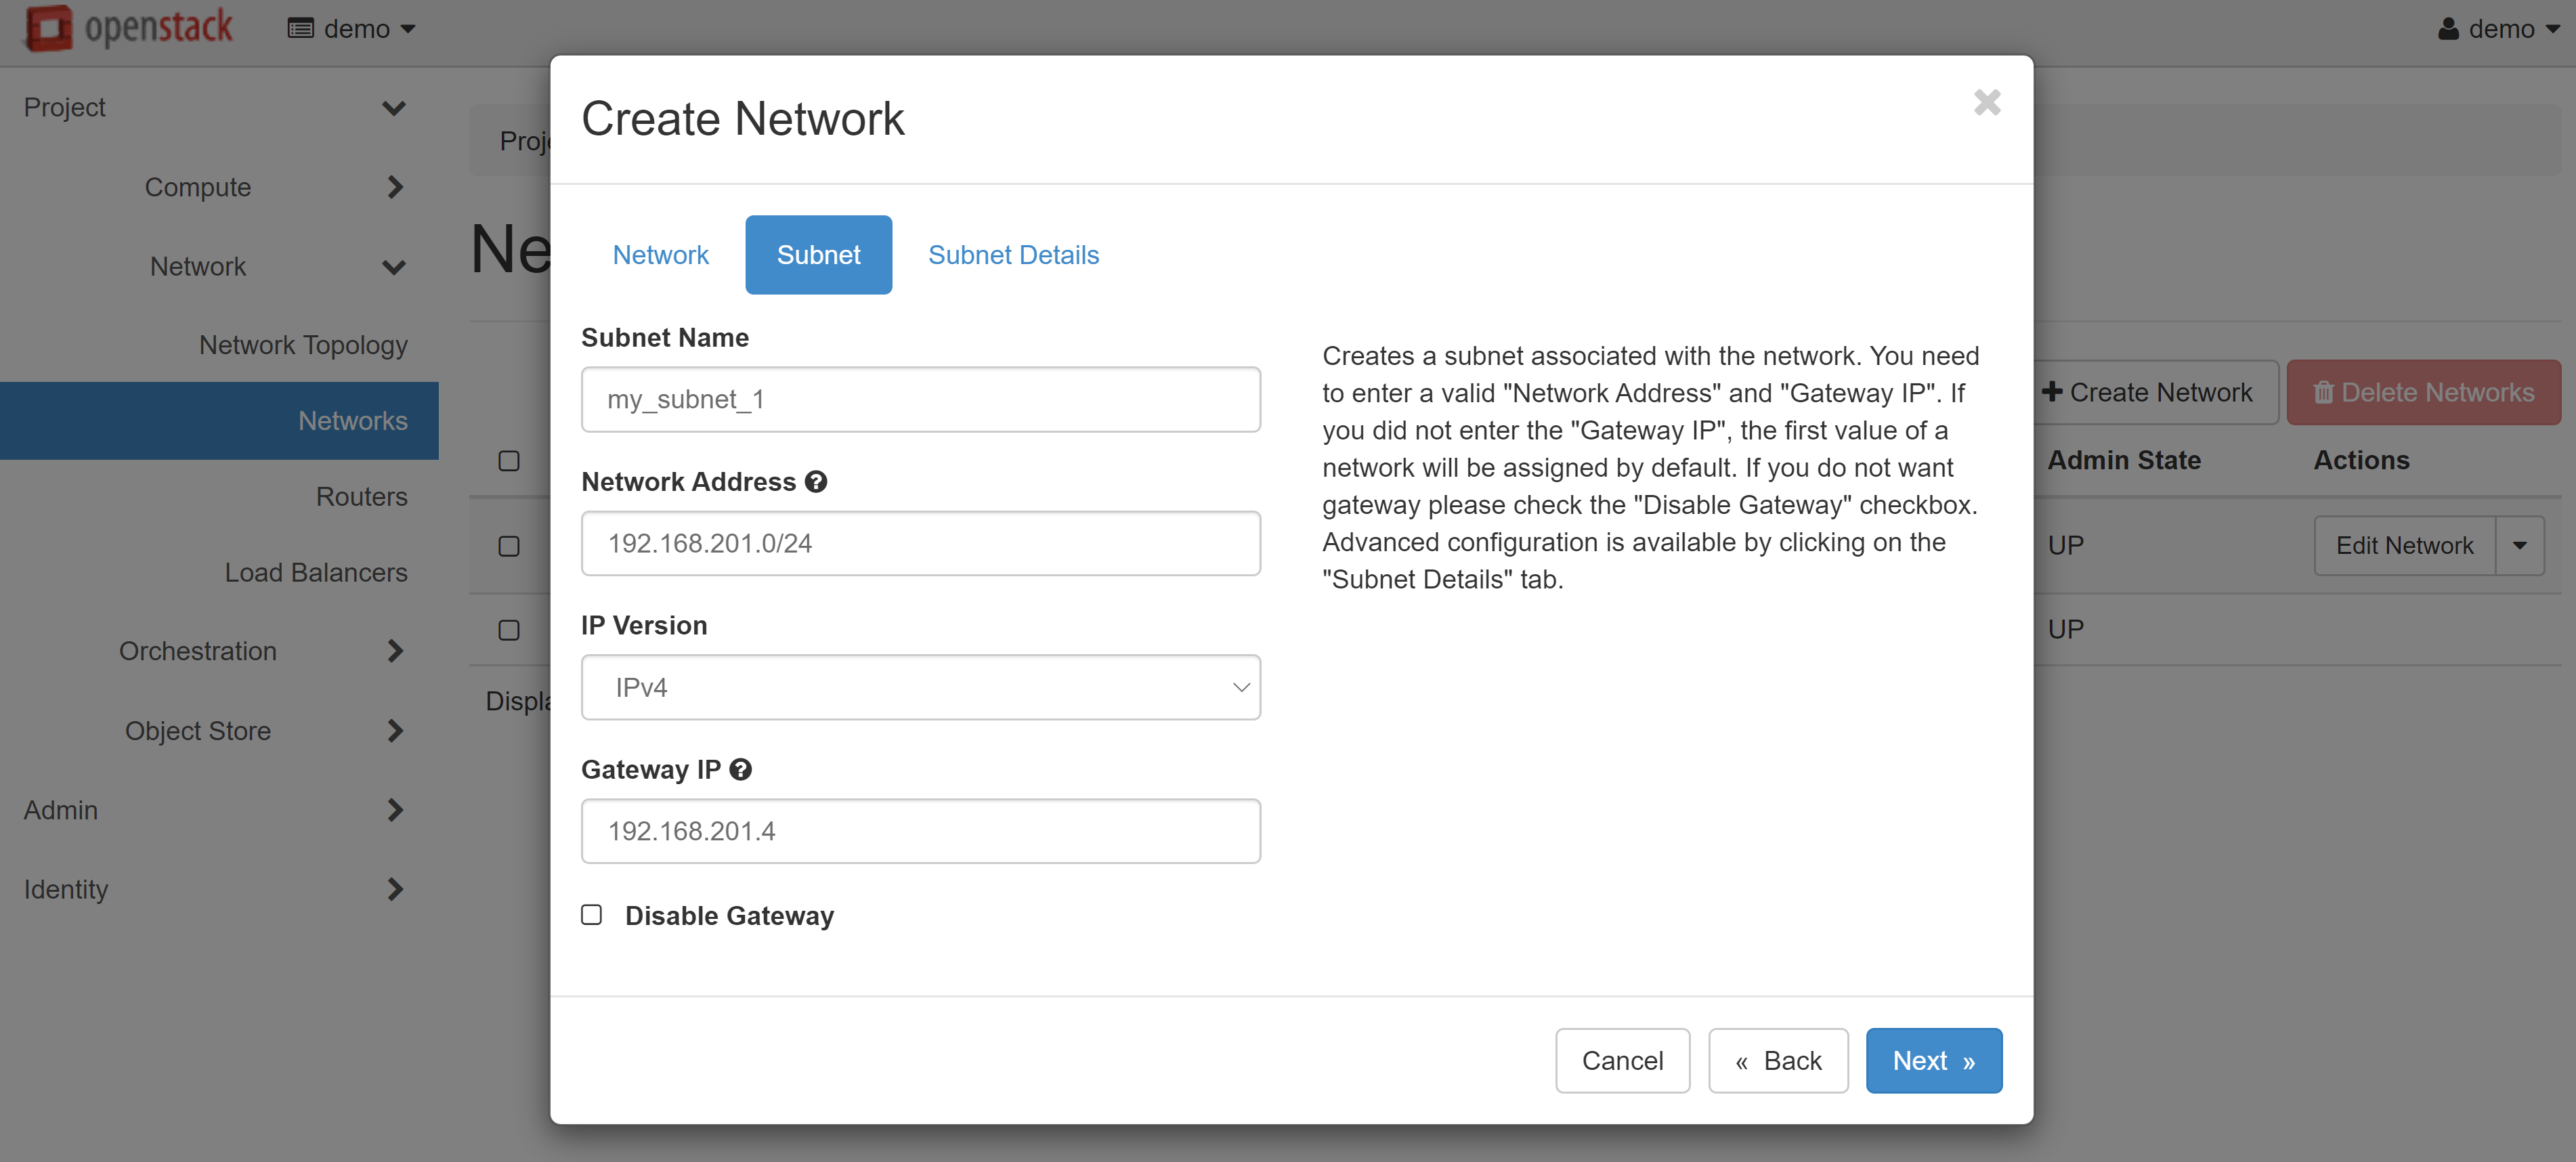
Next, you should add a subnet for your network. Enter any name in the SUBNET NAME field on the SUBNET tab. We recommend setting different names for the network and subnet — for example, my_subnet_1
Below, in the NETWORK ADDRESS field, specify the address for the subnet to be created, for example: 192.168.201.0/24. You can leave the GATEWAY IP field empty — in this case, the first address of the selected network will be used by default. Alternatively, you can provide a specific gateway IP address.
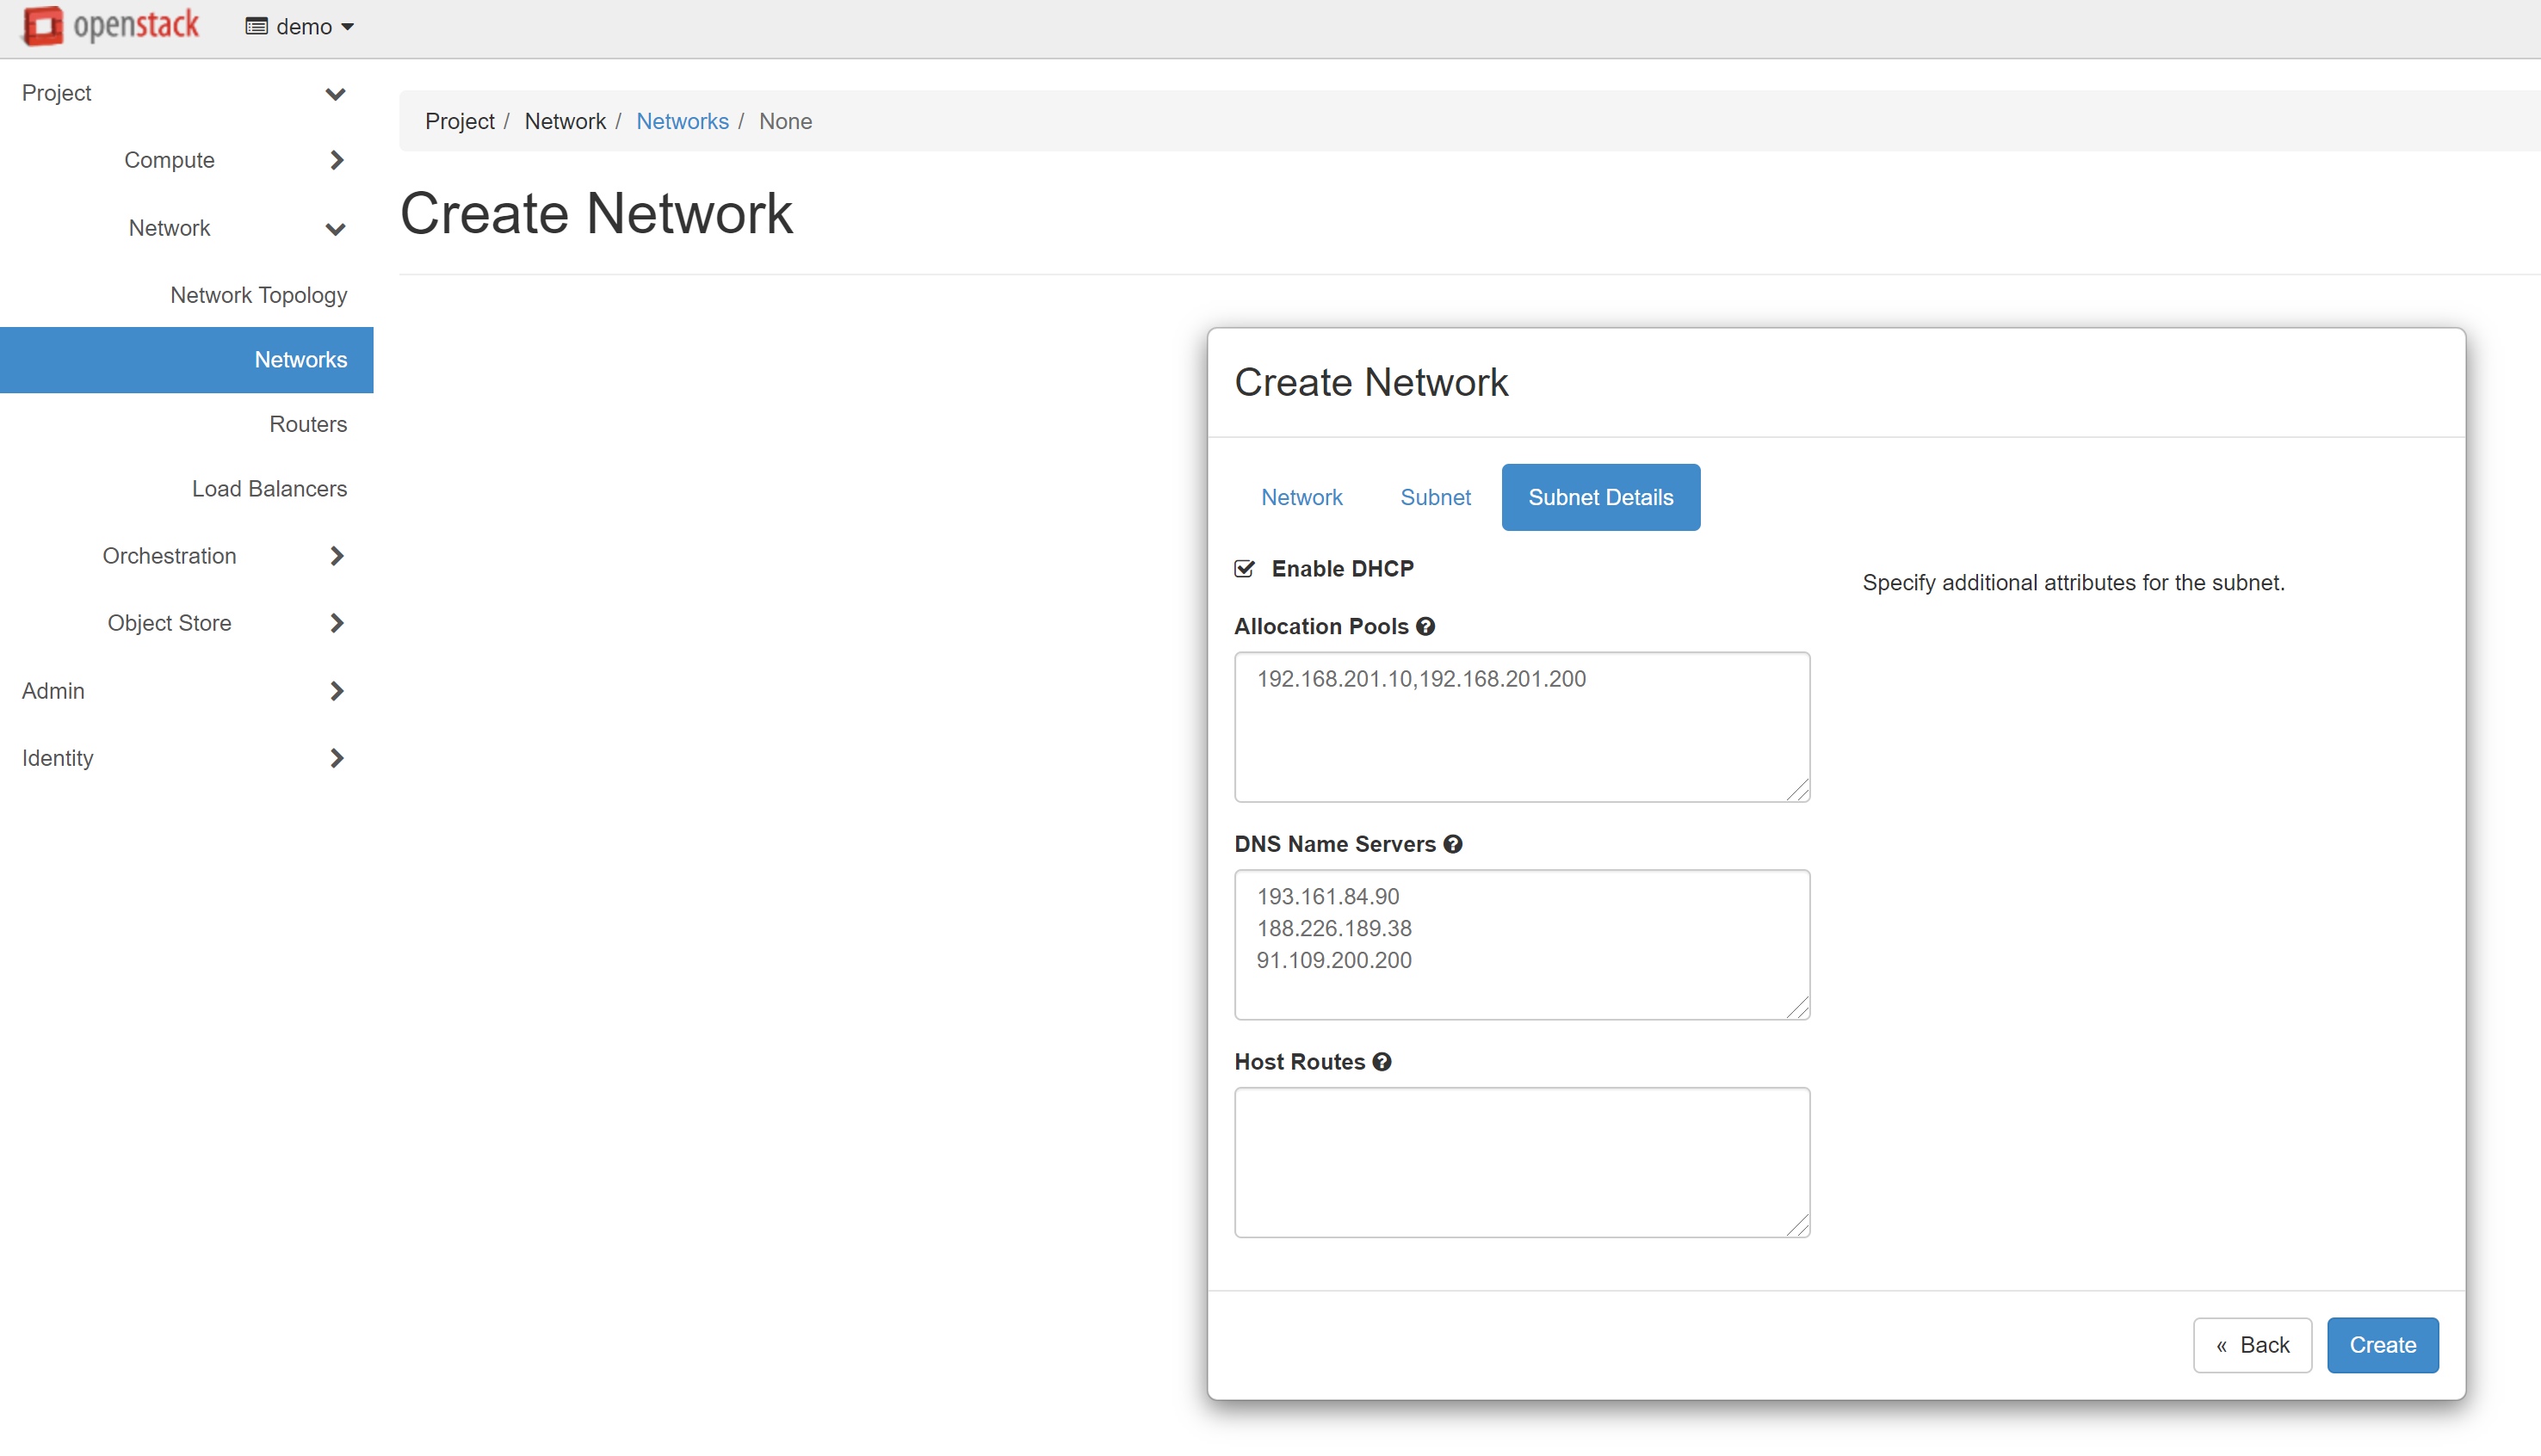
Please make sure that all data is correct, then open the SUBNET DETAILS tab. Check the ENABLE DHCP box. In the ALLOCATION POOLS field, enter the start and end values of the issued addresses separated by commas without spaces — for example, 192.168.201.10, 192.168.201.200. You can use our addresses as DNS servers, or any other. Addresses should be written as one per line.
Our DNS addresses for Europe:
193.161.84.90188.226.189.3891.109.200.200
Then click CREATE, and the created network will appear in the list of networks.
You should create and configure a router to ensure the operability of the network you created. Click CREATE ROUTER in the PROJECT — NETWORK — ROUTERS section.
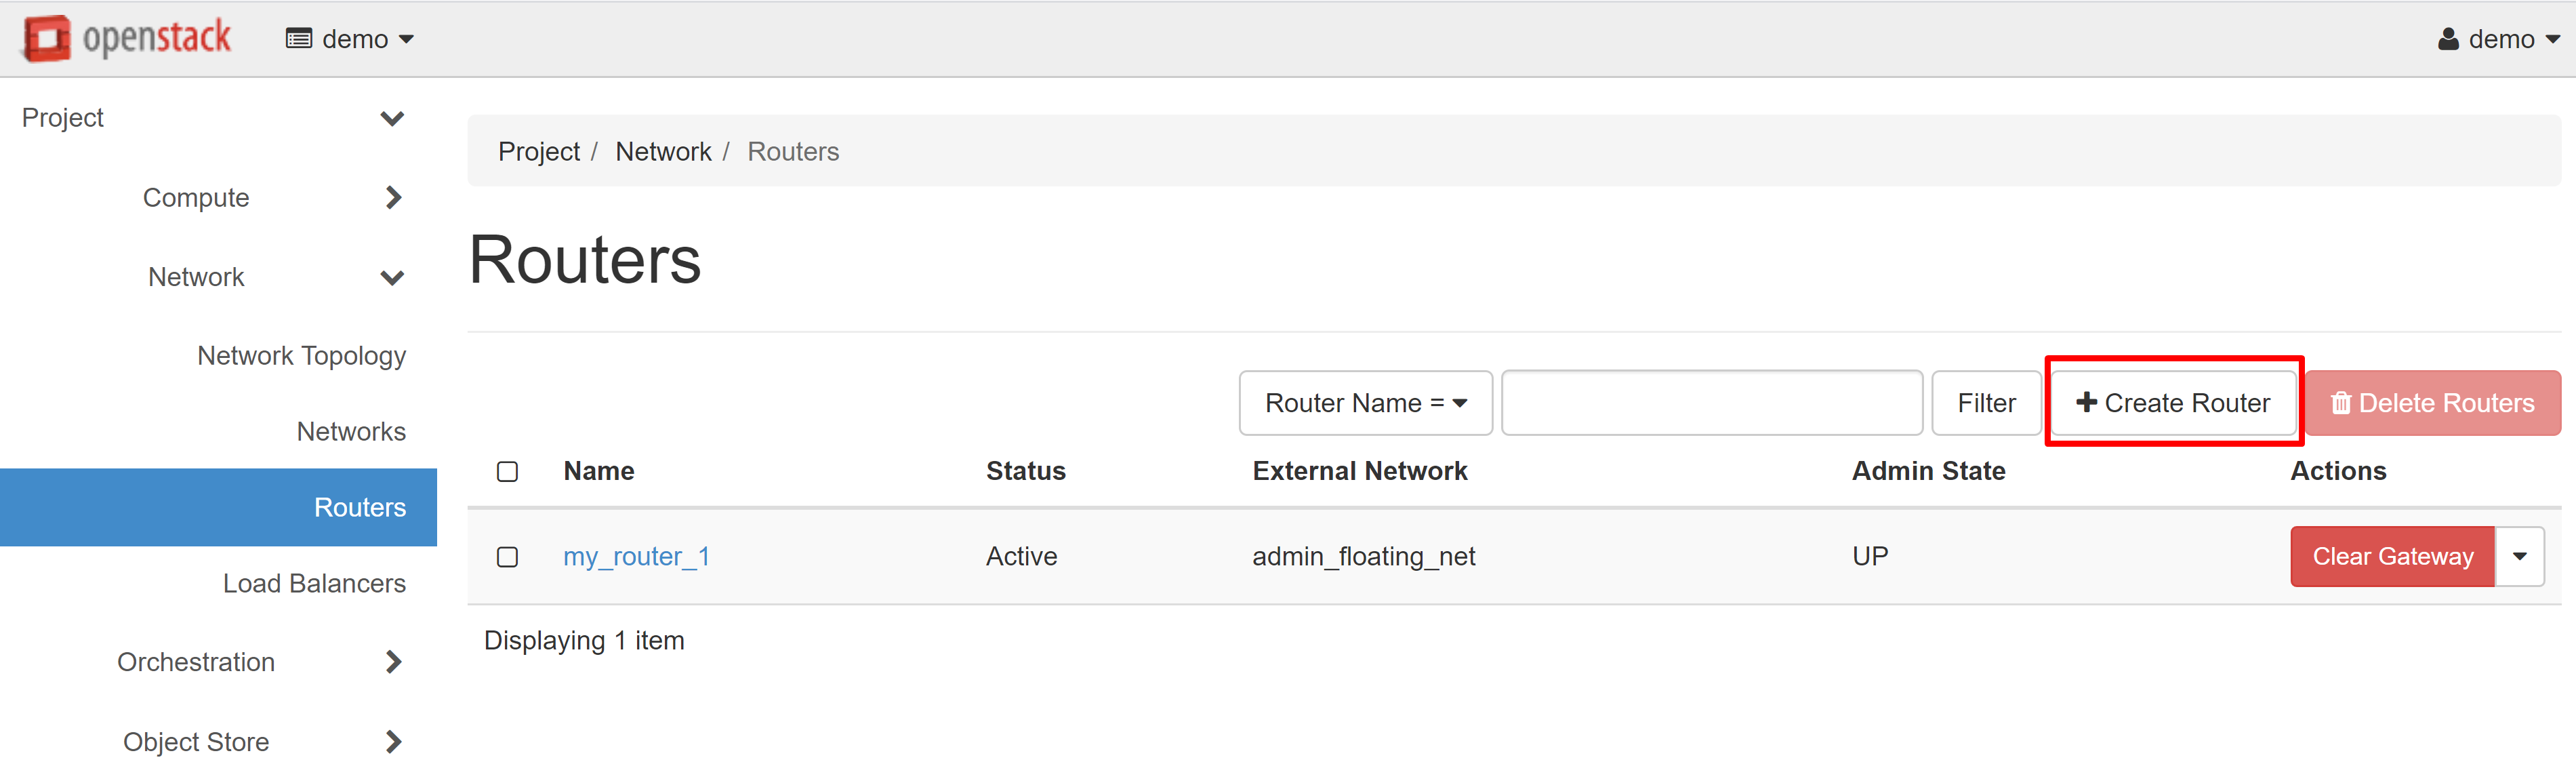
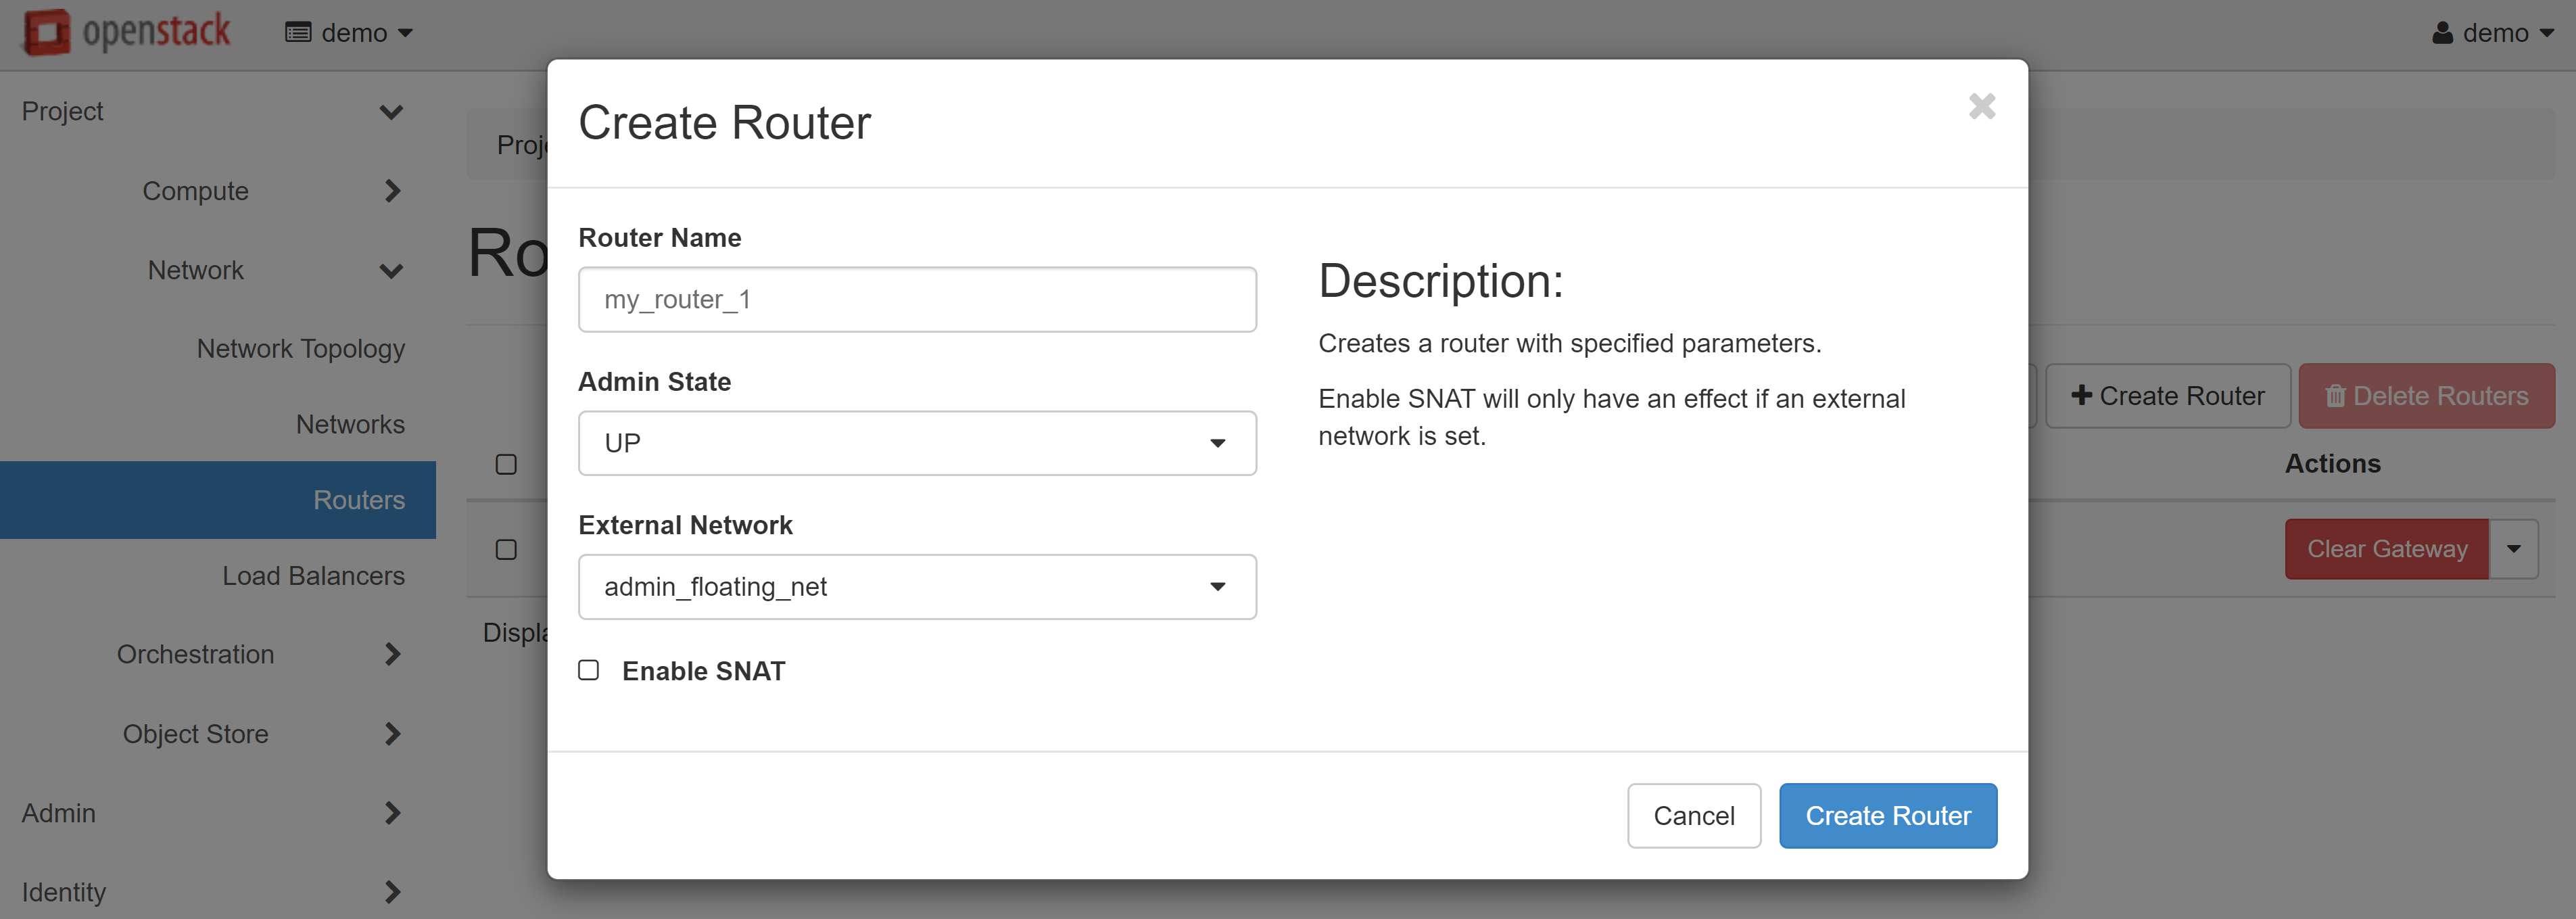
In the opened router creation window enter the router name (in Latin letters!) - for example, my_router_1. In the ADMIN STATE field, select UP, and in the EXTERNAL NETWORK field, select admin_floating_net, and then click CREATE ROUTER.
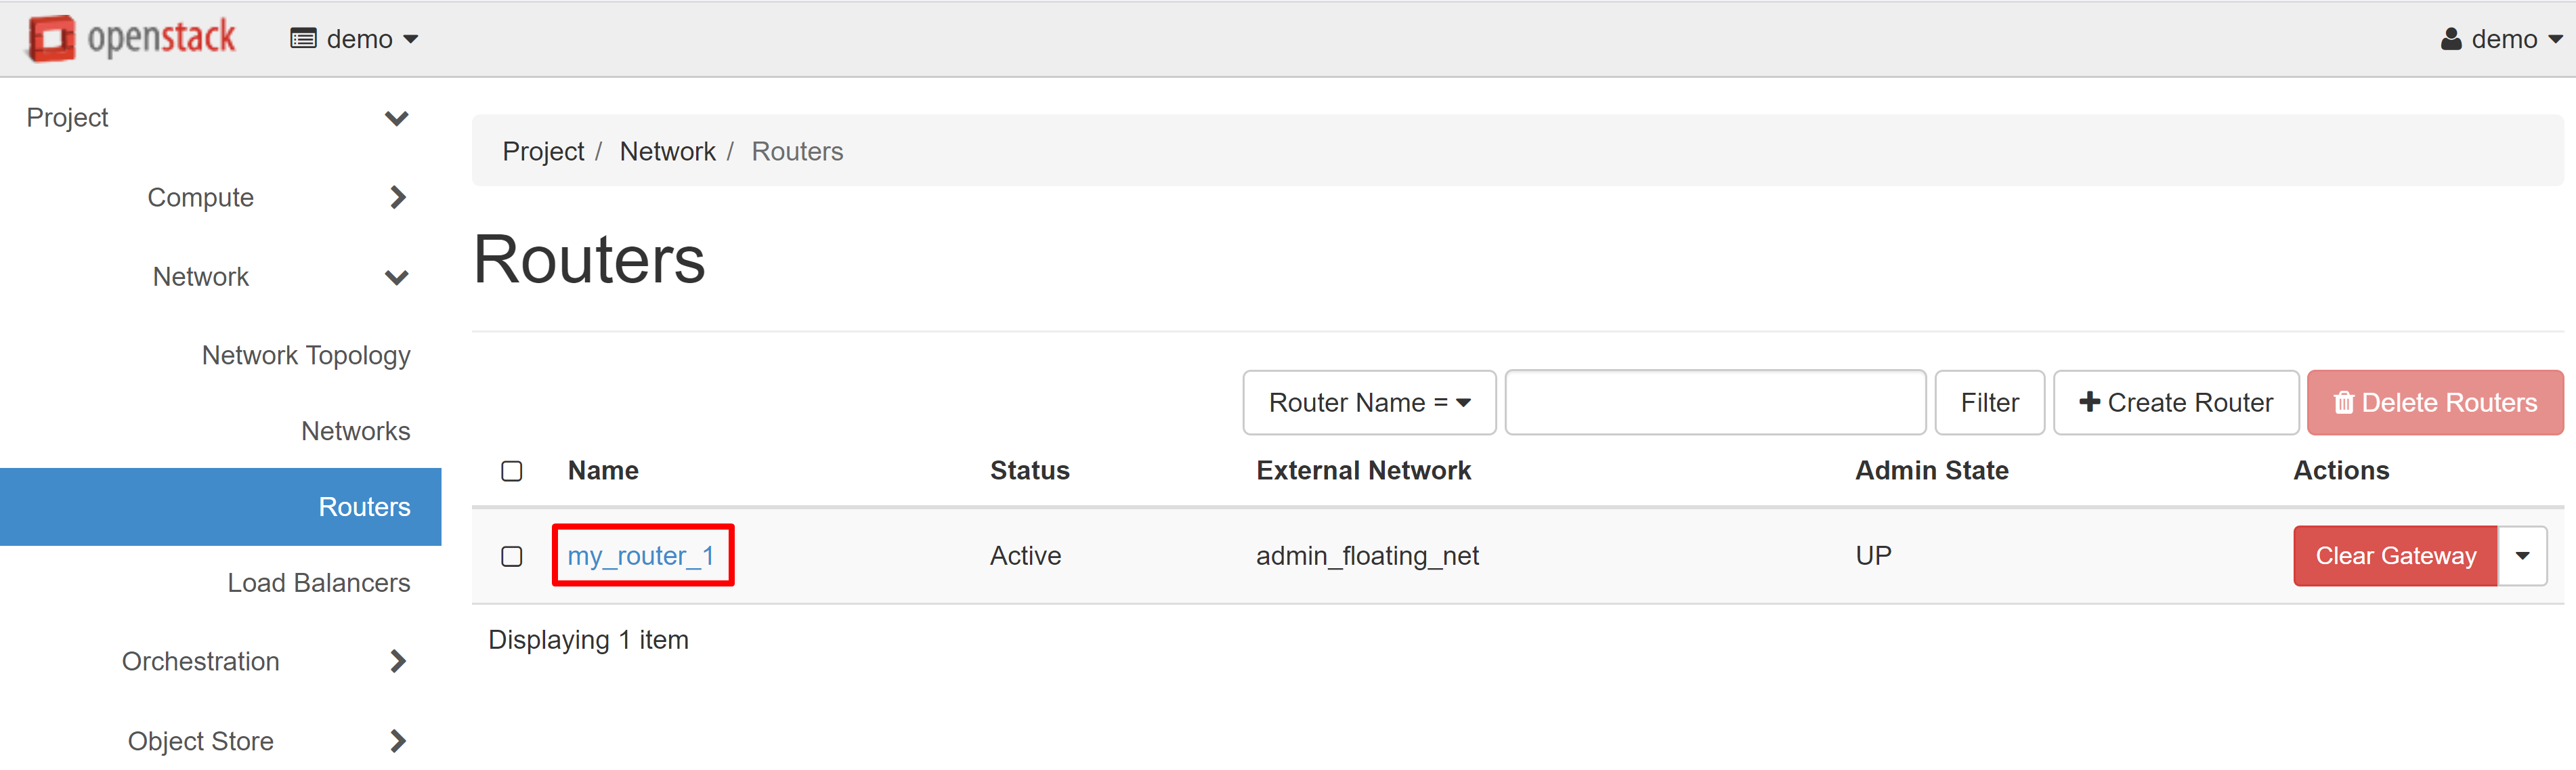
The router will appear in the list. To continue configuration, click on router name.
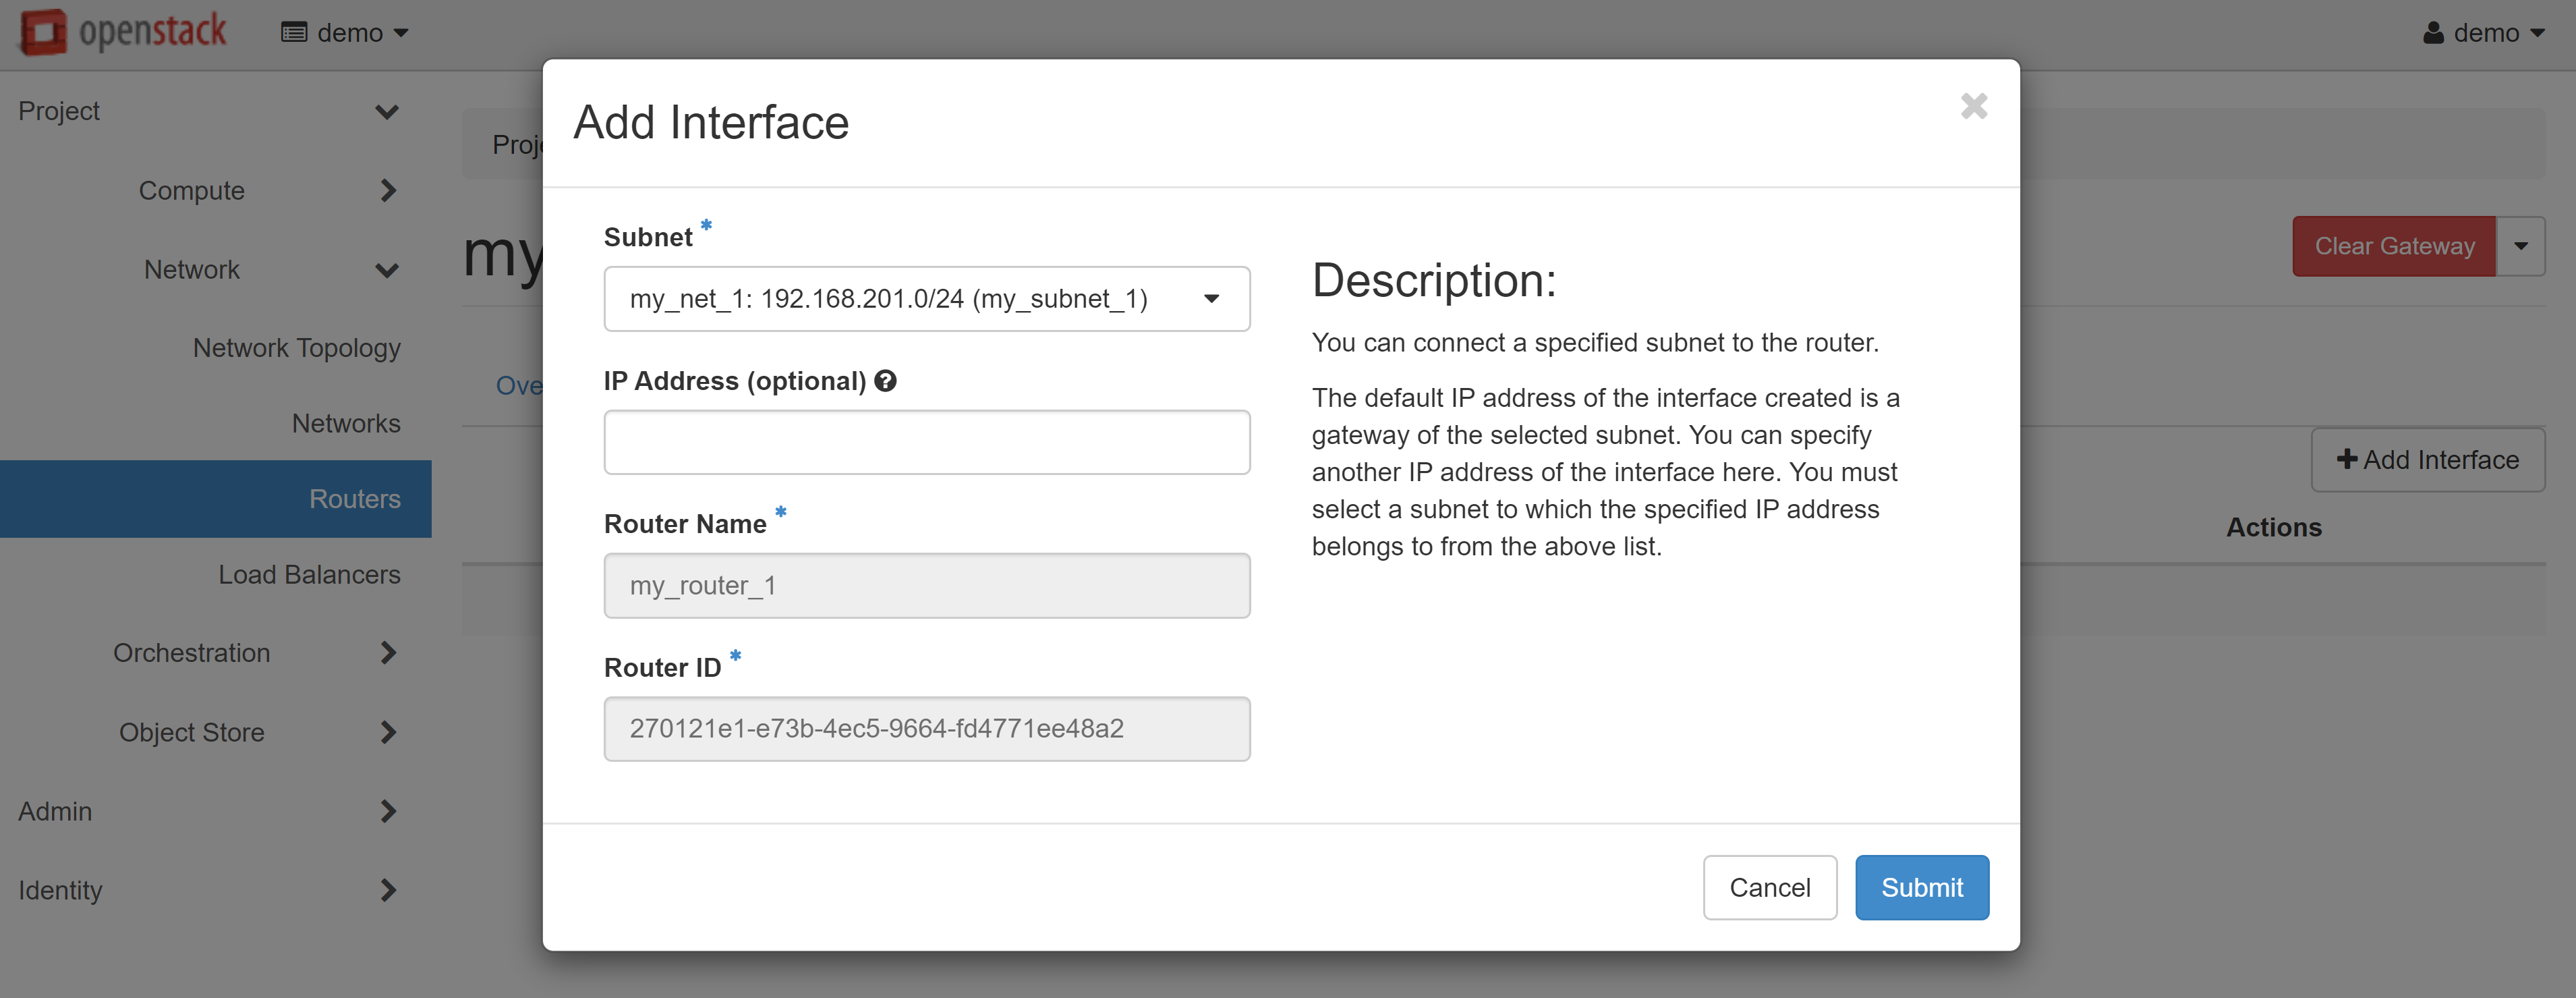
On the page that opens, select the INTERFACES tab, then ADD INTERFACE.
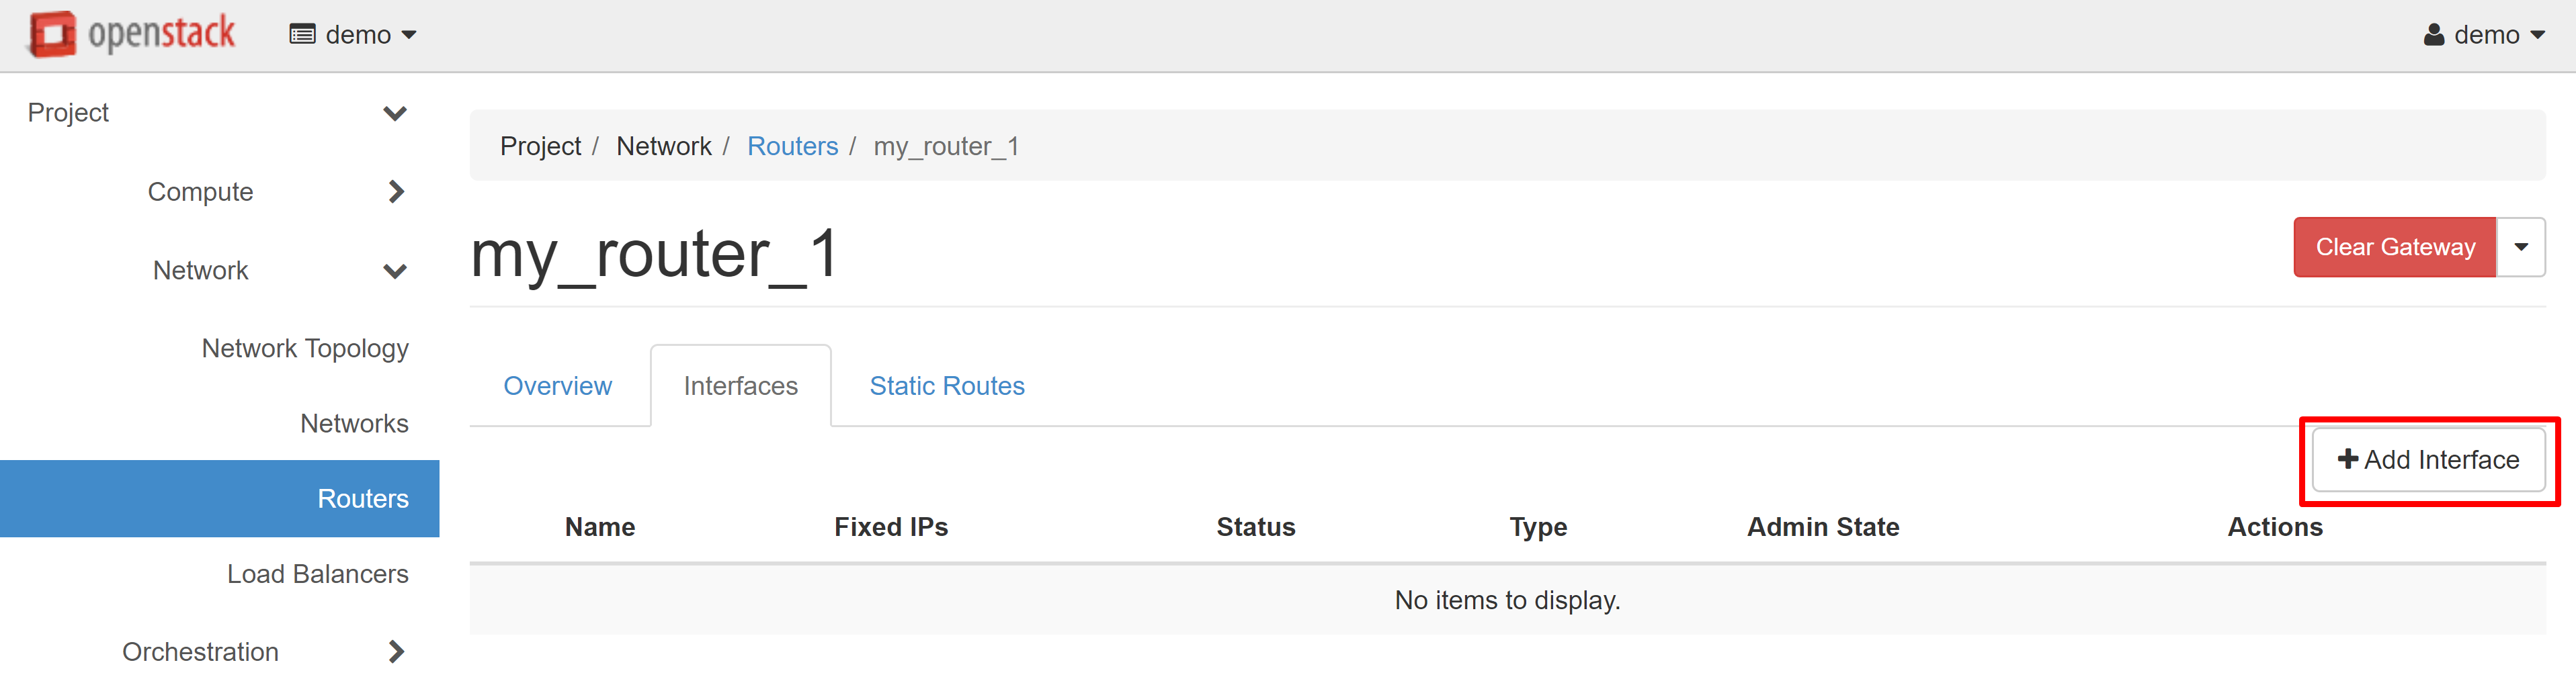
In the SUBNET field, select the previously created network and, if necessary, specify the IP address from the created range, then click SUBMIT.
This completes the network setup. Now you can create your first VM and configure security rules for it.
2. How To Create An Instance
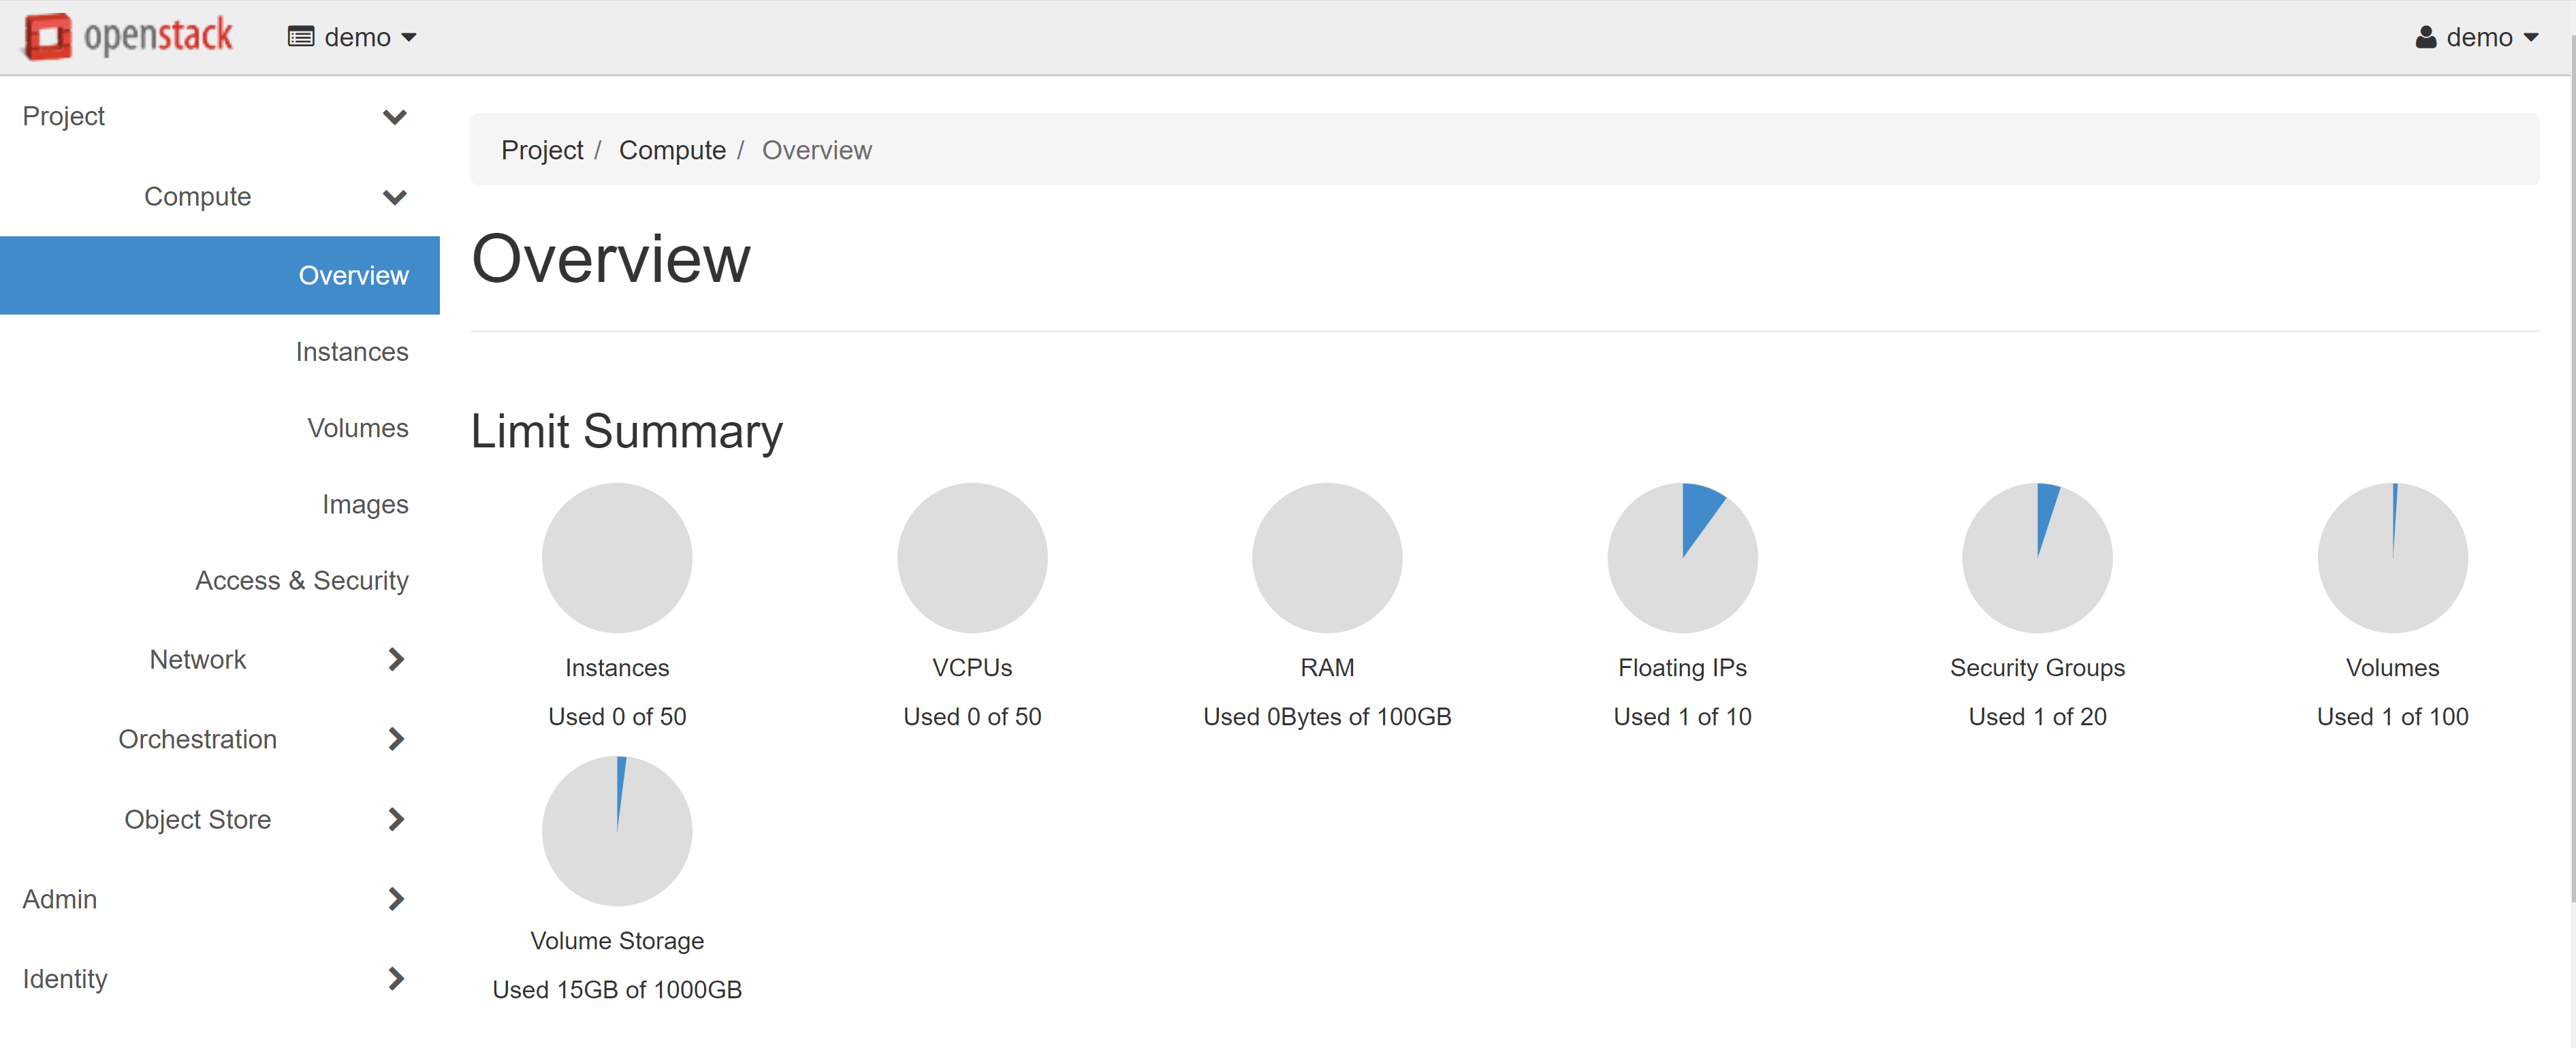
Before creating an instance, it is first recommended to check the available resources that you can use in your project. To do this, open the COMPUTE — OVERVIEW section. On the page that opens, you will see a LIMIT SUMMARY of your resources.
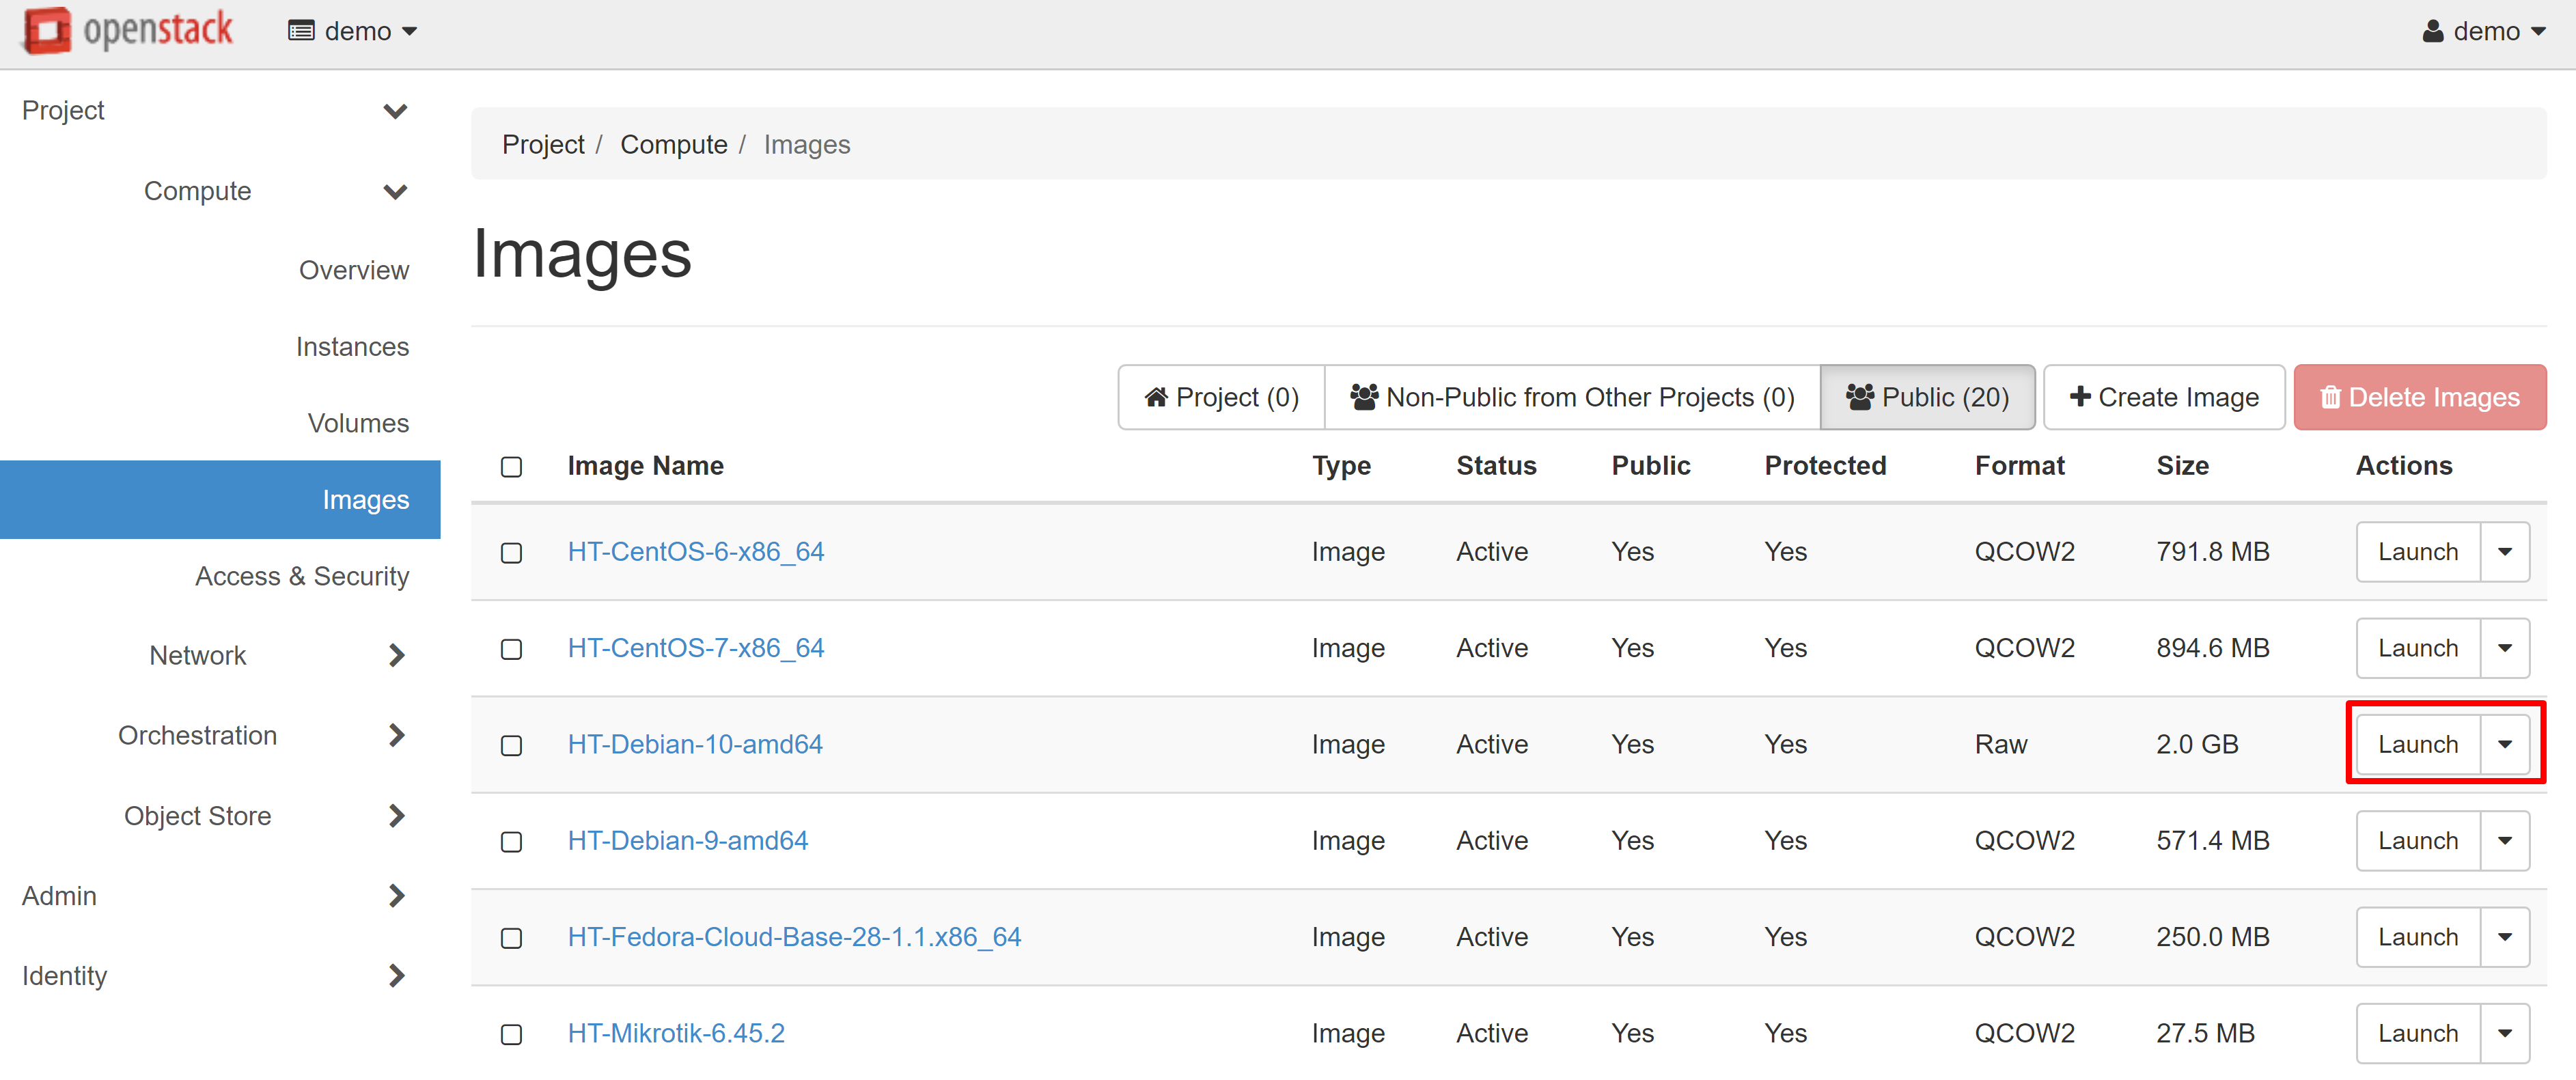
You can find all the VMs you created in the COMPUTE — INSTANCES section. To create an instance, open the COMPUTE — IMAGES section, then select the PUBLIC tab. Here you will see a list of all available images for creating VMs. Once you have decided on the desired image for the instance, click LAUNCH next to the device name. In our example, we used the image of a Debian 10.
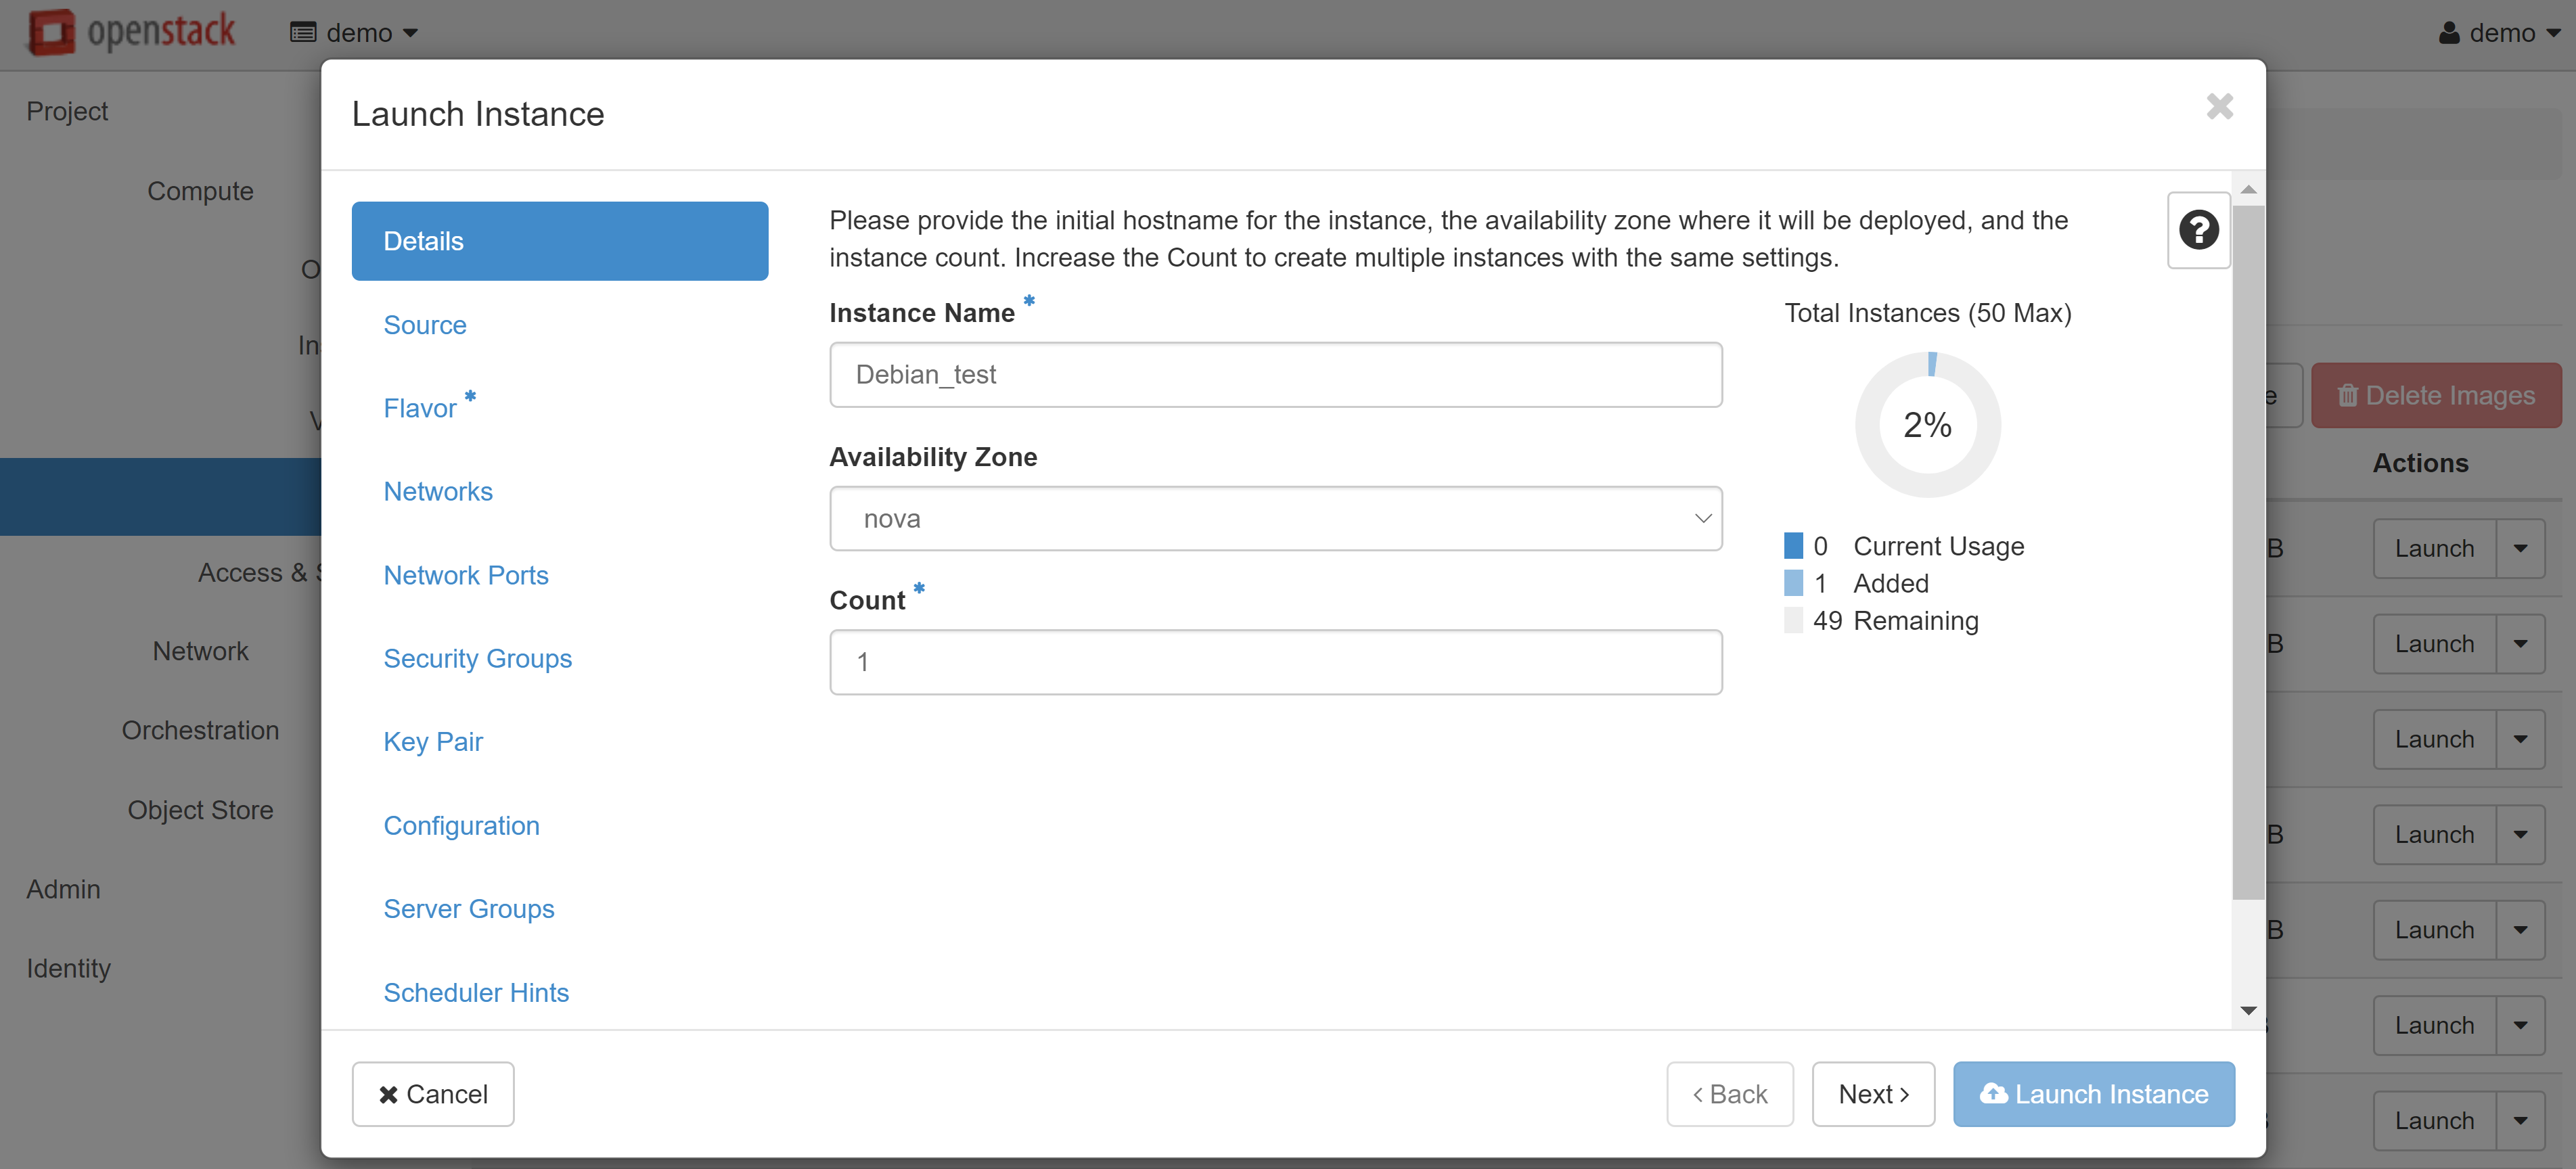
In the instance creation window that opens, enter the desired VM name in the INSTANCE NAME field, which will also be used as the hostname, for example, Debian_test. You can increase the number of created instances in the COUNT field — in this case, they will be allocated to the corresponding indexes.
In the SOURCE menu item (on the left), select CREATE NEW VOLUME and set the volume size. You may also change the image that the VM will be created from, if required.
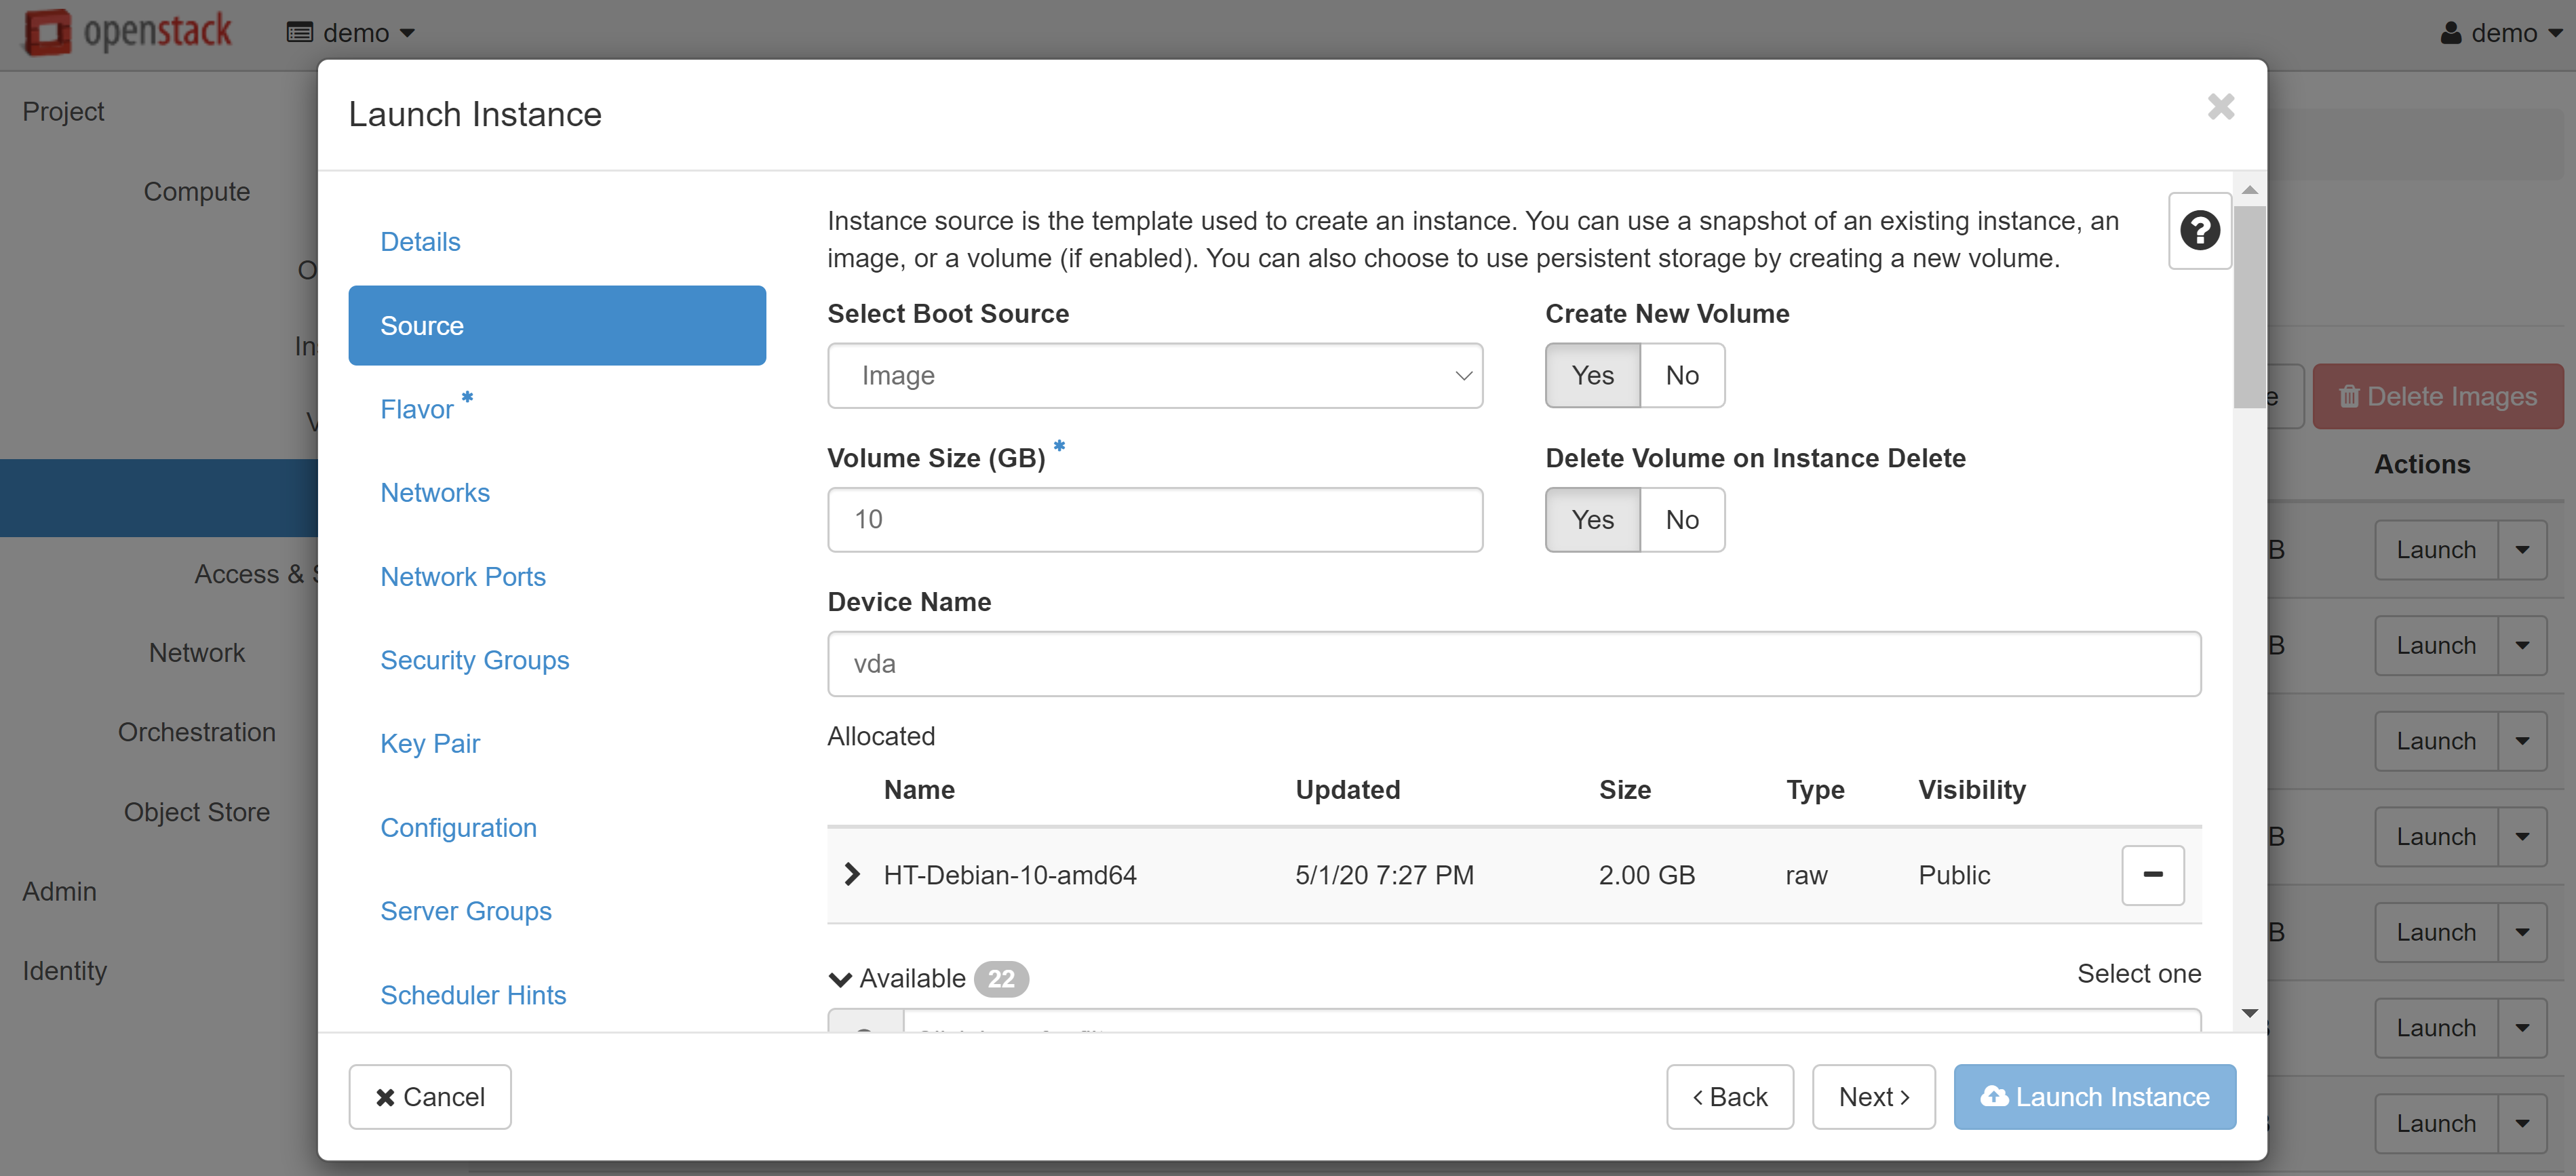
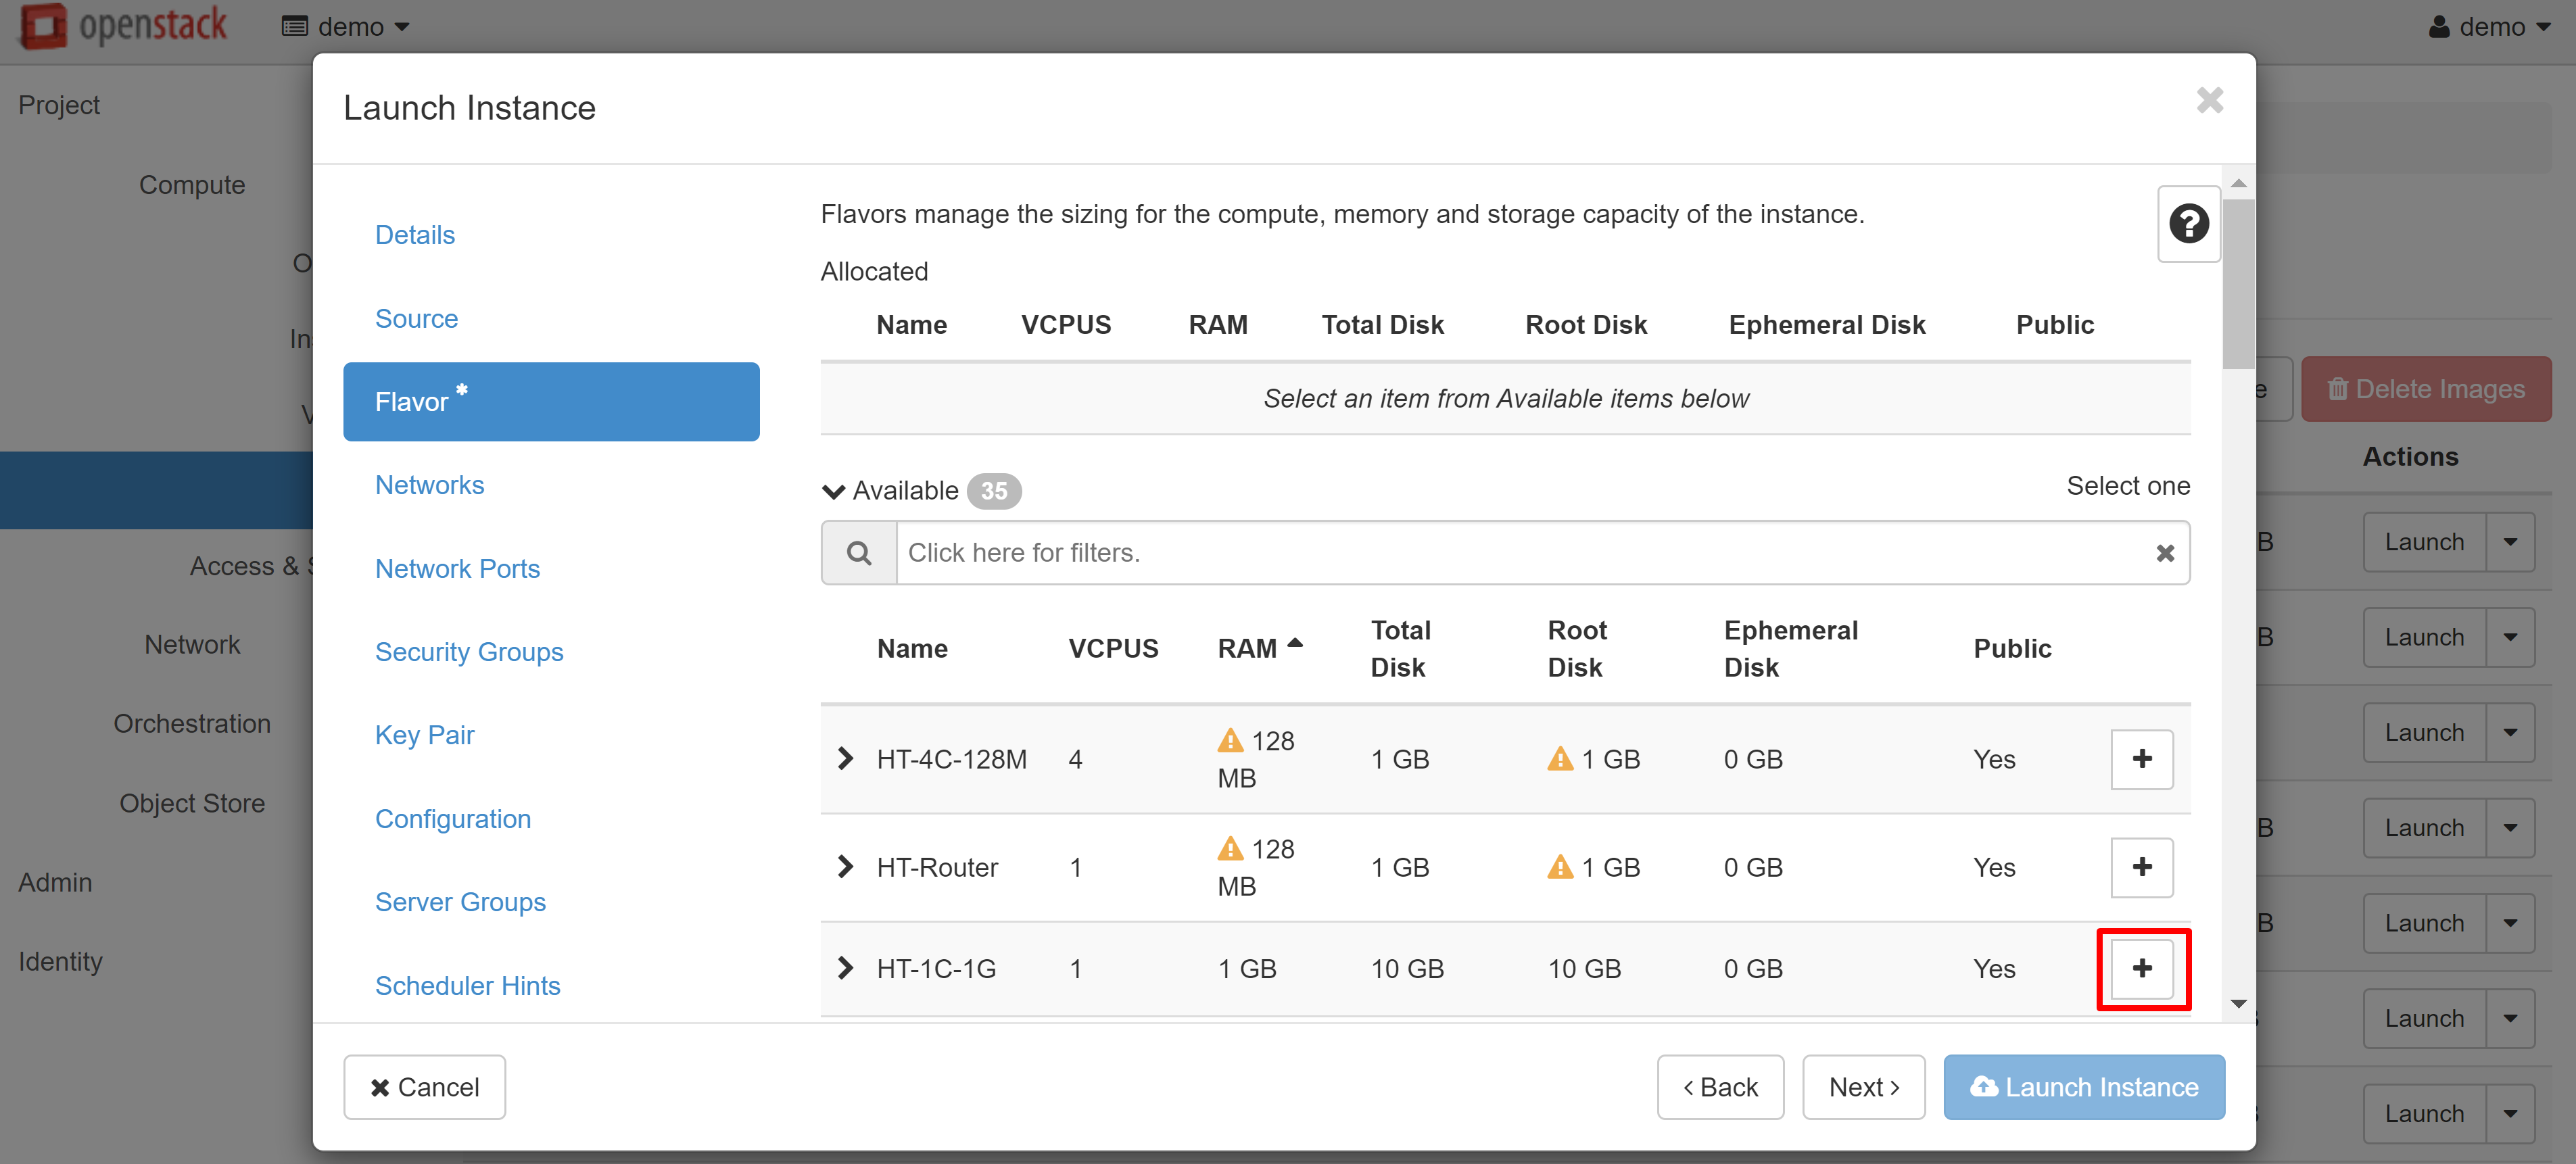
In the FLAVOR menu item, please select a template based on which resources will be issued for the VM. If a template exceeds the resources available to you, an exclamation mark will appear next to it. To select a template, click + next to it.
If you are creating an instance based on a Linux image, you should create a key pair in the KEY PAIR menu section on the left. Without this, you won't be able to connect to the created VM via SSH. You can import an existing key pair using the IMPORT KEY PAIR. If you want to create a new key pair, click on the CREATE KEY PAIR and enter the name in Latin letters (for example, debiankey2). Once created, the key file will be downloaded automatically by your browser.

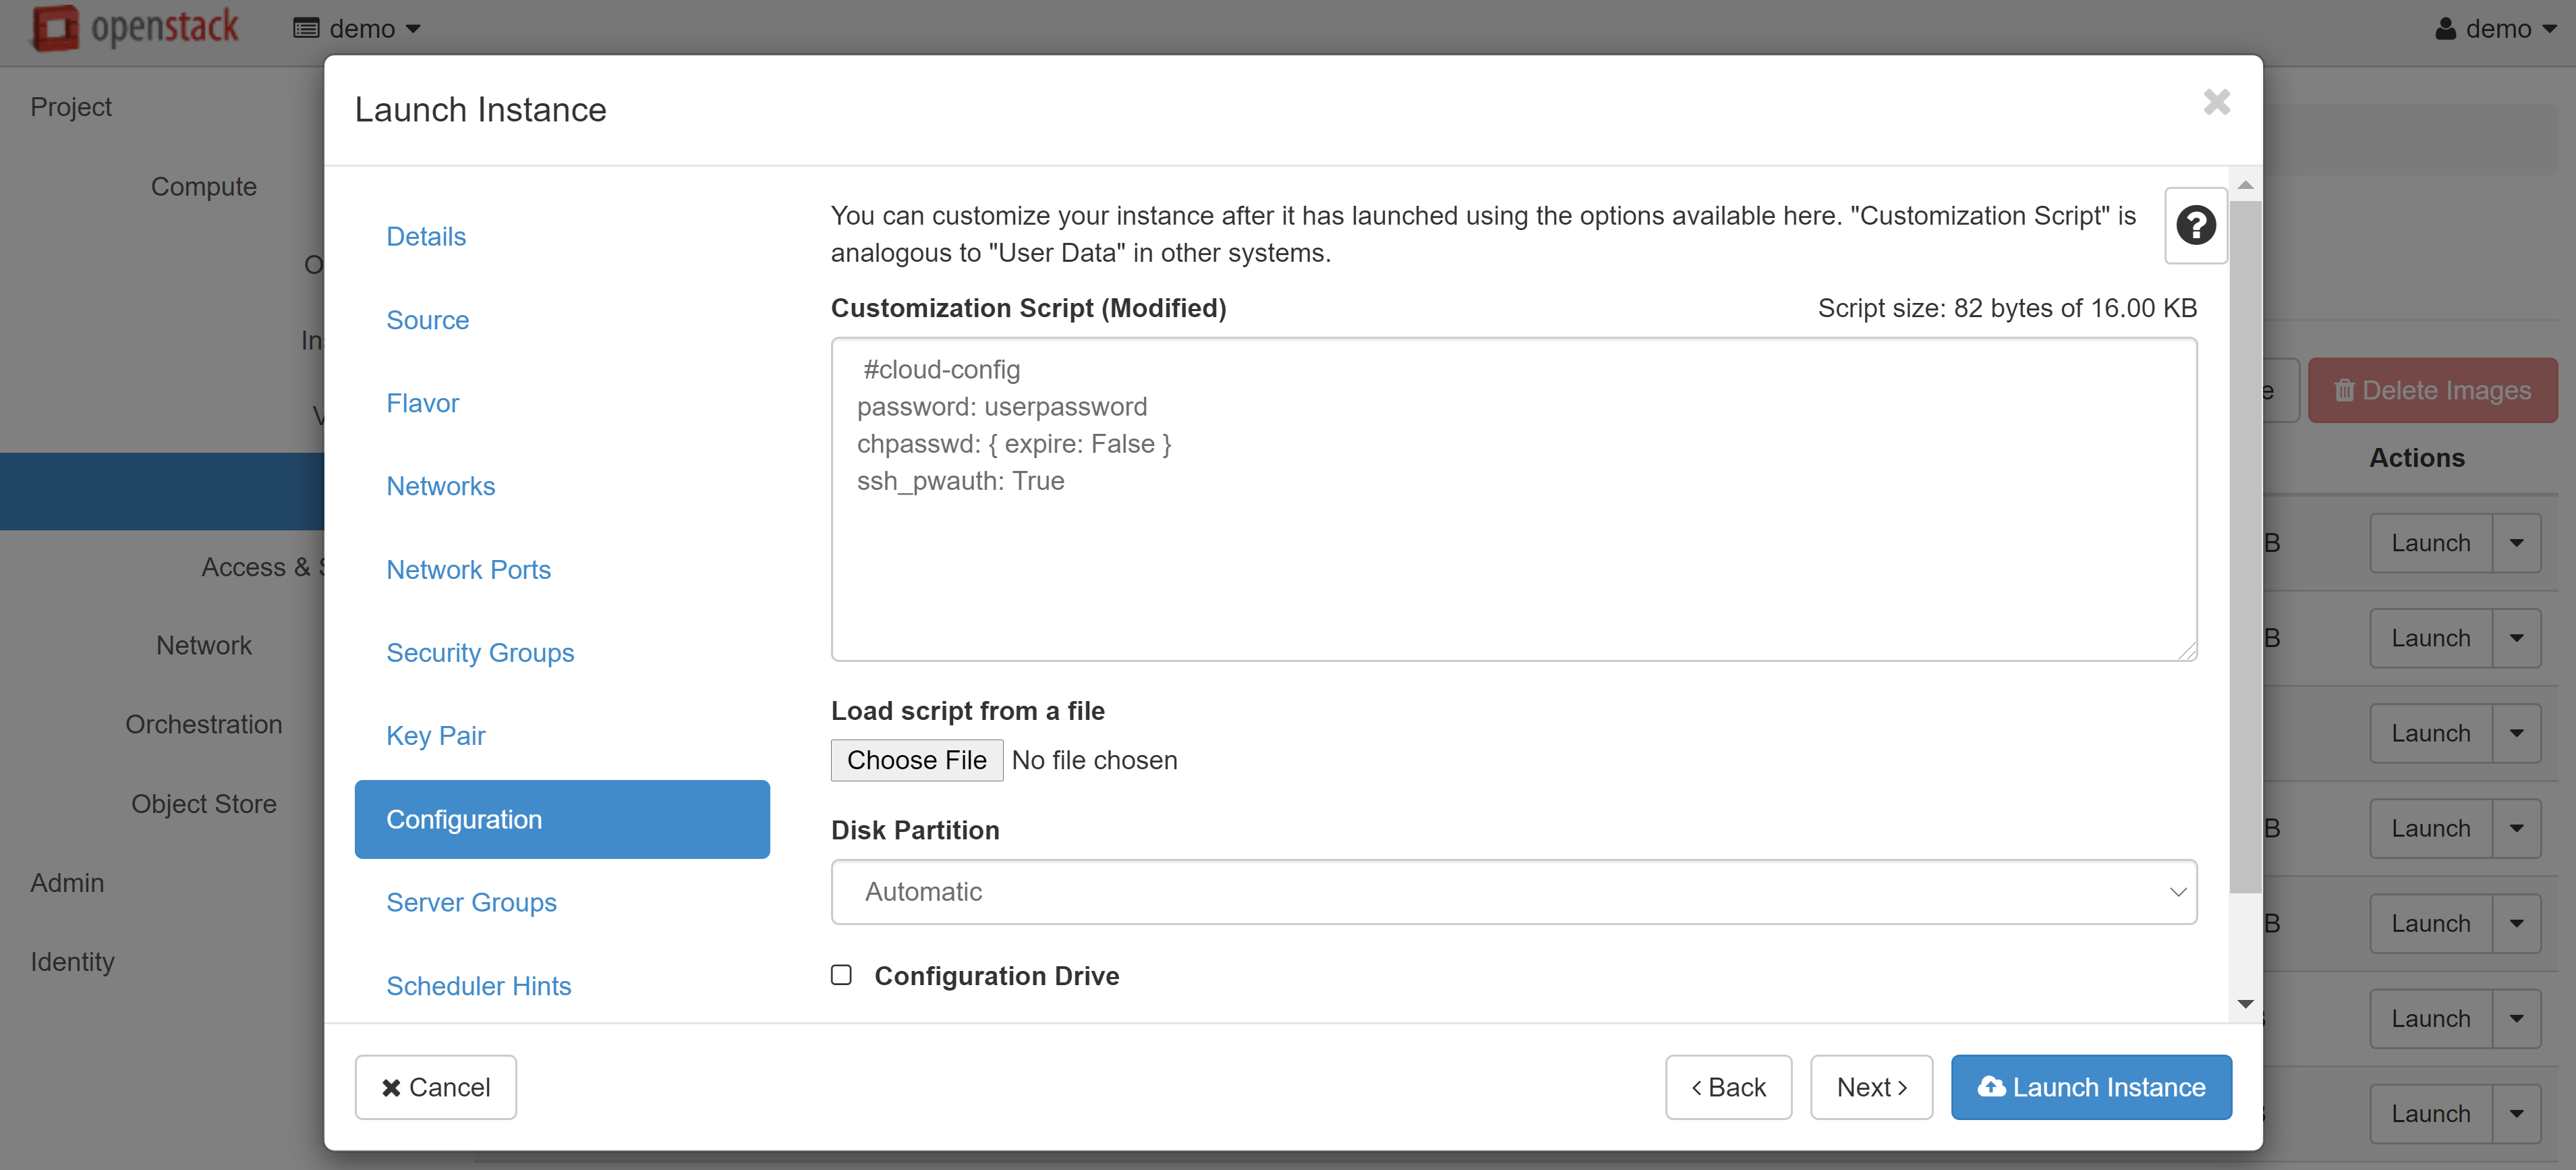
Linux/Unix only: if you plan to connect to the VM via the console and you do not need SSH access, you can add the following script to the CUSTOMIZATION SCRIPT field in the CONFIGURATION section:
#cloud-config
password: userpassword
chpasswd: { expire: False }
ssh_pwauth: True
where USERPASSWORD is your connection password.
After you have finished making changes, click LAUNCH INSTANCE. Your VM will appear in the list of instances, and after a while its status will change to ACTIVE. The next step is to associate a white IP address with your instance. To do this, select ASSOCIATE FLOATING IP from the drop-down menu next to the name of your instance.
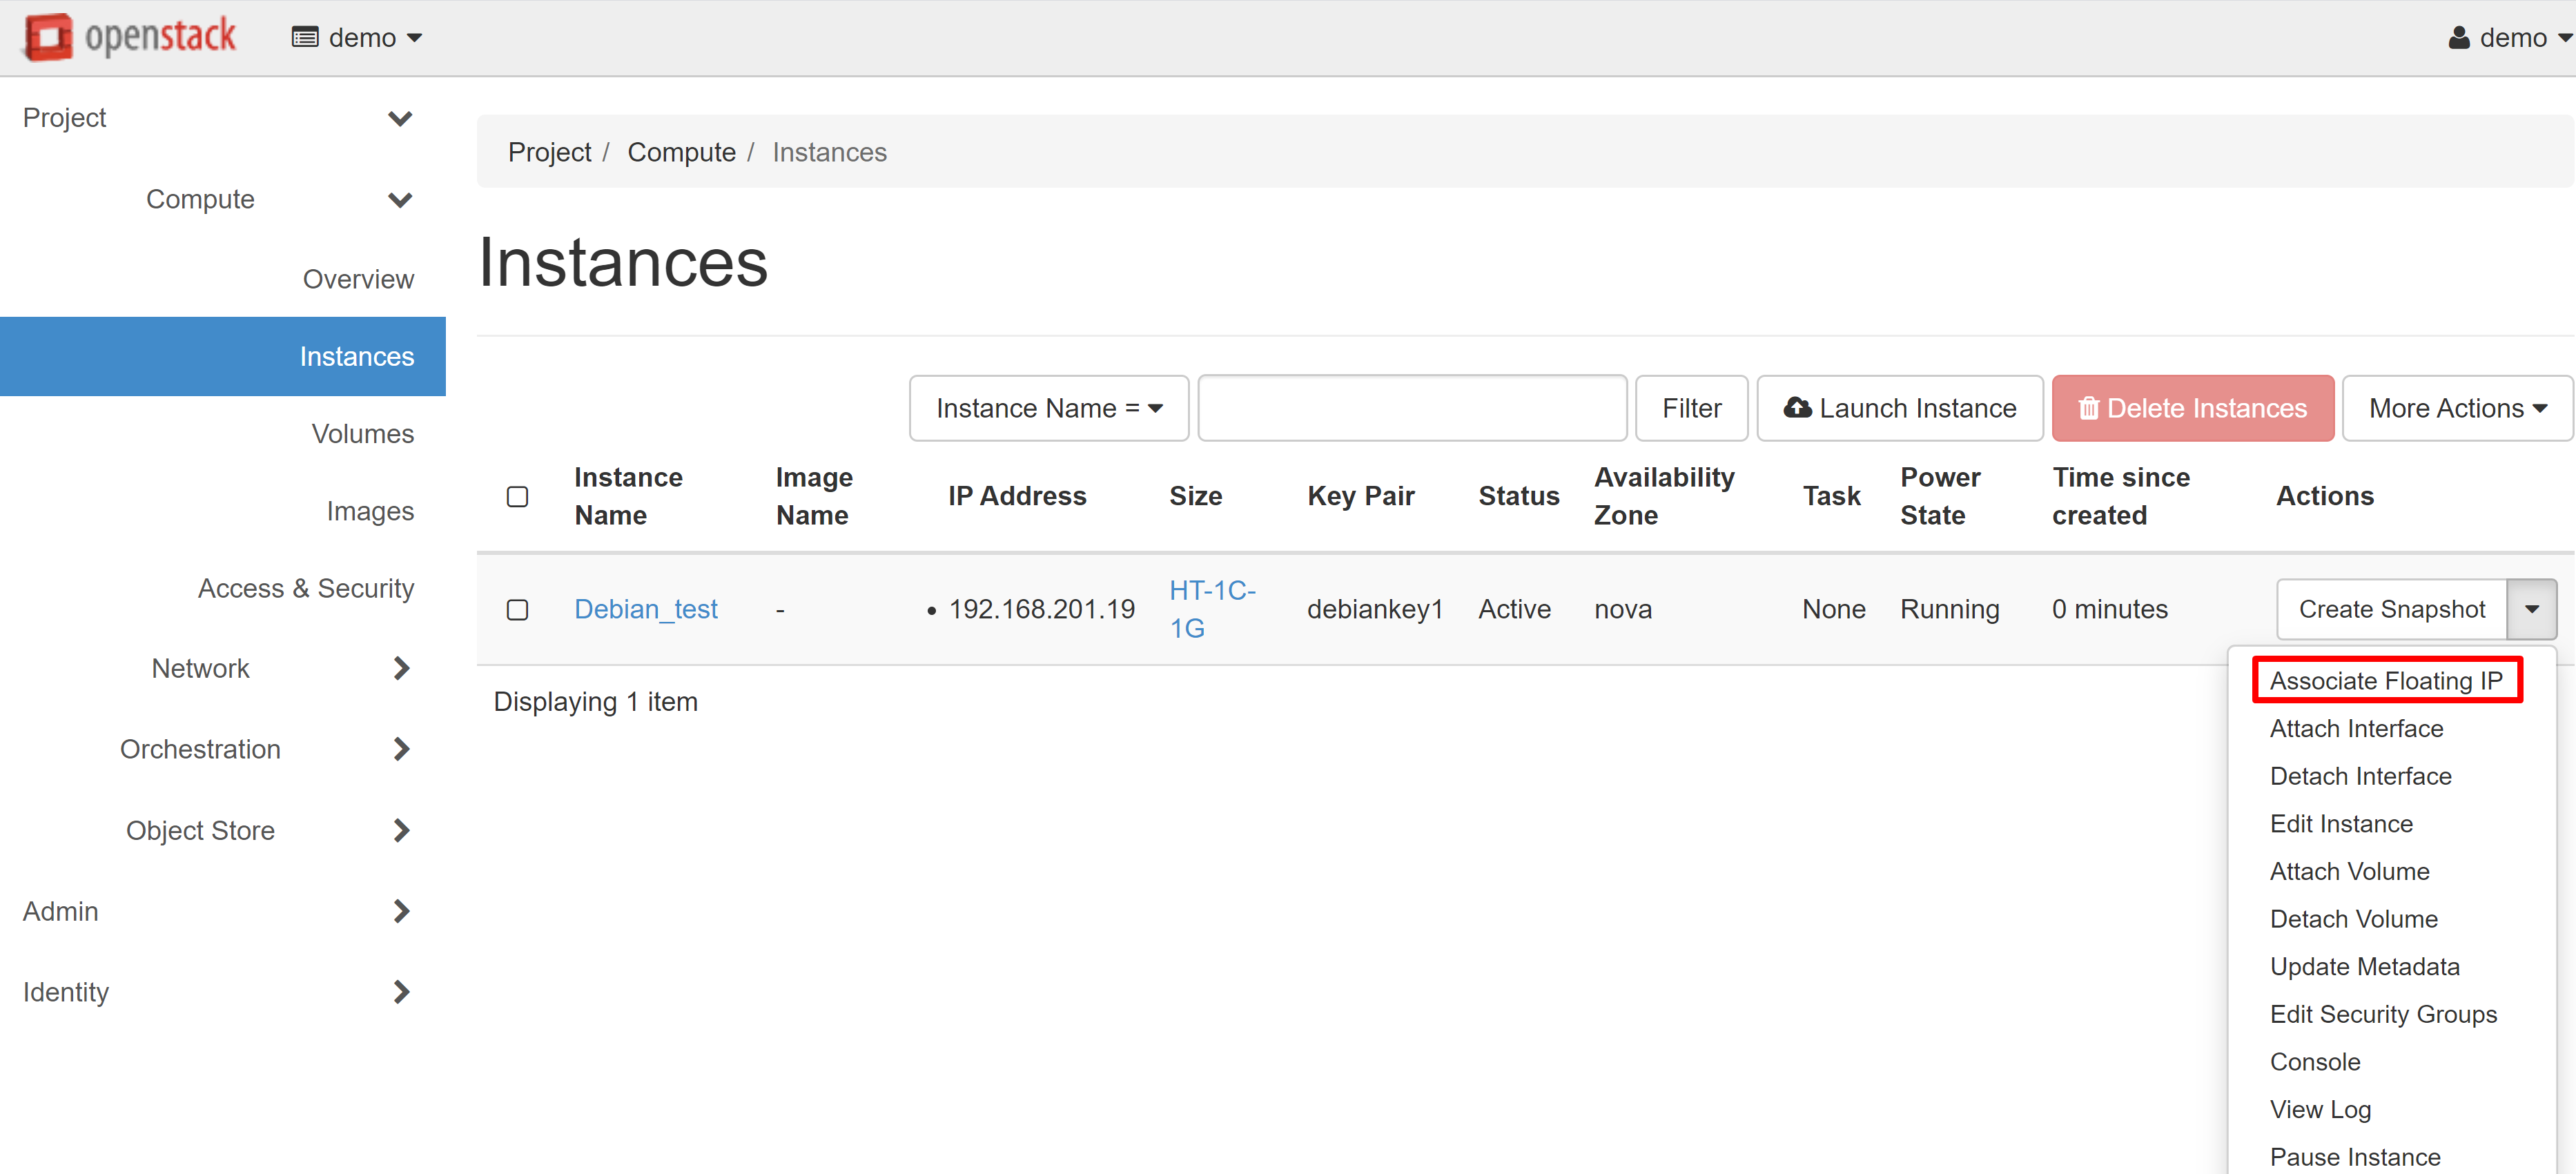
In the window that opens, click «+» under IP ADDRESS.
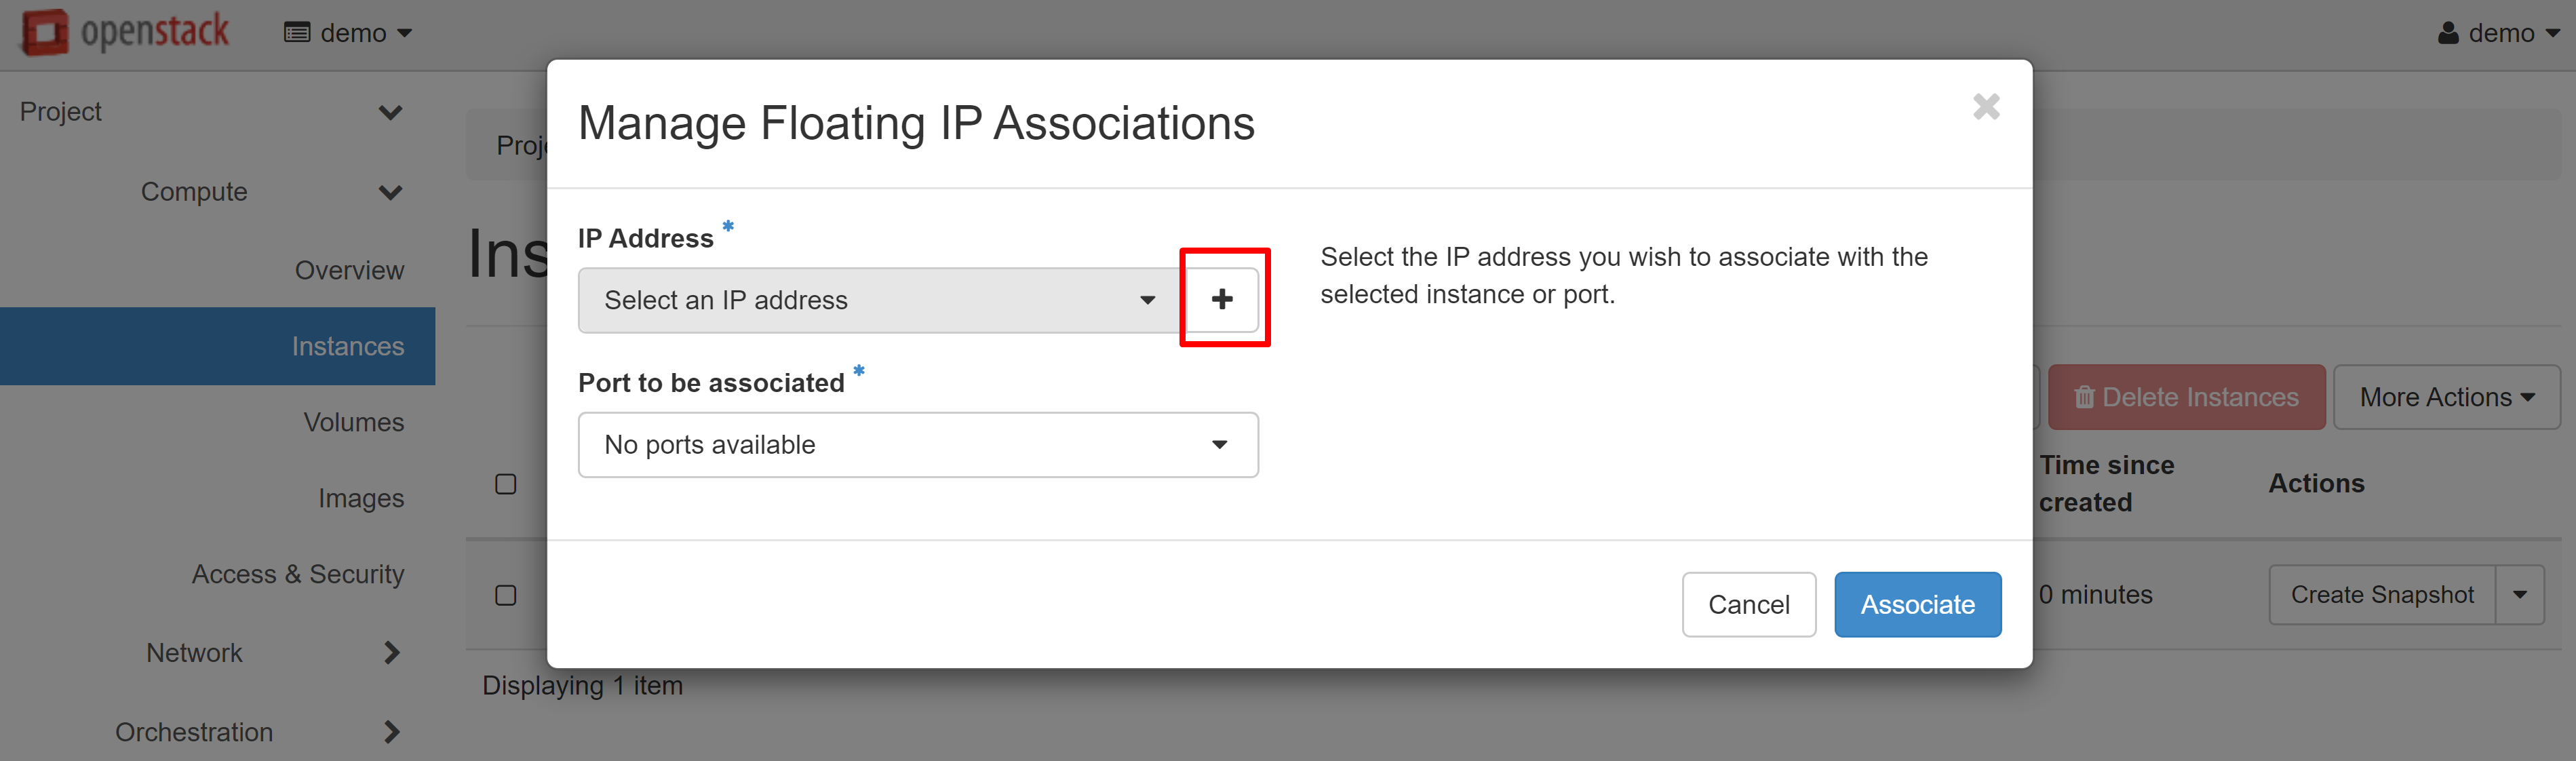
In the window that opens, click ALLOCATE IP, and then you will be redirected to the previous page, where an available white IP will appear in the IP ADDRESS drop-down list, which you can associate with the port of your instance. Click ASSOCIATE to complete the configuration.
The user name for Linux instances is the same as the distribution name: DEBIAN for all versions of Debian, FEDORA for Fedora, etc.
If your VM is Windows-based, open the COMPUTE — INSTANCES section and click the name of the corresponding instance. On the page that opens, go to the CONSOLE tab and configure the system.

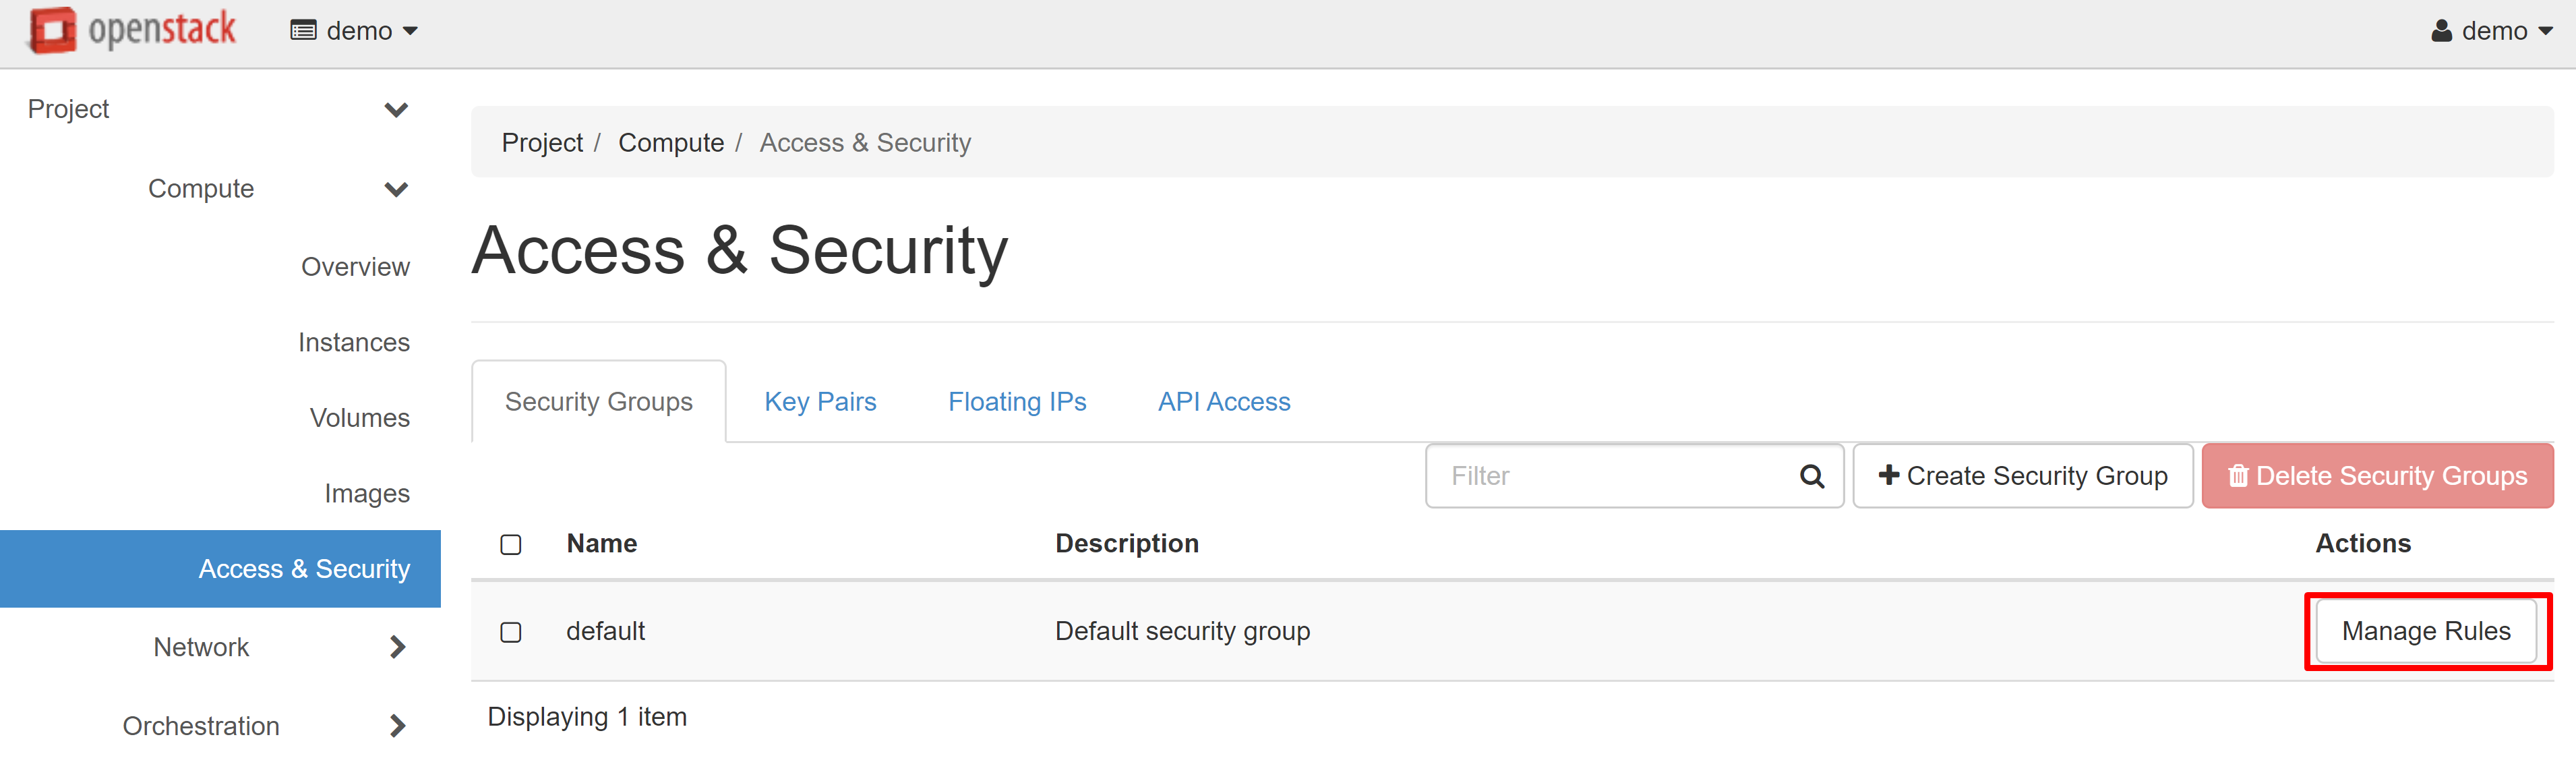
Your cloud VM is now successfully created, but you still don't have access to it via SSH or RDP. To connect to an instance, you should make changes to the current security group.
3. How To Manage Security Groups
To change security group rules — create new ones and edit existing ones — open the COMPUTE — ACCESS & SECURITY section.
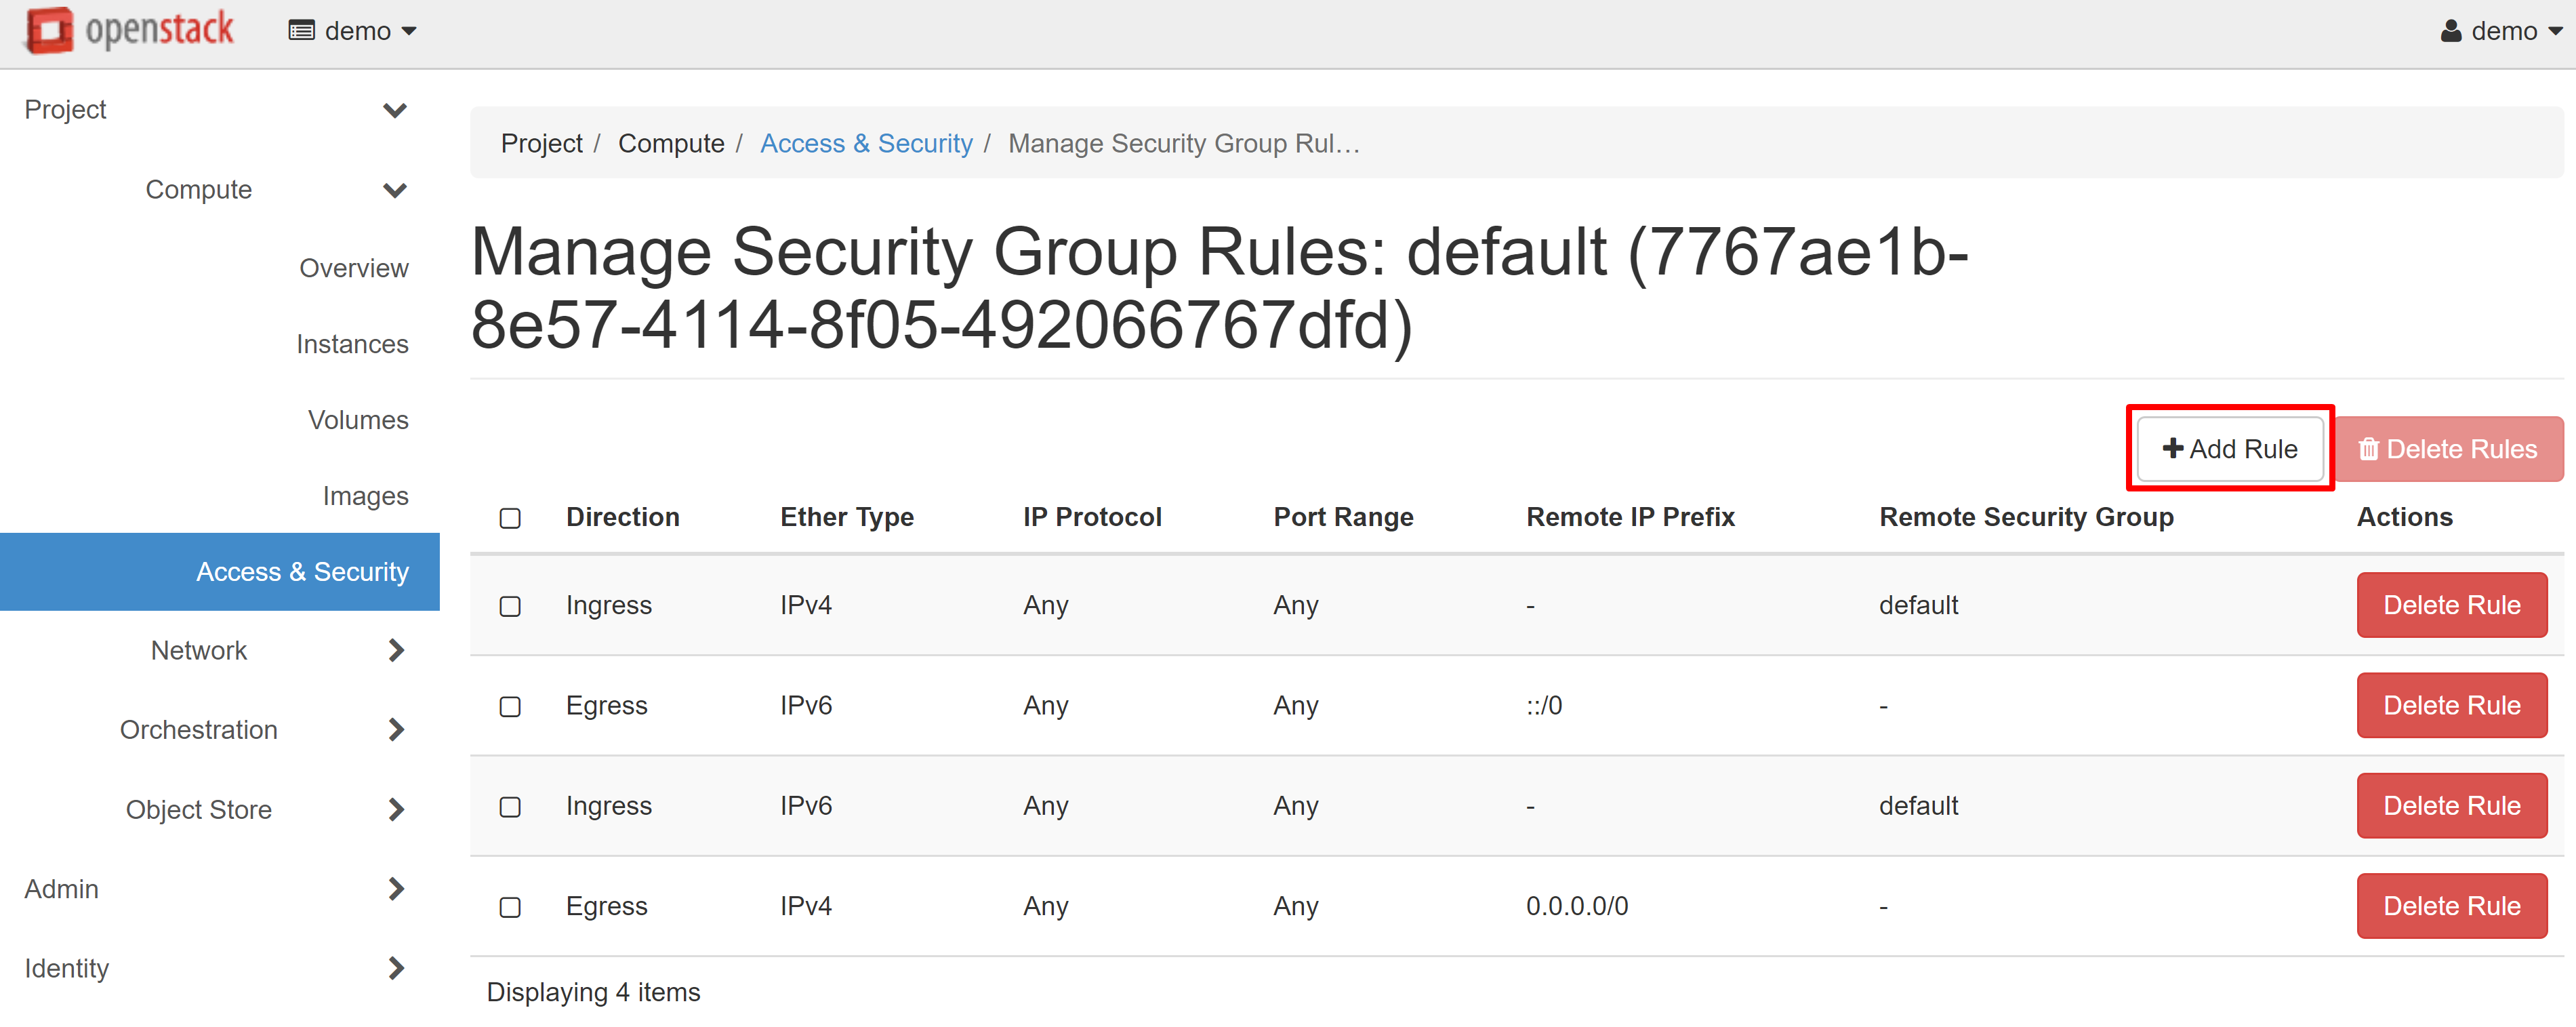
Click MANAGE RULES next to the DEFAULT rule.
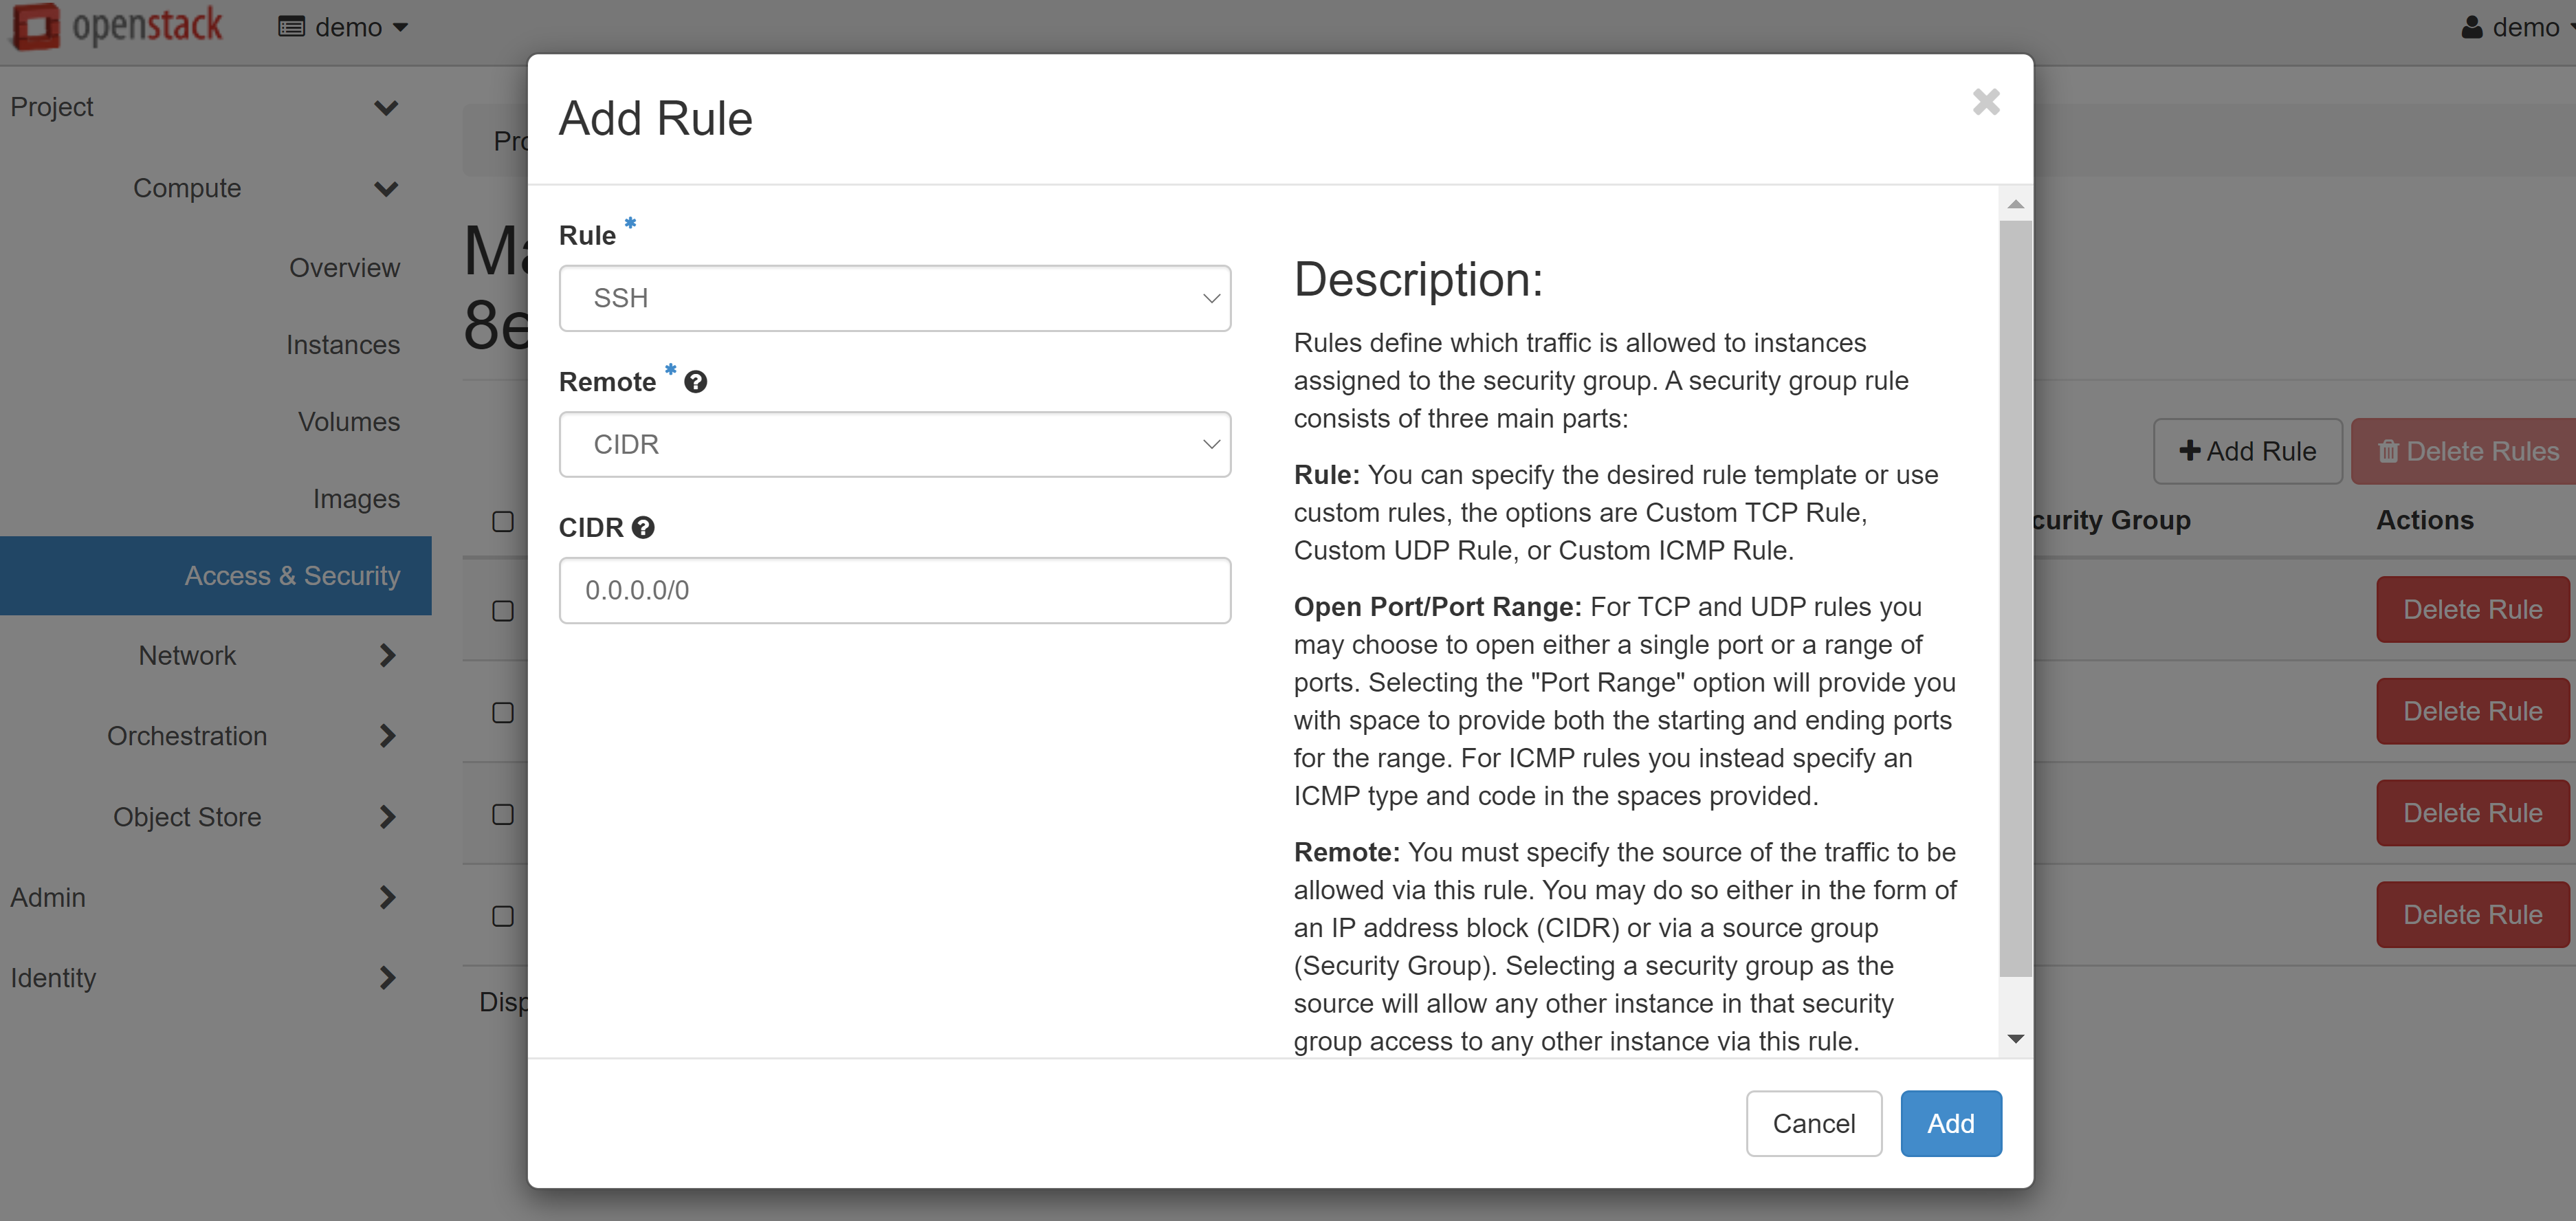
On the page that opens, select ADD RULE.
In the window that opens, select the required parameter from the RULE drop-down list: SSH for Linux or RDP for Windows.
Attention! You should only change the other fields if you are absolutely sure that these actions are necessary.
Then click ADD and the rule will be saved.
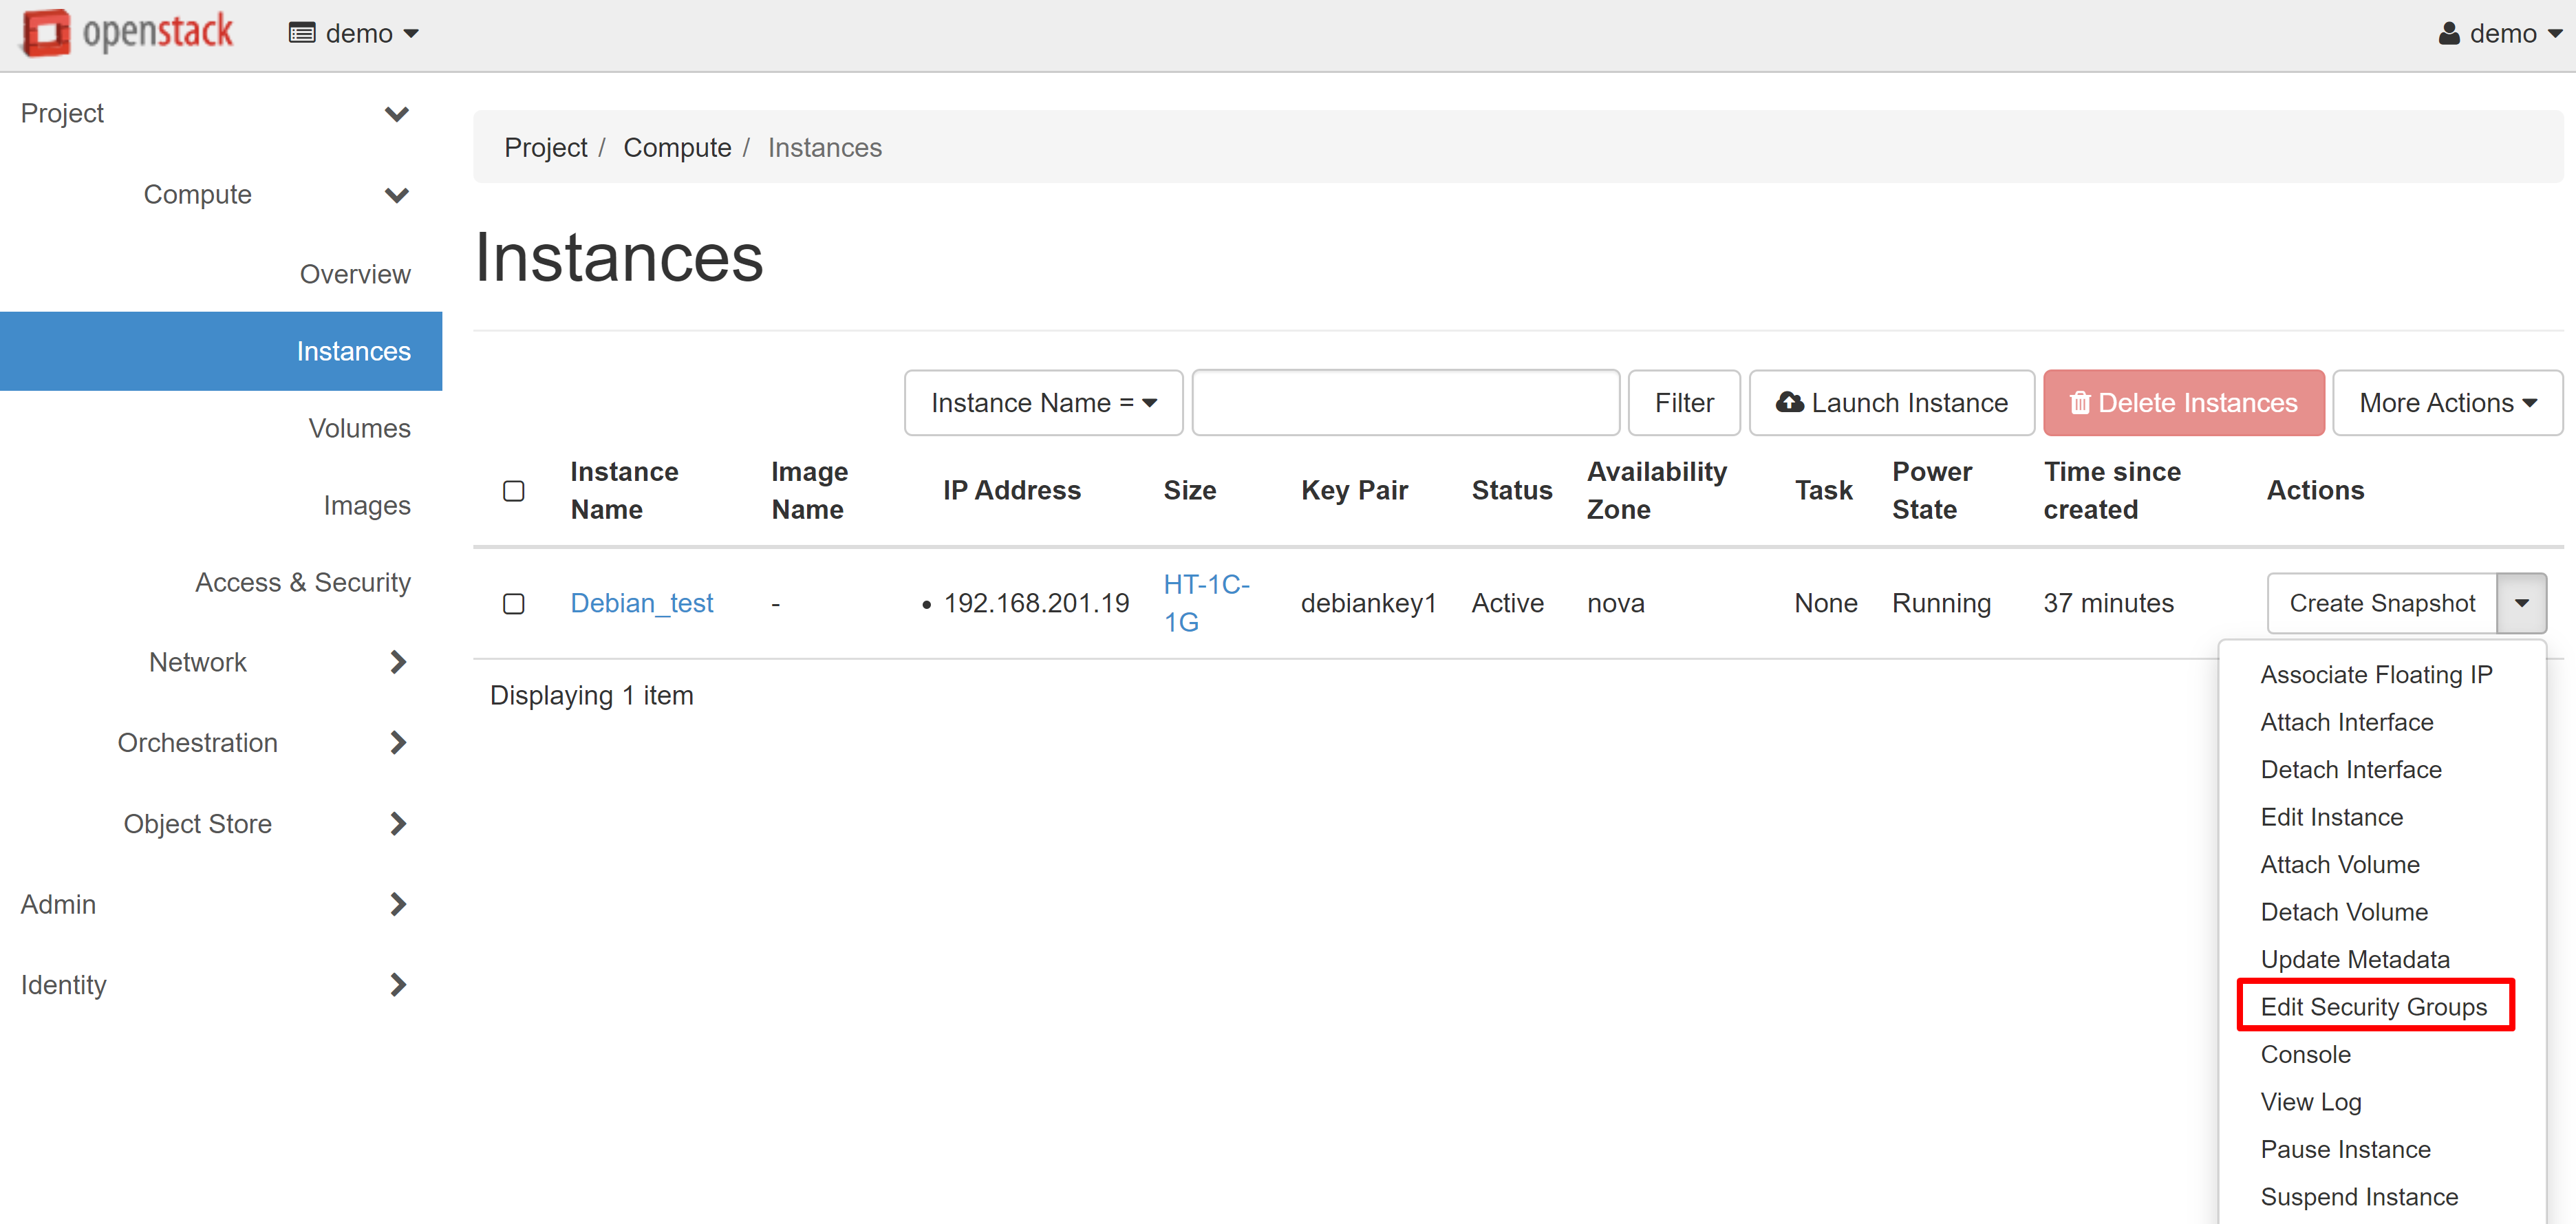
You can create separate security groups for different VMs. You can do this directly during the instance creation process from the corresponding menu section. You may also change the security group for existing instances in the COMPUTE — INSTANCES section. To do this, select EDIT SECURITY GROUPS in the drop-down list next to the desired machine.
You are now able to easily connect to the VM you created via SSH or RDP.