

This guide is designed for Host-telecom.com customers who use virtual hosting services and want to set up corporate email on their domain. Corporate email with your domain name creates a professional image and strengthens customer trust. This step-by-step instruction details the process of creating an email account through the cPanel control panel. By following the directions below, you will quickly set up and start using corporate email on your domain.
The domain your-email.cz is used as an example in this guide.
Step 1: Log in to the cPanel Control Panel
- In your browser, open the page: https://www.host-telecom.com/my-account/
- Go to the
"Hosting panel"section and click the"Enter"button - Enter your domain and login credentials received in the email when activating the virtual hosting service
Step 2: Go to Email Account Management
- In the cPanel interface, open the
"Email"section. -
Select
"Email Accounts".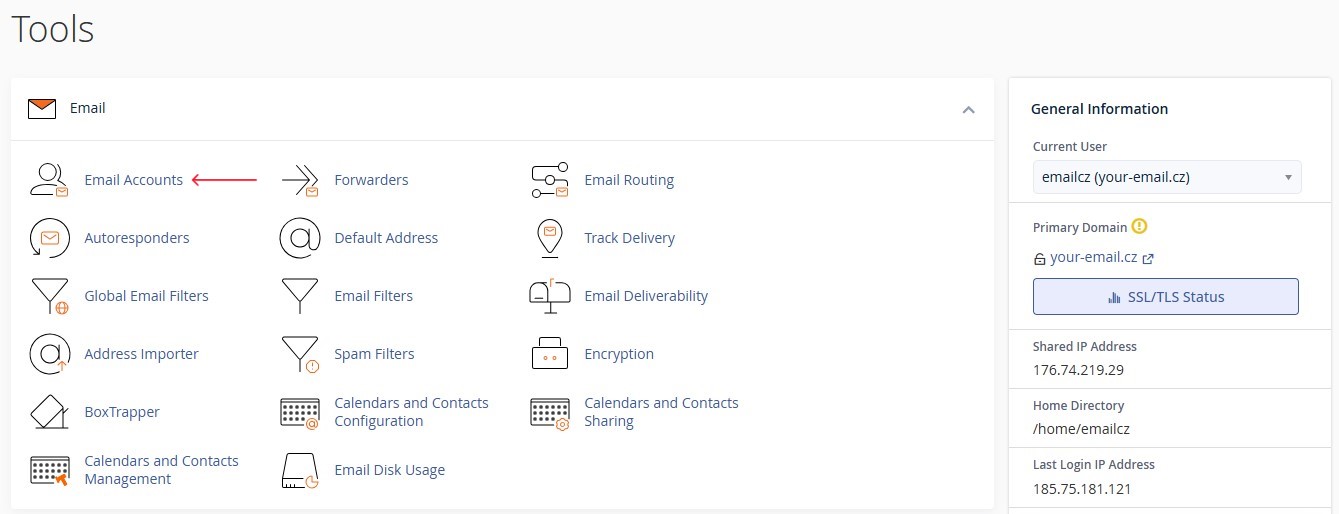
Figure 1. Email section interface in cPanel
Step 3: Create a New Email Account
-
On the email account management page, click the
“Create”button.
Figure 2. "Create" button on the email accounts management pagel
-
Fill out the form:
- In the
"Username"field, specify the name of the account (in our example: example) - Create a secure password for the account
- In the
-
Click the
"Create"button to complete the process.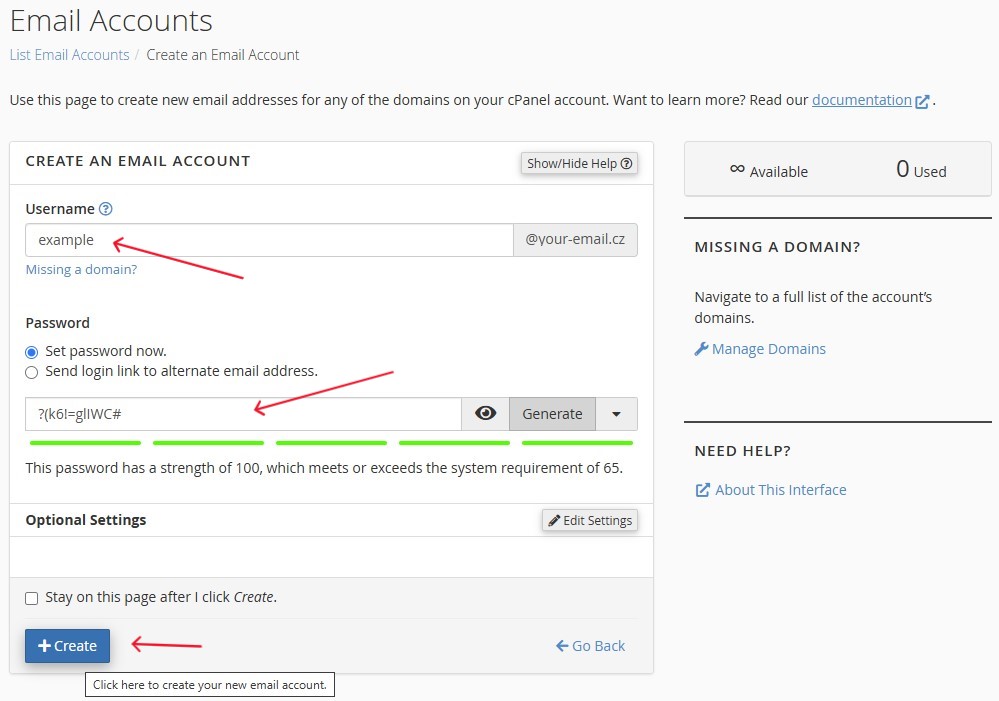
Figure 3. Email account creation form
Step 4: Access the Created Email Account
- The created email account will appear in the list on the
"Email Accounts"management page. -
To access the webmail interface, click the
"Check Email"button next to the created account.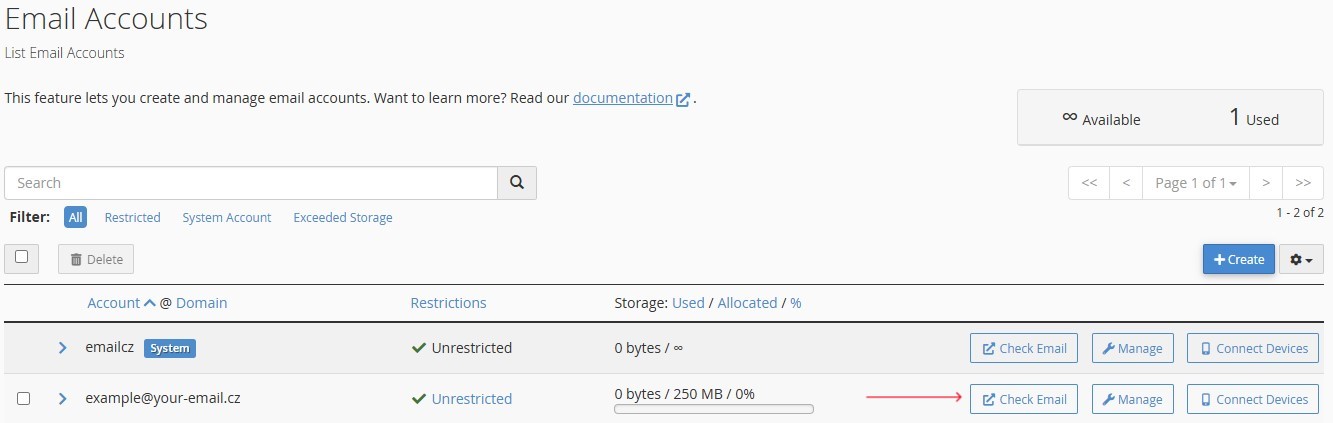
Figure 4. "Check Email" button for email account access
Step 5: Verify Email Functionality through the Web Interface
- Go to the page https://www.host-telecom.com/my-account/
- Select the
"Webmail"section. - The system will redirect you to the
ROUNDCUBEweb interface. -
Click the
"Open"button.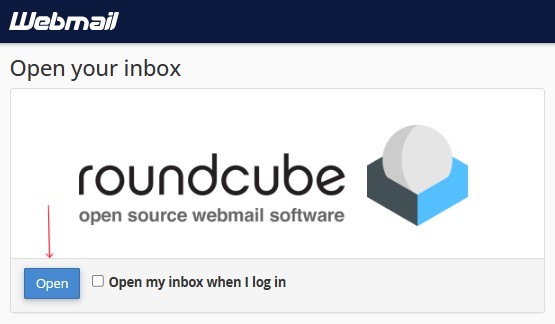
Figure 5. Access to the webmail interface
- Log in to the account using the created credentials.
- Check the functionality of the email account by sending a test message.
Step 6: Get Parameters for Email Client Configuration
You can use the ROUNDCUBE web interface to work with your email or set up an email client. Next, we'll explain how to get the necessary parameters.
-
To get email client settings, click the
"Configure Mail Client"button in the bottom left corner of the webmail interface.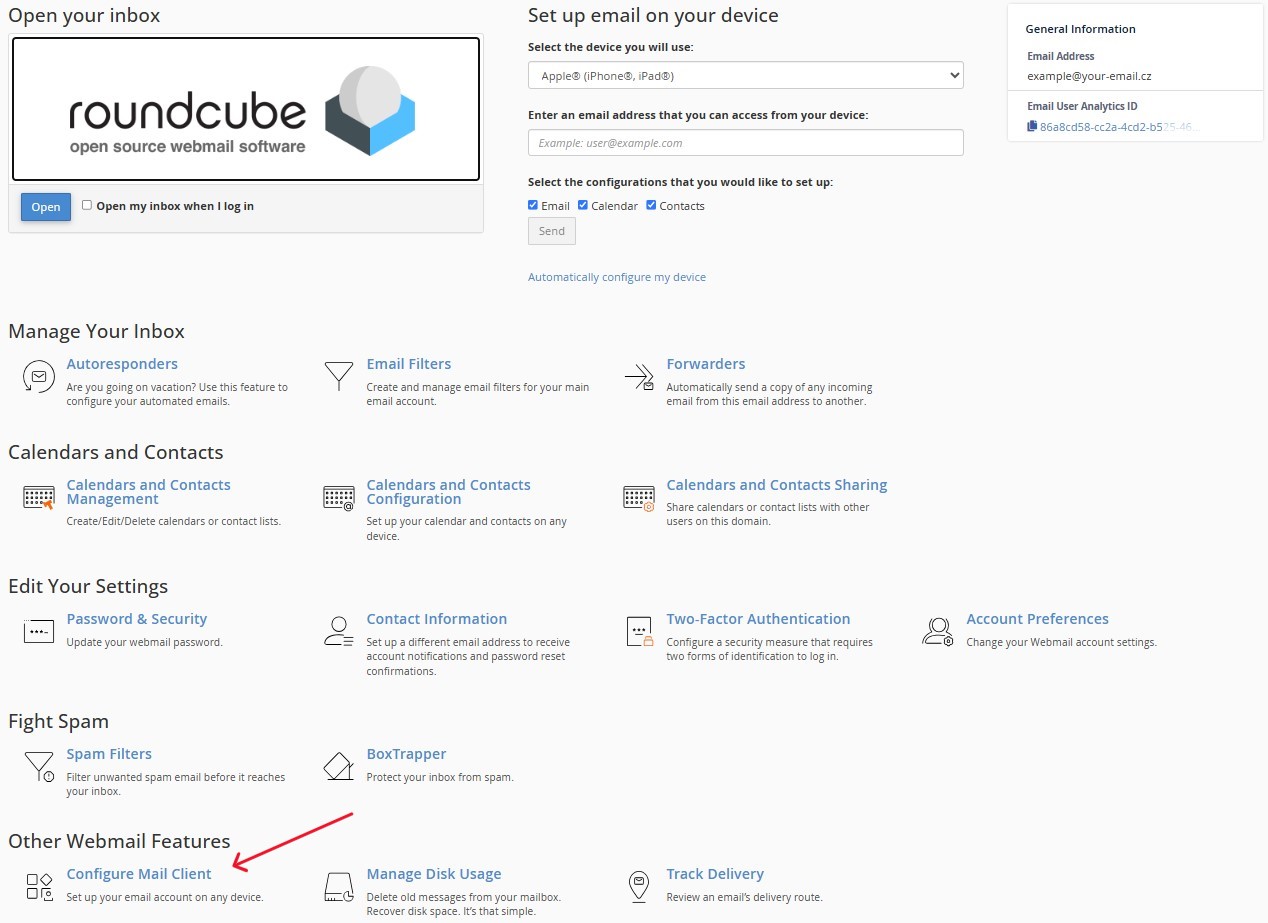
Figure 6. Configure Mail Client button
-
The page that opens will display all the necessary parameters for connecting to various email clients:
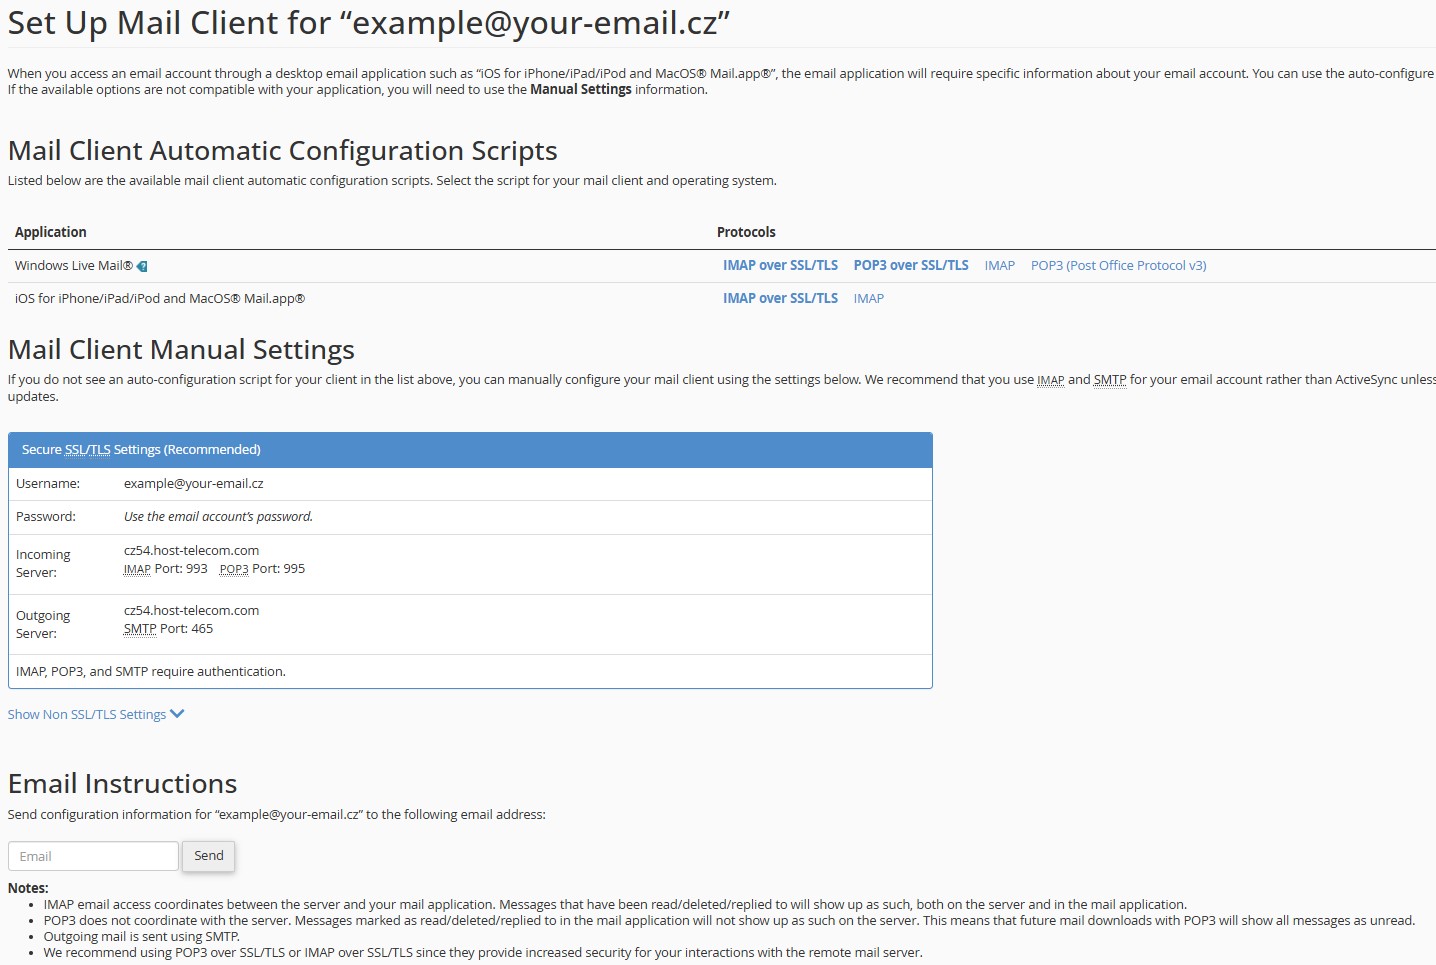
Figure 7. Settings for email clients
Key configuration parameters:
- Email address:
example@your-email.cz(provided only as an example!) - Password: entered when creating the email account
- Incoming mail server IMAP:
cz54.host-telecom.com(provided only as an example!) - IMAP port:
993 - Outgoing mail server SMTP:
cz54.host-telecom.com(provided only as an example!) - SMTP port:
465 IMAP,POP3, andSMTPrequire authentication
Congratulations! You have successfully set up an email account on your own domain in the cPanel control panel. Now you can use it both through the ROUNDCUBE web interface and through email clients.
Detailed instructions for setting up Microsoft Outlook email client can be found in our guide: "How to Set Up Microsoft Outlook Email Client."
If you have questions or technical problems, please contact Host-telecom.com support.
Additional Recommendations
- Periodically update your password to increase security.
- Create a professional signature for your emails.
- Set up an auto-responder for extended absences.